
Understanding the need for a peaceful and quiet environment is imperative, especially in high noise-prone areas.
Whether it’s the chatter from the neighboring room or the bustling streets outside, effective sound insulation can drastically improve the quality of life.
This article will delve into robust and effective ways to insulate your walls for sound.
Tried and tested measures are prescribed here, each method promising to curtail the unwanted noise.
The techniques discussed are designed to fit varied budget ranges, thereby catering to a wider audience.
Make your living space conducive for relaxation or concentration by employing these soundproofing solutions.
Contents
- Ways To Soundproof Walls That Actually Work
- 1. Install soundproofing drywall over existing walls
- 2. Use weather stripping on all door gaps.
- 3. Hang Soundproofing Curtains in the Room
- 4. Use acoustic panels to absorb sound
- 5. Spray Foam Insulation Inside Wall Cavities
- 6. Place foam gaskets behind electrical outlets
- 7. Install Soundproofing Window Inserts
- 8. Apply mass-loaded vinyl before drywall
- 9. Install a Second Layer of Drywall
- 10. Block doorways with high-density foam blocks.
- 11. Install Carpeting or Thick Rugs
- 12. Use Green Glue Between Layers of Drywall
- 13. Replace Hollow Doors with Solid Ones
- 14. Place Insulation Batts in Wall Voids
- 15. Use sound dampening paint on walls.
- The Bottom Line
Ways To Soundproof Walls That Actually Work
1. Install soundproofing drywall over existing walls
One of the most effective ways to soundproof a room is by installing soundproofing drywall over the existing walls.
This is a specialized type of drywall that is designed specifically to reduce noise transmission.
It is made up of multiple layers of different materials, each contributing to noise reduction.
The beauty of soundproofing drywall is that it can be installed right over your existing walls, making it a relatively straightforward DIY project for those with some construction know-how.
This ensures that you do not have to tear down your current walls and start from scratch.
The result is an effective, time-efficient solution to unwanted noise.
The number of layers and the specific materials used can vary, but the overall goal is always the same – to minimize the amount of sound that can pass through the wall.
This is achieved through a combination of absorption, diffusion, and decoupling.
Aspiring DIY-ers may want to consider soundproofing drywall as a Weekend project.
https://www.youtube.com/watch?v=tgvyaDRtqD0
Alternatively, the video above is a handy guide that demonstrates how to install soundproofing drywall over existing walls.
It provides practical, step-by-step instructions to ensure you get the job done efficiently and effectively.
One thing to keep in mind about soundproofing drywall is that, while it does an excellent job of blocking sound, it works best in conjunction with other soundproofing strategies.
This can include things like using weather stripping on your doors, hanging soundproofing curtains, or installing carpeting or thick rugs.
Every little bit helps when it comes to reducing unwanted noise in your living or working space.
Overall, soundproofing drywall is a cost-effective, space-efficient solution for those looking to better soundproof their walls.
2. Use weather stripping on all door gaps.
When you are soundproofing a room, every bit of space counts.
More often than not, doors, especially their gaps, are overlooked.
Cost-effective and easy to install, weather stripping is an effective solution that can significantly decrease sound transmission through door gaps.
“Weather stripping is not just for sealing out cold drafts, but it’s also a great tool for soundproofing.”
As the quote says, it is indeed multi-functional, with uses beyond just keeping the cold or heat out of a room.
Its main function in soundproofing is to seal the gaps between the door and its frame, thus reducing the level of unwanted noise seeping in from these tiny spaces.
Applying this to a door does not require any professional help either.
All that’s needed is some basic DIY skills and the right materials.
To properly apply the weather stripping, you firstly need to clean the surfaces to get rid of any dirt or debris.
This ensures a smooth application and better adhesion of the weatherstrip to the door.
The weather strip should be extended to the full length of the door from top to bottom, as leaving gaps could prove counterproductive to the soundproofing process.
For the best results, apply the weather strip not only at the bottom of the door but also along the sides.
This way, you make sure that every gap is covered and sound leakage is minimized.
Many types of weather stripping products are available in the market, and they differ in terms of their thickness and material.
Some options include adhesive-backed tape strips, door sweep, door gap fillers, and door seal kits.
It’s essential to choose the type that best suits your door gaps and your soundproofing requirements.
It is also worth noting that weather stripping on doors may need regular maintenance or periodic replacement, as it can degrade over time due to wear and tear.
Lastly, remember that while this is a great method for soundproofing doors, it works best when combined with other soundproofing methods.
In summary, using weather stripping on door gaps is an effective, affordable, and easy-to-apply method that significantly decreases noise levels.
It is definitely a recommended step in your journey of soundproofing a room or a house.
3. Hang Soundproofing Curtains in the Room
One practical way to improve the acoustics of your room and reduce noise pollution is to hang soundproofing curtains.
Unlike regular curtains, soundproofing curtains are designed with special materials that can absorb and isolate sound.
These materials often include heavy, dense fabrics such as suede, velvet or polyester.
The thicker and denser the fabric, the better it will be at absorbing sound waves.
You might be thinking, “Well, how much can a curtain actually impact the sound in a room?”.
You’d be surprised.
Soundproofing curtains can significantly diminish the intensity of sound waves from both outside and inside the room.
In fact, even though it may seem like a simple solution, soundproofing curtains can be incredibly effective when used properly.
Of course, the effectiveness of soundproofing curtains greatly depends on the level of noise pollution you are trying to control and your specific needs.
The key is to select the most suitable curtains for your situation.
For instance, if you live in a noisy city and wish to block out traffic noise, you will need heavy-duty soundproofing curtains with the ability to absorb low-frequency sounds.
However, if you simply want to make your living room a little quieter, less dense curtains might suffice.
Another important factor to consider is size.
You’ll want curtains that cover the entire window and extend several inches around the sides, top, and bottom, to block as much noise as possible.
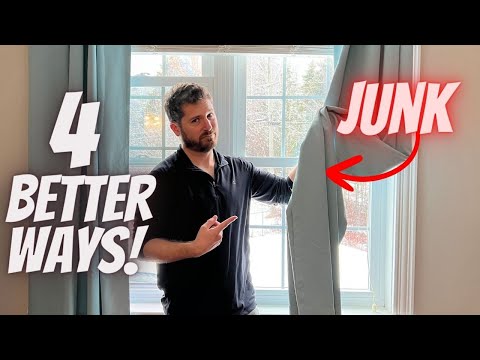
For a more visual explanation of the effectiveness of sound deadening curtains, feel free to watch this video.
It offers some useful alternatives to soundproofing curtains, and explains how to effectively utilize them.
In addition to their soundproofing capabilities, these curtains can also provide other benefits such as thermal insulation and light control.
This makes them a versatile and practical addition to any room.
Installation is also typically straightforward and doesn’t require professional help.
You can easily hang these curtains yourself with the right hardware and a little bit of patience.
To sum up, soundproofing curtains are a simple, affordable, and effective solution for reducing noise pollution in your room.
They are a worthwhile consideration for anyone seeking a quieter and more peaceful environment.
4. Use acoustic panels to absorb sound
The ability to soundproof your walls is greatly enhanced when you use acoustic panels to absorb noise.
These panels work by actually absorbing the sound waves, rather than letting them bounce off surfaces as they do in a typical room.
This makes them an essential component in any serious attempt to soundproof a room.
There are a variety of types of acoustic panels available to choose from such as foam, fiberglass and wool.
This allows you to select the material that will best suit your specific needs.
However, it’s important to remember that not all materials will perform equally well.
For example, materials such as foam and fiberglass are often more effective at high-frequency noise reduction, while wool tends to be more effective for low-frequency noise.
Another consideration to keep in mind when choosing acoustic panels is the panel’s size.
The larger the surface area of the panel, the greater its potential to absorb sound.
Therefore, you’ll want to carefully consider the type and size of panels that will best meet your soundproofing needs.
This includes considering the frequency of the noise you are trying to block and the overall layout of your room.
To achieve the optimal soundproofing effect, it’s usually best to cover as much wall surface as you can with these panels.
Also, it’s good to keep in mind that while these panels can greatly reduce the amount of noise that gets through your walls, they will not be able to eliminate all noise.
However, when combined with other soundproofing techniques, such as installing soundproofing drywall and using weather stripping, you can significantly reduce unwanted noise.
The effectiveness can also be increased by applying these panels on all the surfaces of the room including the ceiling and even the floor.
This will provide you with a more comprehensive and robust strategy to ensure your soundproofing efforts are as successful as possible.
Using the right combination of soundproofing methods will leave you with a quieter, more peaceful space.
5. Spray Foam Insulation Inside Wall Cavities
Spray foam insulation is an important method that can significantly enhance the soundproofing of your walls.
It’s not only effective but also efficient and convenient.
Spraying foam insulation inside your wall cavities helps in reducing noise transfer by filling-up the empty spaces that contribute to sound vibrations.
This process serves as an excellent medium for absorbing sound.
As a result, less noise can travel between walls thereby increasing the acoustic quality of your living spaces.
Spraying foam insulation inside wall cavities makes it hard for sound to travel between walls, thereby significantly enhancing the efficiency of your soundproofing project.
When sprayed into the wall cavities, the foam expands and fills the gaps, preventing sound waves from vibrating and transferring from one room to another.
This measure can prove to be extremely beneficial especially in scenarios where noise usually penetrates through voids or holes.
The foam forms a sturdy barrier between the exterior and interior of your walls, thus drastically reducing the amount of noise that can penetrate through.

By watching the embedded video, you can gain a better understanding of how the process of spray foam insulation works.
You can also learn how it expands to fill up wall cavities, preventing noise from freely moving around.
Another great advantage of using spray foam insulation is its durability and long-lasting effects.
Unlike other noise reduction methods, foam insulation does not deteriorate over time.
It’s a one-time investment that delivers effective results for a very long period.
Moreover, foam insulation is also known to offer added benefits like improved thermal insulation and energy efficiency.
Besides enhancing the soundproofing efficiency of your walls, it can also contribute to temperature regulation and energy savings.
Again, spray foam insulation is a practical, long-term solution for all those suffering from excessive noise penetration in their homes or offices.
6. Place foam gaskets behind electrical outlets
When we speak of soundproofing a room, various strategies come to mind.
One might think of placing soundproofing materials on walls or using mass-loaded vinyl, but often overlooked are the small gaps that can act as conduits for noise transmission.
Specifically, the little gaps around electrical outlets on the walls.
Though they might seem inconsequential, these small gaps can severely undermine your overall soundproofing efforts.
That’s why when working on soundproofing a room, it is vital not to overlook these potential noise entry points.
Placing foam gaskets behind electrical outlets is one practical and effective strategy for plugging these gaps.
These foam gaskets are quite simple to install, and they are readily available in most hardware stores.
Foam gaskets also happen to be particularly practical since they are safe for use around electrical outlets, provided they are installed properly.
Additionally, installing foam gaskets does not require any modifications or alterations to your existing electrical outlets.
All you need to do is remove the outlet cover, place the foam gasket over the outlet, then replace the cover.
This straightforward installation process makes the foam gaskets a user-friendly soundproofing solution.
Foam gaskets are made of a special type of foam that ensures the sound does not leak through these gaps.
While their soundproofing ability may not be as potent as that of other, larger-scale soundproofing solutions.
Every small measure contributes to the overall noise reduction in your room.
As such, placing foam gaskets behind electrical outlets is an integral part of the soundproofing process.
Again, even though, this strategy might not sound like much, it can make a significant difference in enhancing your overall soundproofing efficiency.
7. Install Soundproofing Window Inserts
When we talk about soundproofing a room, the attention often gravitates towards the walls, but windows too hold a crucial role in the said process, thus soundproofing window inserts stand as an efficient solution.
The reason we target windows is that, compared to walls, they are much thinner and more prone to permitting unwanted sound from penetrating the room.
With the installation of soundproofing window inserts, you fabricate a barrier that obstructs noise travel.
These window inserts are created from high-quality, sound-resistant materials like acrylic or laminated glass, sized to a snug fit in your window frame.
The fit aids to seal any gaps where sound might sneak through, dramatically reducing noise transmission.
Most people wrongly believe that replacing windows with thicker glass aids in soundproofing when the reality is distinctly otherwise.
Switching to thicker glass will potentially improve the soundproofing condition of a room a bit, but the type of frame and air gaps around the window significantly affect the overall sound leakage.
So, just replacing the window glass might not yield the desired soundproofing effect.
Incorporating a soundproofing window insert provides a much more complete and comprehensive solution.
Selecting the suitable type of window insert can boost the window’s ability to diminish sound substantially.
For instance, double-pane window inserts have soundproofing capabilities that are arguably far superior to single-pane window inserts.
Performance variations owe to the arrangement of air space sandwiched between panes that act as a sound buffer.
The efficacy of soundproofing through window inserts also fluctuates depending on the type of noise you’re tackling.
If the noise is coming from outside the home, like traffic noise, then window inserts can be highly effective.
Conversely, their effectiveness might be limited if the noise is coming from within your home.

Considering to install soundproofing window inserts yourself?
This video tutorial might serve your cause effectively.
It provides a comprehensive guide which can help you understand the process in a simplified manner.
8. Apply mass-loaded vinyl before drywall
When it comes to soundproofing, mass-loaded vinyl is a valuable tool anyone should consider.
Characterized by its high density and thinness, mass-loaded vinyl or MLV is often used in various soundproofing projects.
MLV is a useful material due to its unique properties; it’s flexible, thin, and heavy all at the same time.
This makes it ideal for adding mass to your walls without the need for substantial construction changes.
Mass is significant in soundproofing because it impedes the transmission of sound waves through a surface.
The more mass a wall has, the less likely it is that sound will penetrate it.
Therefore, applying MLV to your walls before installing drywall can significantly improve the soundproofing of a space.
After all, the application process of MLV is relatively uncomplicated, letting you enhance your room’s soundproofing without much professional experience.
MLV sheets should be installed directly onto the studs of your walls before you attach the drywall.
Stick them up using nails or staples, but ensure you use plenty to prevent the heavy material from sagging or falling.
While applying MLV, it’s essential to be careful about covering each section of the wall entirely to achieve optimum soundproofing.
Overlap the edges of each sheet to ensure there are no gaps that could allow sound to penetrate.
After putting up the MLV, you can then proceed to install your drywall on top of it.
This adds another layer of mass and further improves the soundproofing effect as a result.
The combination of the MLV and drywall by itself creates a highly effective sound barrier that hinders sound transfer both into and out of the room.
At the same time, remember that effective soundproofing is a comprehensive process and not a task of singular solutions.
Even when you apply MLV on your walls, it should be part of a broader soundproofing strategy, wherein you take into consideration the other aspects like doors, windows, and floors as well.
With a comprehensive approach, you can create a truly soundproof space.
9. Install a Second Layer of Drywall
One effective way in the mission to soundproof your home is to install a second layer of drywall.
This process involves adding another layer of gypsum board over the existing drywall to increase the thickness of the wall, therefore enhancing its soundproofing properties.
While somewhat labor-intensive, this method can dramatically reduce the transmission of noise.
Significantly, the second drywall layer effectively dampens vibrations creating a barrier to sound.
This dampening effect works because the second layer effectively increases the mass of the wall, making it more resistant to the transmission of sound waves.
The main principle here is this: the more substantial the surface, the harder it is for sound to pass through.
The above principle is a fundamental concept in the study of acoustics.
It is significant to the understanding of why a second layer of drywall can indeed provide substantial improvement in soundproofing.
Trust this principle as it is rooted in the core physics of sound, specifically how sound waves operate and interact with different materials and their densities.
You have options when installing a double layer of drywall.
It can be attached with screws, or you can employ a special type of noise-dampening glue, often referred to as green glue.
The green glue adds another level of soundproofing since it transforms sound into a small amount of heat, further reducing noise.
To ensure that you are installing the second layer of drywall correctly, you may want to consider hiring a professional to complete the task.
Incorrectly installed drywall can lead to a variety of problems, including decreased effectiveness of the soundproofing and potential structural issues.
To give you a visual and practical approach to this method, you can watch an informative guide on this topic.

By viewing the content, you will have a clearer comprehension of the process involved in adding a second layer of drywall.
You will also appreciate the soundproofing capabilities it offers your home.
Now that you understand the benefits of installing a second layer of drywall for soundproofing purposes, it’s important to make an educated decision based on the specific needs of your space.
Always consider factors such as the source of the noise, the level of soundproofing required, the amount of space available, and the practicalities of the installation process.
10. Block doorways with high-density foam blocks.
Noise reduction is a key requirement in many homes and workplaces, and one essential method to achieve this involves the use of high-density foam blocks to block doorways.
These blocks are specifically designed to absorb and block off sound transmission, providing a more tranquil and quieter surrounding.
High-density foam blocks are generally resistant to mildew and pests, ensuring durability over extended periods.
They are made of open celled foam, which has a great capacity to absorb sound waves because of its molecular structure.
This makes them an excellent option for soundproofing.
The effectiveness of these foam blocks in soundproofing largely depends on their proper installation and positioning at the existing gaps or openings.
Attention needs to be given to the specific details of the doorways to ensure these blocks fit perfectly.
In line with the quoted text, it is crucial to ascertain the dimensions of the doorways before the purchase or commissioning of these foam blocks.
Measure the height, width, and depth of the doorway and let these measurements guide you in purchasing the foam blocks of the right size.
This ensures that they fit perfectly and enhance the efficiency of the soundproofing.
Also important is to ensure that the foam blocks are cut with precision in order to match the doorway requirements.
This task would be easier if you hire a professional who is familiar with this job, however, it can also be handy if a DIY approach is taken, provided one is familiar with the task.
Another key step in this process is the proper positioning and securing of the foam blocks against the doorways.
This action prevents the sound from leaking through any existing spaces and thus ensures more efficient soundproofing.
For the foam blocks to serve their purpose effectively, it is critical to ensure that they are pressed firmly against the doorways.
In doing so, they ensure that no gaps are left which might allow sound to leak through.
The high-density foam blocks can be used in both interior and exterior doorways, and in spaces that you want to soundproof on a temporary or permanent basis.
Their application is highly versatile, and they can be customized as per the requirement.
Another advantage of using high-density foam blocks is their easy maintenance.
These blocks require little to no upkeep, thus making them an efficient and cost-effective method of soundproofing.
They can be easily cleaned with water and mild soap, and do not require any specific cleaning agents thereby making their maintenance easy and straightforward.
High-density foam blocks are also economical and readily available in the market.
This makes them an excellent choice for those seeking a cost-effective soundproofing solution.
While high-density foam blocks play an essential role in soundproofing, it is important to combine them with other soundproofing methods such as installing soundproofing drywall, spraying foam insulation inside wall cavities, hanging soundproofing curtains in the room, etc.
This ensures that effective soundproofing is achieved throughout the space.
Last but not least, these foam blocks are also environmentally friendly as they are made of materials that do not cause harm to the environment.
11. Install Carpeting or Thick Rugs
When we talk about soundproofing a room, we often tend to focus on walls and overlook the importance of the floor.
However, the addition of carpeting or thick rugs can offer an effective solution for reducing noise transmission.
Carpeting not only serves as a decorative element in any space but is also highly useful in absorbing sound and helping to provide a quieter environment.
It might come as a surprise, but the installation of carpets can drastically reduce echoes and background noises by capturing sound waves.
In other words, carpets are excellent at trapping noise, which is why they are commonly used in areas where sound should be kept to a minimum such as libraries and offices.
Moving on, when choosing a carpet as a part of your soundproofing endeavors, it is recommended to opt for thicker styles and designs.
Thicker carpets and pads have more mass, which makes them more effective at absorbing sound waves and thereby reducing noise.
Besides carpeting, you could also consider using thick rugs to control noise.
Apart from being a cost-effective option, they offer the convenience of being easily moved or repositioned for optimal sound reduction.
As with carpets, choose rugs that are thick and dense to get the best soundproofing results.
Areas which are prone to producing loud noises such as entryway, heavy traffic areas or near entertainment systems will greatly benefit from the addition of these rugs.
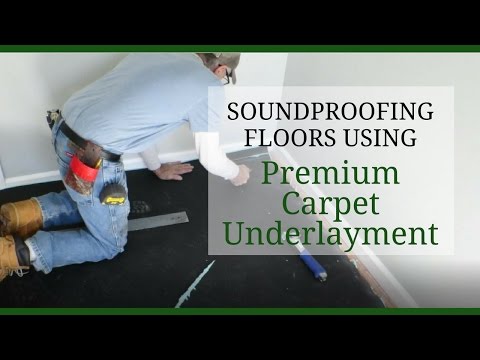
By watching the embedded video, you will gain a clearer understanding on how the proper installation of premium carpet underlay can dramatically increase the effectiveness of your soundproofing project.
You’ll also learn about the unique properties that make this particular type of underlay so efficient at reducing noise.
It’s important to note that while installing carpeting or thick rugs can indeed contribute to the overall soundproofing of your space, it is most effective when used in tandem with other soundproofing methods.
The more comprehensive your approach, the better your chances of achieving a significantly quieter environment.
Remember that every little step counts when it comes to creating a noise-free sanctuary.
12. Use Green Glue Between Layers of Drywall
One of the unseen yet incredibly effective ways to soundproof walls is the use of Green Glue.
Green Glue is not your traditional type of adhesive but a unique soundproofing compound designed to be sandwiched between two layers of rigid material, typically drywall.
Having established itself as a trusted leader in the soundproofing industry, Green Glue comes with fantastic sound dampening properties that have the potential to deaden noise transmission drastically.
Unlike ordinary substances, Green Glue converts sound waves into a minuscule amount of heat, losing their energy and volume in the process, effectively reducing noise transmission.
This unique method of handling sound waves makes Green Glue superior to many soundproofing techniques.
It can absorb a wide range of frequencies, making it ideal for multiple soundproofing applications.
Most people find Green Glue attractive because it’s easy to use and doesn’t require professional application.
All you have to do is apply the Green Glue directly onto the back of your second layer of drywall, then hang it onto the first layer with screws.
Remember, it’s vital to use just two tubes of Green Glue for every 4 x 8-foot sheet of drywall to maintain its efficacy.
Although after applying Green Glue, you might notice an immediate reduction in noise, its full soundproofing effects are not instantaneous and take some time to kick in fully.
It may take up to two weeks to notice a significant change in the soundproofing level, so patience is crucial here.
One considerable advantage of using Green Glue is its compatibility with different materials besides drywall, like plywood, OSB, MDF, and more.
This flexibility makes it a highly versatile soundproofing choice.
Despite being a bit more costly than traditional soundproofing methods, Green Glue offers long-lasting results, proving its worth as a worthy investment in the long run.
Overall, using Green Glue between layers of drywall is a highly effective method of creating a soundproof barrier in walls that will surely reduce noise transmission to a significant degree.
Again, while there are numerous ways of soundproofing a wall, using a soundproofing compound like Green Glue provides an easy, effective, and long-lasting solution.
13. Replace Hollow Doors with Solid Ones
The process of soundproofing your living space for a more peaceful environment extends beyond your walls.
It is equally important to consider the doors in your premises when you aim for a comprehensive soundproofing solution.
Replacing your hollow doors with solid ones brings a significant reduction in the amount of noise infiltrating your spaces.
Most homeowners have hollow-core doors installed in their homes.
These doors, though lightweight and inexpensive, allow noise to pass through them easily.
Investing in solid doors, however, ensures that the sound transference happening through your door is kept to a minimum.
Heavy, solid doors present a physical barrier to sound due to their dense construction materials.
It can be a material as dense as solid wood or even metal.
Solid-core doors are excellent for both sound insulation and thermal insulation.
This makes the replacement of hollow doors with solid ones a multipurpose update, bringing both increased comfort in terms of temperature regulation and noise reduction.
However, it would be crucial to note that switching from hollow doors to solid ones involves a risk of causing strains to your door frames due to the weight difference.
The switch would therefore need a lot of careful consideration in terms of support and installation.

Watching the linked video can provide an in-depth understanding of the differences between hollow-core doors and solid-core doors.
It explains visually how sound differently affects these two types of door structures.
More so, it encompasses all that a homeowner needs to know about door selection, including the installation of a solid-core door, which would be extremely beneficial for you if you are considering this soundproofing alternative.
To efficiently transform your hollow doors into sound barriers, couple your installation with weather stripping.
This seals all potential gaps that might emerge around doors thus further optimizing your sound absorption.
In summary, a thorough and complete soundproofing task should see you consider not only your walls but also your doors.
One cannot achieve optimized soundproofing by ignoring the significant role that doors play in letting noise into our spaces.
Hence, the replacement of hollow doors with solid ones is a worthwhile investment for achieving a quieter and more peaceful room or home environment.
14. Place Insulation Batts in Wall Voids
When aiming to soundproof a room, incorporating insulation batts in your wall voids is a highly effective strategy.
This method involves stuffing insulation batts into any gaps present in the construction of your wall, which can be vital in blocking unwanted noise.
Insulation batts, commonly made of fiberglass or mineral wool, are designed to absorb sound waves, preventing their propagation into the room.
By reducing the space available for sound to travel through, these batts effectively dampen both airborne and impact noises.
The process of installing insulation batts requires some degree of construction knowledge as it involves removing portions of the interior wall surface.
Nevertheless, this method offers remarkable long-term noise reduction benefits that outweigh the initial effort and costs.
It’s essential to understand that the effectiveness of this method relies heavily on the quality of the insulation batts used.
Higher density materials provide more effective soundproofing because they can absorb more sound energy.
However, these high-quality materials tend to be more expensive, so it requires a balance between your budget and your need for soundproofing.
It’s important to remember that finding this balance should not compromise the considerable impacts on your soundproofing project’s overall success.
You also need to ensure that all wall cavities are completely filled to maximize the soundproofing potential of the insulation batts.
If noise continues to be problematic after installing insulation batts, you might consider incorporating other soundproofing techniques to achieve the desired silence.
This could range from hanging soundproofing curtains or installing additional layers of drywall to using sound dampening paint on your walls.
The combination of these methods will ensure that you have a holistic and effective soundproofing solution for your spaces.
Again, placing insulation batts in wall voids serves as an effective measure in a wider soundproofing strategy to achieve the desired quiet and serene living environment.
Though it might need some initial labor investment, the long-term benefits of soundproofing using insulation batts are worth it.
15. Use sound dampening paint on walls.
When exploring ways to soundproof walls, an option that often goes overlooked is the use of soundproofing paint.
Also known as acoustic paint or sound dampening paint, this product is designed specifically to reduce and absorb airborne sound.
It is denser compared to common paint, and it’s this density that gives it its sound dampening properties.
Not all soundproofing paints are created equal, and the efficiency of such paints varies largely based on their composition and application.
Between two to three layers are usually required for optimal sound reduction.
The process of applying sound dampening paint is straightforward, making it a highly doable DIY project for most homeowners.
Importantly, it’s more advantageous to use it as part of a comprehensive approach to soundproofing, rather than relying solely on the paint.
Applying it over other soundproofing measures such as drywall or mass-loaded vinyl can significantly enhance its efficiency.
Some acoustic paints also come with the additional benefit of thermal insulation.
Another noteworthy perk is that most sound reducing paints are odorless and not harmful to the human body or the environment.
“Soundproofing paint is not a magic solution, but when used correctly, it can play a significant role in reducing unwanted noise.“
It can diminish high-frequency noises such as talking or music, which are often the most bothersome in a residential setting.
However, do not expect it to completely block out low-frequency sounds like traffic or construction noise.
All in all, while every little bit helps, it’s important to keep realistic expectations.
Ultimately, the effectiveness of acoustic paint will depend on the nature of the noise you are trying to reduce and the overall design of your space.
After watching this video, you’ll gain a better understanding of how sound dampening paint works and what to expect from it.
It provides some valuable insights on various soundproofing techniques, including the use of such paint.
The Bottom Line
Soundproofing a space may seem like a complex task, but these strategies offer a roadmap to silence.
More than just a handful of tips, they represent a bespoke approach to blocking out unwelcome noise.
The key is to consider all potential sources and pathways of sound.
It’s not just about installing the right materials – soundproofing drywall, foam insulation, acoustic panels, mass-loaded vinyl and beyond – but also on sealing gaps in windows and doors, buffering outlets and blocking doorways.
It’s about replacing hollow doors with solid ones, using sound-absorbing furnishings like thick rugs or carpets and even applying sound-dampening paint.
Ultimately, every element must function collectively to manage sound effectively.
If done correctly, all these measures should blend into the background, providing you with a space that is not only visually appealing but acoustically serene too.