Noise pollution in residential and corporate spaces has been a escalating concern in recent times.
The disruptive inconvenience of unwanted sound can be particularly troublesome when it originates from floors, which are essentially the foundation upon which we live or work.
Wooden floors, though aesthetically appealing, are notorious for their propensity to allow noise transmission.
This could be a daunting issue, especially for occupants of multi-story buildings.
However, with meticulous planning and the right materials, there are viable and effective methods to mitigate this challenge.
This explorative piece aims to shed light on precisely those strategies.
Contents
- Ways To Soundproof A Wooden Floor
- 1. Install Mass Loaded Vinyl (MLV) underneath the floor.
- 2. Use Green Glue Noise Proofing Compound
- 3. Install acoustic floor underlay.
- 4. Apply Carpeting or Rugs.
- 5. Use Soundproofing Floor Mats
- 6. Install Wooden Floor Soundproofing Insulation
- 7. Lay a Layer of Resilient Channels
- 8. Affix Sound Absorption/Sheep Wool Insulation
- 9. Apply Sound-Deadening Floor Paint
- 10. Construct a Floating Floor
- 11. Apply soundproofing floor sealant
- 12. Use Acoustic Floor Tiles
- 13. Install a Drop Ceiling Below the Floor
- 14. Use Dense Rubber Floor Mats
- 15. Use cork underlayment for noise reduction.
- 16. Apply a layer of foam mats
- 17. Install Gypsum Concrete Floor Underlayment
- The Bottom Line
Ways To Soundproof A Wooden Floor
1. Install Mass Loaded Vinyl (MLV) underneath the floor.
The first method of soundproofing your wooden floor is the installation of a unique material known as Mass Loaded Vinyl (MLV).
This incredibly dense material is designed specifically to block out sound waves, providing a significant reduction in the transmission of unwanted noise.
When installing MLV, it’s important to start by measuring and accurately cutting the required pieces.
Then, unbolt any existing floorboards or panels and place the MLV underneath, ensuring it sits snugly without any gaps or loose ends.
Proper MLV installation is crucial in ensuring it effectively blocks the transmission of sound waves, reducing both airborne and impact noise.
This quoted statement is not to be taken lightly, as incorrect or sloppy installation can drastically reduce the product’s efficacy.
The perfect fitting minimizes any possible avenues for sound to penetrate through, optimizing your noise reduction efforts.
In essence, the superior the installation, the better the soundproofing results.
The advantage of MLV is that it is thin enough to fit under existing floors without causing any significant increase in floor level.
However, do note that due to its density, MLV can be quite heavy and may require additional hands or professional assistance during the installation process.
The effort and time invested in installing MLV, however, can render significant soundproofing results, thus making it a good investment for any space requiring noise control.

For further understanding of floor soundproofing, we recommend you watch the embedded video.
From this, you can gain additional tips and insights on installing materials like MLV for sound reduction.
From choosing the best soundproofing materials to understanding the science behind noise reduction, the video provides practical insights that can aid your soundproofing efforts.
Remember, soundproofing is not just about blocking sound but also about creating a quieter, more peaceful living environment.
The more effort you put into soundproofing, the better the results will be and the more you will appreciate your tranquil, noise-free space.
2. Use Green Glue Noise Proofing Compound
Soundproofing wooden floors can greatly contribute to a quieter and more peaceful living environment. One efficient method is to use Green Glue Noise Proofing Compound.
Green Glue is a viscoelastic compound designed to convert sound waves into heat. To put it simply, when sound hits a wall or floor treated with Green Glue, it gets turned into a small amount of heat rather than bouncing back into the room.
It’s a non-toxic and environmentally friendly solution that can be easily applied between layers of construction materials for both new and existing structures.
The compound has a unique formulation that sets it apart from other noise reduction products. When applied correctly, it is able to drastically reduce impact sounds such as footsteps, dropped objects, and furniture moving.
p>The major benefit of using Green Glue Noise Proofing Compound lies in its efficiency in reducing both airborne and impact noise.
This noise proofing compound is most effective when used in combination with other soundproofing techniques. It does not provide complete sound isolation on its own, but it can greatly enhance the effectiveness of other soundproofing methods.
Green Glue is available in tubes that can be applied using a standard quart sized calking gun. The application process is simple and straightforward, requiring no special skills or expensive tools.
After applying the compound, it is recommended to wait for about 30 days for the material to dry and achieve its highest level of performance. During this curing period, you may notice a significant reduction in noise levels.
One tube covers approximately 16 square feet, and for optimal results, it is advisable to apply two layers.
This means that if the floor area is large, using Green Glue can become somewhat expensive. However, the cost is typically justified by the noise reduction benefits it offers.
It’s important to note that Green Glue is a messy substance and can easily stain. Wearing protective clothing and using cardboard or plastic sheets to protect the surrounding area is advised during application.
This compound is made to be used between two sheets of dense material such as drywall or subflooring. It isn’t meant to be exposed once dried, and should be covered with a finish layer of flooring material.
In summary, the Green Glue Noise Proofing compound is an efficient and easy to use solution that can contribute significantly to the soundproofing of your wooden floor. Its benefits, however, are greatly enhanced if it is used in combination with other soundproofing methods.
3. Install acoustic floor underlay.
There are various ways to soundproof a wooden floor, one of the most effective being the installation of an acoustic floor underlay.
This soundproofing method entails the installation of a specialist material, often a thick foam or rubber layer, directly beneath the wooden floor.
A perfect example of this solution would be using Versilay Instashield™ acoustic underlay.

By viewing the attached video, you will be guided through the actual installation process of the Versilay Instashield™ acoustic underlay.
You will also grasp how this underlay works to reduce the transmission of noise through the floor.
The Acoustic floor underlay acts as an extra, highly-effective layer of insulation, effectively absorbing and reducing sound waves, and significantly diminishing the noise levels.
It is ideal for wooden floors as it integrates seamlessly and doesn’t necessitate massive alterations to the existing floor.
If installed correctly, the acoustic floor underlay can dramatically decrease the impact and airborne noise levels, making your space quieter and more peaceful.
Essentially, the acoustic floor underlay works by absorbing sound vibrations caused by foot traffic or objects moving on the floor.
The absorbed vibrations are then converted into heat energy, thus stopping the sound from traveling through the floor and into the room below.
Additionally, using an underlay can also contribute thermal insulation properties, which can improve the energy efficiency of your home.
One major advantage of this method of soundproofing is that it’s relatively easy for most people to install, as you don’t need any specific technical skills.
It’s also cost-effective because you don’t have to do any major structural changes in the floor to install the underlay.
Again, installing an acoustic underlay beneath your wooden floor is an efficient and easy way to significantly reduce noise levels.
Let’s proceed to the next steps for further soundproofing options.
4. Apply Carpeting or Rugs.
Carpeting and rugs can significantly contribute to the soundproofing of a wooden floor. Their soft and thick texture helps absorb and dampen noise, reducing sound transmissions and echoes substantially.
A particularly effective method of soundproofing is to use heavy and thick-pile carpets or rugs. They are typically more effective at sound absorption than their thinner counterparts.
Moreover, carpets and rugs don’t just help with airborne sounds but they also considerably reduce impact noises. These are noises originating from physical impacts on the floor, such as footsteps or dropped objects.
The reduction of both airborne and impact sounds helps achieve a higher level of soundproofing.
By using a suitable underlay together with your carpet or rug, you can achieve an even higher level of soundproofing. The underlay also adds an extra layer of soundproofing, further reducing noise transmission.
This is because, the underlay
functions as a layer of insulation that traps sound. Moreover, it enhances the soundproofing qualities of your carpet or rug by adding more mass and hence, extra sound absorption capacity.If you’re looking at adding area rugs as a soundproofing solution, consider using rug pads underneath them. Just like an underlay improves the soundproofing of a carpet, rug pads enhance the soundproofing efficiency of area rugs.
Speaking of materials, wool and cotton rugs are known for their excellent sound absorption properties. These are thus, highly recommended for soundproofing a wooden floor.
The soundproofing effectiveness of carpets and rugs depends largely on their thickness and the material they are made from. A thick, high pile carpet or a plush rug will absorb sound better than a thin, low pile one.
One of the key advantages of using carpets or rugs for soundproofing is that they are readily available and are relatively easy to install.
You can also choose from a wide array of styles, colors, and materials to match the aesthetics of your room while soundproofing your wooden floor.
Applying carpeting or rugs is not just a practical way of soundproofing a wooden floor, it also adds to your room’s decor.
Choosing the right carpet or rug can certainly help in creating a peaceful and quiet space free from bothersome noise levels.
5. Use Soundproofing Floor Mats
When considering methods to soundproof a wooden floor, an excellent and practical approach is to use soundproofing floor mats.
These mats are specially designed with materials that absorb and minimize the volume of noise.
Not only will these mats lower the noise levels, but they can even help in reducing echo and enhancing acoustics in a room.
They are fabricated from high-density materials which have excellent sound deadening properties.
The process of installing these mats is fairly simple, and can be easily handled even if you opt for a DIY project.
The mats come in various sizes; thus, they can easily fit any room size or shape.
You just have to roll out the mats over your wooden floor, and if the mat is larger than your floor area, you can easily cut them to size.
Using soundproofing floor mats is one of the most efficient and affordable ways to suppress unwanted noise and vibrations from your wooden floor.
This will not only make your living space more peaceful but could also add to the aesthetics of your room.
Some mats come in beautiful designs and colors that can match your interior decor.
Their soft texture also adds a layer of comfort to your floor, which could be an excellent addition if you have children who play on the floor.
The one downside might be that the mats could be a slip hazard, but you can easily fix this issue by using an anti-slip underlay under the mats.
Let’s take a look at a practical demonstration of a particularly effective type of soundproofing mat in action.

By watching the video, you can get a clear concept of how these mats work and how you can install them in your home.
It will also give you an overview of the different types of mats available in the market, so you can choose the one that fits perfectly with your needs.
By using a soundproofing floor mat, you can drastically reduce the noise from your wooden floor, making your home a more comfortable and serene place to live.
6. Install Wooden Floor Soundproofing Insulation
The process of soundproofing a wooden floor is aimed at reducing or eliminating noise transmission, and installing wooden floor soundproofing insulation is an effective step in this process.
Wooden floor soundproofing insulation is designed specifically to block and absorb sound waves that may be transferred through a wooden floor.
This type of insulation is typically comprised of dense materials, such as mineral wool or fiberglass, that work to trap sound energy and prevent it from being transferred through the wooden floorboards.
Both mineral wool and fiberglass insulation are considered effective materials for soundproofing due to their density and capacity to absorb sound waves.
Installation of wooden floor soundproofing insulation typically involves fitting the insulation between the floor joists, under the floorboards.
This procedure helps create a barrier between the source of the noise and the living space above, isolating noise and preventing it from travelling through the floor.
With this method, however, it is important to ensure that there are no gaps or spaces left around the insulation as sound waves can easily travel through these gaps and compromise the level of soundproofing.
Seal any openings using a noise-proofing sealant to create a fully enclosed sound barrier. This is particularly effective for reducing airborne noise, such as conversation and television sound, that can easily pass through gaps and spaces.
It is also important to cover the insulating material with a layer of mass loaded vinyl (MLV) or other sound-deadening material, prior to re installing the wooden floorboards.
This double-layer approach can increase the effectiveness of the soundproofing process by not only absorbing the sound but also providing a barrier to block the transfer of sound energy.
Another significant aspect that should be taken into consideration is that soundproofing insulation should extend into the walls so that it fits snugly against the baseboards of the room above. This stops any sound that might leak around the edges of the floor.
Keep in mind that although wooden floor soundproofing installation can be a DIY project, it can also be quite labor-intensive and time-consuming. Therefore, for larger projects or if you’re unsure about doing it yourself, it may be beneficial to consider hiring a professional installer.
Again, installing wooden floor soundproofing insulation can be a crucial step towards creating a quieter and more peaceful environment. The type of insulation used, its correct placement, and the use of additional sound-deadening materials can all significantly impact the effectiveness of this soundproofing method.
Last but not least, remember that no soundproofing method can completely eliminate noise, but the correct installation and use of wooden floor soundproofing insulation can significantly reduce the volume and clarity of sounds transmitted through wooden floors.
7. Lay a Layer of Resilient Channels
Among the various steps to soundproof a wooden floor, laying a layer of resilient channels occupies a significant place due to its effectiveness and long-lasting results.
This method predominantly focuses on decoupling the floor using resilient channels to reduce noise transmission.
The primary focus of resilient channels is to create a gap between the floor and the subfloor which reduces the surface area where the sound can travel.
Justifying the importance of the above quote, the soundwaves are mitigated within the formed gap, reducing the noise that is heard.
Moreover, the mentioned lessened surface area of sound travel makes sound energy diminish rapidly, leading to a significant drop in noise levels.
Resilient channels are generally made of metal, which further aids in soundproofing as metal absorbs and dampens sound vibration.

While carrying out the resilient channel procedure, it is important to ensure the correct orientation of channels.
The channels are installed perpendicular to the floor joists and attached using screws for maintaining the integrity of the soundproofing system.
With each layer added to the floor, you add a new line of defense against noise. This includes high frequencies sounds that tend to get easily transmitted through the floor boards, hence reinforcing your soundproofing.
In the comprehensive process of installing resilient channels, each individual step plays a critical role and must be performed with precision and accuracy as any oversight might compromise the overall soundproofing effectiveness.
Following the installation guidelines is of immense importance, and in the instance where one feels unsure about the installation, obtaining professional assistance might be a worthy step.
It is recommended to have a basic understanding of soundproofing theories and a general DIY skill-set to carry out this task effectively and precisely.
The process might seem tedious or complex at first glance, but once you get the hang of it, it becomes a straightforward task.
When installed correctly, resilient channels can significantly reduce impact and airborne noise, thereby making your wooden floor soundproofed.
Watching the video can provide a visual demonstration of how to properly install the resilient channels.
This provides an opportunity to understand the exact technique used to install the resilient channels, empowering you to apply the same hands-on approach to your own wooden flooring project.
8. Affix Sound Absorption/Sheep Wool Insulation
When soundproofing a wooden floor, affixing sound absorption or sheep wool insulation can be an impressive method.
Unlike other insulators, sheep wool is a natural sound absorber and able to reduce echo, reverb and hollow sounds.
Being bio-degradable and sourced from a renewable resource, it’s a greener solution compared to other soundproofing alternatives.
The performance of sheep wool insulation is undeniably high when minimizing airborne noises.
Its natural porous structure allows it to absorb more sound than synthetic alternatives, which merely deflect it.
This absorption power prevents sound bouncing within a room and decreases transmission to other areas.
Tied to the absorption capabilities, wool has a wide frequency range, dealing with low, mid and high-frequency sounds.
That broad spectrum offers a significant sensation of noise reduction.
Moreover, the installation process is quite straightforward.
You need to cut the wool to the required size and tightly fit it into space between the floor joists.
No special tools are required, but gloves, a mask, and a cutting table will make the job easier and safer.
Securing wool insulation is key to ensure it remains in place, you can use supporting netting, wood battens or adhesive depending on the floor condition.
Adequate installation contributes significantly to the long-term acoustic performance.
However, doing it well is an easy way to maximize the effectiveness of your soundproofing efforts.
One bonus is that sheep wool insulation doubles as excellent thermal insulation, allowing it to contribute to energy efficiency in your home.
To sum up, sheep wool insulation is well worth considering for its strength in sound absorption, comprehensive frequency handling, environmental benefits, and relative ease of installation.
Just remember, as with any soundproofing project, ensuring a precise fit and careful installation are vital to achieving the best sound control.
9. Apply Sound-Deadening Floor Paint
The utilization of sound-deadening floor paint is a remarkably economical, practical, and notably effective technique of contributing to the soundproofing of your wooden floor.
This type of paint is primarily designed to absorb and dissipate sound vibrations, aiding in the reduction of noise seepage.
One of the advantageous points of using sound-deadening paint is that it can be applied independently or in conjunction with other soundproofing methods, such as underfoot insulation or mass loaded vinyl.
The soundproofing properties of the sound-deadening floor paint is largely due to the content of ceramic microspheres and sound-absorbing fillers within the paint.
The multitude of microspheres also contributes to the thermic insulation of your wooden floor.
The paint is effortlessly applied exactly as you would apply any common floor paint, and it can provide an aesthetically pleasing finish to your wooden flooring while still performing its function.
Supporting this idea, it’s worth noting that even though this is a soundproofing technique, it doesn’t require any compromises on the aesthetics of your wooden floor.
Indeed, these sound-deadening paints come in a variety of color options, allowing you to choose the perfect shade that matches your existing interior décor.
Additionally, as it is a paint, there is the possibility to easily reapply or update the color should you wish to alter the look of your wooden floor in the future.
The most interesting aspect of sound-deadening floor paint is its double-edged capability to improve both soundproofing and aesthetics.
Its impact lays in how this simple upgrade can dramatically reduce the amount of noise transmitted through your wooden flooring, allowing for a quieter, more tranquil living environment.
Lastly, it’s important to remind homeowners that regardless of the only physical difference being a paint layer, the performance difference with regards to sound insulation can be quite significant.
Whether you decide to use sound-deadening floor paint alone or in conjunction with other methods, it should definitely be noted as a viable and economical solution in the big picture of soundproofing a wooden floor.
10. Construct a Floating Floor
When looking for ways to soundproof a wooden floor, constructing a floating floor is an effective method worth considering.
A floating floor is a type of floor that is not physically attached to the subfloor beneath it.
Instead, there are various layers of soundproofing materials between the floating floor and the subfloor, drastically reducing the noises transmitted through the floor.
By eliminating the physical connection between the floating floor and the subfloor, the impact sounds and structural-born noises are significantly mitigated – making it an excellent soundproofing solution.
Following the concept behind the floating floor, it’s evident that the less direct contact the floor has with the rest of the building, the fewer sound travels.
When the floor vibrates, sound waves move through it, and these vibrations are what we perceive as noise.
By effectively reducing these vibrations with a floating floor, fewer noise leaks through the flooring.
There are various types of floating floors you could opt for, including laminate, cork, and some engineered hardwood floors.
Besides, the floating floor system also aids in efficiently concealing the sound insulating materials beneath it – providing a neat aesthetic look.
Additionally, they are also far more affordable and easier to install compared to other soundproofing methods, making it an excellent choice for soundproofing your wooden floor.
It’s essential to note that constructing a floating floor to soundproof your wooden floor will require you to raise the floor level.
This might not be an issue for some, but for others with low ceiling heights, the added height may pose a problem.
Hence, when considering building a floating floor, consider whether the added floor height will be a practical solution for your space.
All in all, creating a floating floor is a viable option for soundproofing a wooden floor that can dually serve as a do-it-yourself project or be completed by a professional.
It provides you with a soundproofed floor while maintaining the aesthetic quality of your interior décor, and also optimizing space usage.
11. Apply soundproofing floor sealant
A crucial step in soundproofing a wooden floor is the application of a soundproofing floor sealant.
This particular soundproofing material not only proves to be an excellent additional layer of noise reduction, but also enhances the durability of the wooden floor by providing a thin but strong protective layer on its surface.
The sealant functions by filling up the crevices and tiny gaps on the wooden floor, which often act as miniature channels allowing sound waves to flow through.
Thus, soundproofing sealant works on a microscopic level to prevent the propagation of these sound wave channels.
When applied correctly, a good quality soundproofing floor sealant can remarkably reduce both the impact and the airborne noise, making the environment significantly quieter and more peaceful.
This quite simply means that it not only blocks the noise coming from the impact on the floor, such as footsteps or falling objects, but it also prevents the noise in the air, like music or conversations, from resonating through the wooden floor.
This dual function of the soundproofing sealant contributes to creating an almost completely noise-free environment.

From the insightful video above, you may gain an understanding of how soundproofing effectively works.
Additionally, it can provide some hands-on knowledge on effective DIY strategies for soundproofing, which can be beneficial if you plan to undertake this project by yourself.
Application of the soundproofing sealant is generally a simple and straightforward process, and can be successfully completed even by amateurs with a basic understanding of DIY projects.
You just need to ensure a clean and dry surface for the sealant to adhere properly, and then apply it uniformly over the entire floor surface.
It is also highly recommended to wear protective gear, such as gloves and a mask, to ensure your safety.
One important advantage of using a soundproofing floor sealant is that it dries clear and does not alter the appearance or texture of the wooden floor.
Thus, it maintains the authentic and appealing look of the wooden floor while delivering superior noise reduction performance.
The market today offers a wide variety of soundproofing floor sealants with different properties and price ranges, giving you the flexibility to choose one that suits your requirements and budget.
Hence, the application of a high-quality soundproofing floor sealant, when done correctly, can greatly enhance the soundproofing effectivity of your wooden floor and contribute to a quieter and more serene living space.
12. Use Acoustic Floor Tiles
One of the most efficient ways to soundproof a wooden floor is by using acoustic floor tiles which are specifically designed to reduce noise transmission.
The tiles work by absorbing sound waves, preventing them from bouncing off the floor and creating an echo.
These tiles are usually made of dense materials which provide excellent sound insulation.
They come in a variety of sizes, designs, and thicknesses, meaning you can choose the one that best suits your specific needs and aesthetic preferences.
While these tiles may be slightly more expensive than other flooring options, their high soundproofing efficiency makes them a worthy investment for anyone looking to reduce noise in their space.
This is particularly true for spaces where high levels of noise are expected such as music studios, office buildings, or apartments located in noisy areas.
Moreover, they also add an extra layer of comfort to the floor, making it feel warmer and more pleasant to walk on.
Acoustic floor tiles are easy to install as they typically come with self-adhesive backing, eliminating the need for any glue or adhesives.
The installation process requires you to first clean the floor, remove any debris, and then simply peel off the backing and stick the tiles to the floor.
If correctly installed, these tiles can greatly improve the acoustics of any room by reducing echoing and background noise.
It’s important to note that although these tiles are highly efficient in reducing noise, their efficiency may reduce over time due to wear and tear, and the soundproofing factor may decline.
Therefore, to ensure their longevity and maintain soundproofing efficiency, one must take proper care of these tiles, including cleaning them regularly and avoiding excessive friction or heavy weight on them.
Additionally, to further enhance the sound insulation, you may consider installing a layer of acoustic underlay beneath the tiles.
This will improve the level of sound absorption and ensure that you get the most out of your soundproof floor.
Using acoustic floor tiles is a practical, economical and stylistically versatile method to reduce noise transmission through wooden floors in residential, commercial or industrial settings.
13. Install a Drop Ceiling Below the Floor
For those seeking a solution for soundproofing a wooden floor, a notable method to consider would be the installation of a drop ceiling below the floor.
This can be quite effective in blocking out noise from upper levels, provided it’s done in the right way.
A drop ceiling, also known as a suspended ceiling, consists of a metal grid that suspends lightweight panels from the floor above.
The key factor here is the creation of an air spacewhich acts as a natural sound buffer.
Using this direct but simple method, the floor effectively becomes a ceiling for the room below, Therefore, any sound is first significantly dampened by the wood flooring, then again as it passes through the air gap before finally being absorbed by the ceiling tiles.
By employing a double layer of sound absorption, a drop ceiling can provide substantial noise reduction.
How effective this strategy is, largely depends on the specific materials used in the drop ceiling. The tiles, for instance, should ideally be made from a sound-absorbing material like mineral fiber or fiberglass.
Remember, the thicker the tile, the better its soundproofing capability.
Another factor to note is that as drop ceilings require additional space under the floor, they might not be suitable if you have low ceilings or if the space under the floor is limited.
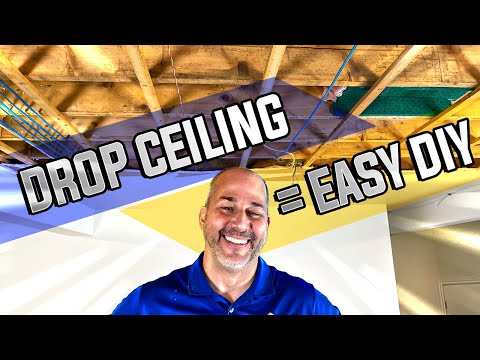
In the video link provided above, the installation process is demonstrated, guiding you through every step, from measuring the ceiling, installing the grid and placing the tiles. For those unfamiliar with how to go about the process, this video provides an excellent visual aid that could be of immense help, ensuring you can do it correctly and efficiently.
Understanding the processes involved not only makes the prospect of installing a drop ceiling more manageable, but it also empowers you to do it yourself and thus potentially saving on the cost of hiring a professional.
It’s worth noting, of course, that no soundproofing method is completely foolproof and the effectiveness of installing a drop ceiling will greatly depend on the type and volume of the noise you’re attempting to block.
However, given the right conditions, well-installed drop ceilings can certainly contribute to a quieter and more peaceful environment within your home.
Remember, the goal is not to achieve completely silent conditions—instead, it’s to significantly reduce the travel of sound, making your wooden floors more acoustically friendly.
14. Use Dense Rubber Floor Mats
The use of dense rubber floor mats is a highly recommended technique to soundproof wooden floors effectively.
These mats are particularly designed with a high density composition which permits them to absorb sound vibrations efficiently.
Also, they are effortless to install as most of them come with an adhesive backing for easy attachment to the floor.
The high density nature of these mats contributes greatly in absorbing and blocking off not only airborne but also impact noise, which is an important factor in soundproofing your wooden floor.
Moreover, they are versatile and due to their high durability, dense rubber floor mats are a cost-effective long-term solution to sound proofing issues.
Supporting the above, it is also seen that dense rubber floor mats are highly resistant to wear and tear, which ensures their longevity and thereby making them economical in the long run.
Along with being visually appealing, these mats also enhance the overall acoustic quality of the room by reducing echo and background noise.
Being thick and dense, they act as excellent thermal insulators, aiding in maintaining a balanced room temperature.
Available in myriad sizes and thicknesses, you have ample options to select from, based on your specific requirements.
The ease of maintenance associated with these mats can not be overstated.
Since they can be swiftly removed and cleaned, this feature further eliminates the inconvenience of special treatment or processes for cleanliness and maintenance.
These mats can be placed beneath furniture or heavy appliances without the fear of degradation or damage.
In addition to their use for soundproofing purposes, dense rubber floor mats also provide a softer and warmer feeling under feet.
Thus, it is worth considering investing in these mats if you are looking to insulate your wooden floors not only against unwanted noise but also from extreme temperatures.
This finishes the deep dive for this section, but many other soundproofing options await in the subsequent sections.
15. Use cork underlayment for noise reduction.
When it comes to soundproofing a wooden floor, an excellent method to consider is the use of cork underlayment.
Cork underlayment is a natural and sustainable product that provides great sound insulation due to its naturally spongy consistency.
This is a remarkable product as it is not just functional but also eco-friendly, as the cork trees used to make cork underlayment are not harmed during the extraction process.
A key benefit of cork underlayment is its ability to absorb the impact of sound vibrations, effectively reducing the amount of noise that permeates through the floor.
Installing cork underlayment can be done as a DIY project, but professional installation is recommended to ensure maximum soundproofing efficacy.
When purchasing cork underlayment, it’s crucial to consider factors such as the thickness of the cork, the size of the room, and the type of floor you are soundproofing.
The thicker the cork underlayment, the more efficient it will be at reducing noise.
The right cork underlayment can be a game-changer in your efforts to soundproof a wooden floor.
Indeed, good quality cork underlayment can significantly attenuate both airborne noise (like conversation or TV sounds) and impact noise (like heavy footsteps or dropped objects).
Moreover, it can effectively absorb vibration, creating a quiet and serene environment.
The process of applying cork underlayment usually entails placing layers of the material between the wooden floor and the final floor covering.
Using a good-quality adhesive ensures that the underlayment remains firmly in place, thereby enhancing its performance.
This method can be combined with other soundproofing techniques for more comprehensive noise reduction.

In this video, you will observe a practical demonstration of how to install cork underlayment and cork floating flooring.
You’ll also grasp insights on why cork is an excellent choice for acoustic insulation in your space.
16. Apply a layer of foam mats
One of the most versatile and cost-effective ways to soundproof a wooden floor is to apply a layer of foam mats.
These are not regular foam mats that exercise enthusiasts use at the gym.
Instead, these are specially designed for soundproofing and have unique features like dense cores and textured surfaces to better absorb and dissipate sound waves.
They are designed to be layered over existing flooring, creating an effective barrier against sound transmission.
These foam mats are used not only in homes but also in commercial and industrial setups where noise control is essential.
Applying these mats is a do-it-yourself (DIY) task as all you need to do is to lay them down, trim the edges if necessary, and done!
This is why foam mats are a popular choice among many users.
They are easy to install, affordable, yet extremely effective.
The thickness of these foam mats can vary, and naturally, the thicker the mat, the better the soundproofing property.
You can even stack layers of these mats to get enhanced soundproofing.
The material of these foam mats is also an important feature.
They are usually made of high-density foam, which practically eliminates any airborne noise while greatly reducing the impact noise.
An added benefit of applying these foam mats is the thermal insulation they provide.
Along with noise control, they also help in maintaining room temperature and save energy.
Despite their many benefits, these foam mats do have a few drawbacks. They may not be suitable for rooms with heavy furniture as the pressure can damage the foam.
Also, the joints of these mats are generally not very visually appealing and might require additional decorative covering.
However, with their affordable price and high effectiveness, foam mats could be an excellent addition to your noise control strategy for a wooden floor.
17. Install Gypsum Concrete Floor Underlayment
In your quest to soundproof a wooden floor, another effective measure you could consider involves using gypsum concrete floor underlayment.
This soundproofing method works especially well when you want to reduce both impact and airborne sound transmission.
Gypsum concrete is a lightweight, high-performance solution that creates a solid, hard surface yet offers excellent sound reduction properties.
Not only does gypsum concrete underlayment provide an effective noise barrier, but it also adds structural resilience to your floors, making them more durable and longer-lasting.
When this type of underlayment is used in conjunction with other soundproofing measures, it can significantly improve your floor’s overall resistance to noise.
In essence, gypsum concrete underlayment forms a sound-absorbent layer that comes between the floor and the noise source, thus helping to mitigate the sound’s impact.
Despite its effectiveness, it’s important to mention that installing gypsum concrete underlayment necessitates some building expertise.
Therefore, if you are not familiar with this type of work, you might find it more suitable to hire a professional to ensure the job is done correctly.
On the other hand, if you are a DIY enthusiast, support is available to help you with the process.

From the embedded video, you can get to learn some key techniques in correctly applying gypsum concrete underlayment.
It also shows how the material is prepared and installed, which can be beneficial as you undertake your project.
While gypsum concrete underlayment is a bit pricier compared to some other soundproofing options, the investment is worth it given the substantial improvement in noise reduction capabilities and the structural integrity it affords your floors.
All in all, gypsum concrete underlayment is a highly effective solution in your arsenal of ways to soundproof a wooden floor.
The process may be quite involved, but the rewards in terms of enhanced tranquility and peace in your space are immeasurable.
So, whether you decide to take on the task yourself or hire a pro, the choice to use gypsum concrete underlayment could be an effective solution for your soundproofing needs.
Just remember, soundproofing a floor requires patience and determination, but with the right materials like gypsum concrete, you’ll reap the benefits of tranquility and noise-free living.
The Bottom Line
Considering the numerous soundproofing methods articulated above, it becomes evident that there are ample solutions to effectively reduce noise levels in any given space.
Techniques such as applying Mass Loaded Vinyl (MLV) underneath the floor, or using Green Glue Noise Proofing Compound, can offer a significant reduction in sound transmission.
Similarly, carpeting, rugs, and soundproofing mats can absorb sound and thereby increase the level of tranquility.
Additionally, more constructive methods such as installing wooden floor soundproofing insulation or constructing a floating floor can provide even more profound silence.
Albeit, whichever methods are employed largely depend on the individual’s needs, factors specific to the space, and budget.
Finally, regardless of the methods used, the aim remains constant – creating a peaceful, quieter environment.