The tranquil serenity of a home can often be interrupted by the unwanted noise of a flushing toilet, especially during the quiet hours of the night.
This unexpected disruption may seem inevitable, but there is a solution.
It requires a strategic approach coupled with the right materials and tools.
The process may seem daunting, but with simple step-by-step guidance, anyone can achieve this.
Soundproofing a toilet tank can drastically reduce noise pollution in your home.
Today, we delve into practical, yet effective ways to maintain peace and quiet, transforming your toilet into a noise-free environment.
Contents
- How To Soundproof A Toilet Tank?
- A Step-By-Step Guide to Soundproofing a Toilet Tank
- What Materials are Needed for Soundproofing a Toilet Tank?
- Exploring Toilet Tank Sound-Damping Wraps: How Do They Work?
- The Role of Anti-Vibration Mats in Toilet Soundproofing
- Mass-Loaded Vinyl: A Powerful Soundproofing Solution
- How to Install Mass-Loaded Vinyl around a Toilet Tank
- The Importance of Using a Quiet Fill Valve
- Adjusting Water Pressure to Reduce Toilet Noise
- Understanding the Decibel Reduction from Toilet Soundproofing
- How to Maintain Your Soundproofed Toilet Tank Over Time
- The Bottom Line
How To Soundproof A Toilet Tank?
To soundproof a toilet tank, the first step is to install a toilet tank sound-damping wrap or anti-vibration mat, which can absorb the noise produced when it is flushed or refilled. Another option is to apply mass-loaded vinyl to the walls around the toilet tank, since this material has soundproofing properties. Equipping the toilet with a quiet fill valve or adjusting the water pressure can also reduce noise.
Delving deeper into this topic, it’s worth noting that in addition to the soundproofing techniques mentioned, we will also be discussing different types of high-end soundproofing technologies that continue to develop around this issue.
Moreover, we will provide you with comprehensive guidance on how to adopt these techniques step by step.
Keep on reading if you wish to transform your bathroom into a peaceful, acoustically optimized space, while simultaneously enhancing its efficiency and sustainability.
A Step-By-Step Guide to Soundproofing a Toilet Tank
The sound of a running toilet can be a major disturbance for many households. Luckily, soundproofing techniques can mitigate this issue.
Understanding how to soundproof a toilet tank effectively is essential for achieving the desired results. In this section, we’ll explore a step-by-step guide to help anyone seeking to reduce toilet noise effectively.
Identifying the Source of the Noise
Before starting any soundproofing project, you need to pinpoint the source of the noise.
This helps determine the most suitable sound-absorbing materials and the level of soundproofing required.
The noise from toilets usually originates from the tank
This is where water is stored and then released into the bowl to flush away waste. Noise also arises when the tank refills after flushing.
Soundproofing the tank is thus a practical way to reduce toilet noise substantially.
The tank’s large, hollow structure amplifies sounds, making them louder than they would otherwise be.
By addressing the sound at its source, the effectiveness of the soundproofing measures is improved dramatically.
Selecting the Right Soundproofing Materials
Choosing the right soundproofing materials is a vital step. The choice of materials depends on the source and nature of the noise, as well as your own preferences.
There are several types of sound-absorbing materials that are suitable for use in toilets, including sound damping wraps, anti-vibration mats, and mass-loaded vinyl.
Each of these materials works differently to absorb or block sound waves, but all are effective in reducing noise levels to a more comfortable level.
Applying the Soundproofing Materials
Soundproofing materials should be applied to the toilet tank meticulously to ensure maximum noise reduction. Effective application enhances the noise reduction offered by the chosen materials.
The application process typically involves adhering the sound-absorbing material to the exterior of the toilet tank. Some people prefer to apply the material to the inside of the tank, but this is more complex and may require additional waterproofing steps. In general, adhering the material to the exterior yields desirable results effectively.
Proper application of soundproofing materials is critical for achieving maximum noise reduction.
Following the manufacturer’s instructions closely ensures the materials perform as expected.
Diligence and attention to detail are important factors when applying these materials.
Watching this video will provide you with visual guidance on handling a toilet replacement, which can be quite similar to applying soundproofing materials.
You might gain practical tips that can help make your soundproofing project easier and more effective.
Testing the Effectiveness of the Soundproofing
Once the soundproofing materials are in place, you should test the effectiveness of the soundproofing. This is achieved by flushing the toilet and listening carefully to observe any noise reduction.
Keep in mind that it’s improbable to completely eliminate all noise, but a substantial reduction should be achieved.
A well-executed soundproofing project can reduce the noise to such a level that it’s hardly noticeable, especially when other sounds in the house are present.
Striking a balance between sound reduction and functionality is key to creating a comfortable and peaceful environment.
This step-by-step approach simplifies the soundproofing process, making it more accessible for everyone. By reducing toilet tank noise, households can enjoy a more peaceful environment.
Soundproofing a toilet tank may seem difficult at first, but with the right guidance and materials, it’s a project that anyone can undertake successfully.
What Materials are Needed for Soundproofing a Toilet Tank?
The process of soundproofing a toilet tank involves several strategic materials that all play a vital role in reducing the noise from your toilet tank. These materials not only suppress the sound, but also help in making your bathroom more private and peaceful.
One of the key materials required for this is the sound-damping wraps. These wraps are designed to absorb the noise produced by the toilet tank. Made from insulating materials such as neoprene, they envelope the tank to decrease the vibrations that generate the noise. These wraps are effective, easy to use, and can be set up within minutes.
Another essential component in this process is the anti-vibration mat. This mat is placed under the toilet tank and works by minimizing the vibrations from the tank’s base. The mat is made out of dense rubber or similar materials that stifle vibrations and help in reducing the noise significantly.
Solution for Powerful Soundproofing: Mass-Loaded Vinyl
For a comprehensive solution to toilet tank sound, using mass-loaded vinyl is a powerful remedy. The science behind this material is that it adds mass to your structure and hence reduces the noise. The vinyl is dense yet flexible, which makes it a beneficial element in soundproofing your toilet tank.
Installing mass-loaded vinyl may be slightly more tedious in comparison to wraps or mats, but its effectiveness is unmatched in terms of sound reduction. It can be cut easily to fit the dimensions of your toilet tank, and the difference in noise levels will be noticeable immediately after installation.
The use of a quiet fill valve is also a significant aspect of this process. The fill valve is the device that controls the amount of water in your toilet tank. If the valve is noisy, your tank will be too. Therefore, exchanging your existing valve with a quieter one can dramatically lower the noise levels of your toilet tank.
The use of a quiet fill valve is a significant aspect of this process. The fill valve is the device that controls the amount of water in your toilet tank. If the valve is noisy, your tank will be too. Therefore, exchanging your existing valve with a quieter one can dramatically lower the noise levels of your toilet tank.
Following the quote above, adjusting your fill valve may seem like a small adjustment but it behaves significantly in controlling the noise. Practically speaking, investing in a high-quality fill valve would reduce those mechanical sounds, thereby contributing positively daily for a peaceful and serene bathroom environment.
Lastly, regulating your water pressure is also needed. As the toilet flushes, the noise is produced by the flow of water. Hence, by adjusting water pressure not only the likelihood of leaks is reduced but also the sound of rushing water can be controlled to a large extent.
Again, soundproofing your toilet tank involves a few carefully chosen materials and some minor adjustments. The materials, such as mass-loaded vinyl, sound-damping wraps, anti-vibration mats, and a quiet fill valve, all contribute to lowering noise levels. When used collectively, they create an optimal soundproofing solution for your bathroom.
Exploring Toilet Tank Sound-Damping Wraps: How Do They Work?
There is a raging debate in the DIY world on whether soundproofing a toilet tank actually works.
However, those who have made use of sound-damping wraps can attest to their efficacy.
This solution does not only reduce the irritating noise made by the toilet tank but also creates an environment that is serene and peaceful.
Understanding Sound-Damping Wraps
So, what exactly are sound-damping wraps?
In essence, they are a type of acoustic material designed to absorb or reduce sound energy.
They work by adding an extra layer of noise reduction material on the surface of the toilet tank.
This adds mass to the toilet tank which helps in absorbing the sound vibrations.
Consequently, the sound waves that would typically bounce off the tank are largely absorbed, thereby reducing the amount of noise that is transmitted.
Sound-damping wraps work by adding mass to the toilet tank, which helps in absorbing sound vibrations, thereby reducing the transmitted noise.
While there may be some minute sounds that escape through the added layer, the overall impact is a significant reduction in noise.
This makes sound-damping wraps an effective method for soundproofing toilet tanks.
Additionally, sound-damping wraps are fairly easy to install.
Sound-Damping Wrap Installation
To install sound-damping wraps, all one needs is to clean the toilet tank thoroughly before attaching the wrap on the tank using an adhesive.
Next, smooth out any rough edges and ensure the wrap is securely fastened to the tank.
This will prevent any accidental detachment or damage to the toilet tank or the wrap itself.
This ensures optimal performance of the wrap which in turn, leads to effectively soundproofing the toilet tank.
Despite the straightforward installation process, it is crucial to pay attention to details to ensure the wrap perfectly contours to the tank’s shape.
Attention to detail is critical during installation to ensure the sound-damping wrap contours perfectly to the tank’s shape and optimizes soundproofing.
A poorly executed job might result in an inefficiently soundproofed toilet tank.
While installing, the wraps remember, the main goal is to reduce the amount of sound energy escaping from the tank.
As such, covering the tank comprehensively could make a significant difference in achieving this goal.
The Effectiveness of Sound-Damping Wraps
When effectively employed, sound-damping wraps can decrease the noise produced by a toilet tank significantly.
Observably, the sound-damping wrap absorbs the sound waves emanating from the tank during flushing, effectively reducing the noise.
However, the efficacy of the wrap is largely dependent on the quality of the product and installation process.
For the wrap to be most effective, both factors need to be executed with the highest standards and meticulousness.

For those interested in learning more about effective ways of soundproofing and dampening sound, the above video might be of help.
It could even offer insights on how to improve the installation process of your sound-damping wraps, getting the most out of your soundproofing efforts.
The Role of Anti-Vibration Mats in Toilet Soundproofing
Toilet soundproofing involves various strategies, one of the notable amongst them is the use of anti-vibration mats.
These mats, commonly made from rubber or vinyl, are specially designed to absorb vibrations that can cause noise in various objects, including toilet tanks.
Functionality of Anti-Vibration Mats
Placed under the toilet tank, these mats prevent vibrations that the toilet tank might cause while refilling, from transmitting to the floor and amplifying.
They work by converting the vibrational energy into heat energy, which reduces the overall noise produced.
Reflecting and absorbing the energy helps in mitigation of the transmission of noise to surrounding areas.
Made from materials like rubber or vinyl, the anti-vibration mats absorb the vibrational energy, reduce noise produced and provide a quieter environment.
Indeed, the mats are constructed out of materials that have high damping properties, which makes them excellent in reducing vibrations.
The thickness and density of these mats also contribute significantly to their sound-proofing qualities.
Installation Process
Installing anti-vibration mats is a relatively easy process.
Once the toilet tank is disconnected, the mat can be placed underneath.
Most anti-vibration mats are adhesive and adhere securely to the toilet tank, reducing vibration transfer effectively.
Some may require screws or drilling for installation, but the overall process is quite straightforward and manageable.
The installation process is quite straightforward and manageable. Anti-vibration mats provide an easy and practical solution for toilet soundproofing.
These mats are also usually lightweight and compact, allowing for easy handling and installation without requiring professional help.
Given their efficiency and ease of installation, anti-vibration mats can play a crucial role in your toilet soundproofing strategy.
Choosing the Right Anti-Vibration Mat
When choosing an anti-vibration mat, there are a few factors to consider for maximum effectiveness.
The material and thickness of the mat can affect how much vibration it can absorb and thus, the degree of noise reduction it can provide.
You also need to consider the size and fit of the mat for your specific toilet tank, as these can impact the mat’s performance as well.
Consider factors like material, thickness, size and fit when choosing an anti vibration mat for you toilet tank.
An excellent anti-vibration mat will provide significant noise reduction and enhance your overall bathroom experience by making the toilet tank operation smoother and quieter.
Thus, investing in a good quality anti-vibration mat can prove beneficial in your endeavor to soundproof your toilet.
Mass-Loaded Vinyl: A Powerful Soundproofing Solution
Among the numerous soundproofing techniques and materials available on the market, mass-loaded vinyl, or MLV, is a standout due to its high efficacy in noise reduction.
This product was specifically designed for deadening sound, and its effectiveness lies in its unique combination of density (mass) and flexibility.
Imagine a thin sheet of rubber, but much denser and heavier.
MLV works just like that rubber sheet in terms of flexibility, yet it is far superior in terms of its capability to trap and diffuse sound.
The Working Principle of MLV
The method behind MLV’s functioning is actually relatively simple and straightforward.
When sound waves hit the surface of mass-loaded vinyl, the material’s high mass and flexible nature enable it to absorb a significant portion of these waves.
More importantly, by diffusing the remaining energy of the waves as heat, it prevents the vibration energy from transmitting via the material itself.
Essentially, mass-loaded vinyl works by transforming the energy within sound waves into yet another form of energy (heat), thereby drastically reducing the intensity and audibility of the sound.
As implied by this statement, the higher the mass of the material, the greater its sound isolation efficiency.
To put it another way, the denser the material, the more sound waves it can absorb and dissipate.
Soundproofing a Toilet Tank with MLV
Now, you may wonder: can this kind of material be used for soundproofing a toilet tank?
The answer is a resounding yes.
Despite its high effectiveness, MLV remains easy to use, and can be readily trimmed and fitted to size around most toilet tanks.
After the material is cut to specification, it can be simply affixed using a suitable adhesive to the outer surface of the tank.
The only significant limiting factor might be aesthetic, as the MLV may alter the tank’s visual appearance.
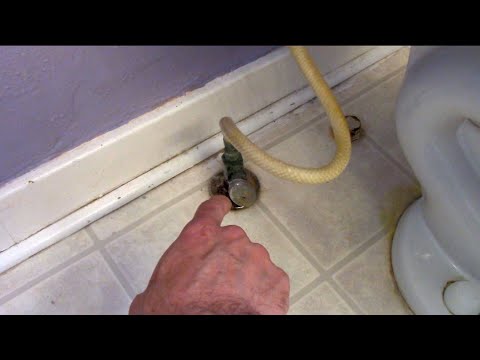
From the embedded video, users will get a comprehensive guide on how to prevent noise and vibrations from the toilet valve.
It also provides practical tips on how to effectively soundproof your bathroom area.
Maintaining MLV for Long-term Effectiveness
The maintenance of the MLV is a crucial element to consider.
It is a durable material and typically does not need to be replaced frequently.
As it’s placed on the toilet tank, it would be exposed to humidity, a common occurrence in bathrooms, but the polyvinyl composition of MLV makes it resilient.
MLV is designed to withstand high temperatures and humidity without losing its sound-dampening effectiveness.
Regular cleaning is all that’s needed, which can be done with a wet cloth and a mild cleanser.
Maintaining MLV properly can keep it functional for years, providing you a noise-free environment for all that time.
Proper maintenance and care for MLV involve nothing more than regular cleaning, and maybe occasional replacement if necessary.
Sufficient care can extend its life span, ensuring that it provides you efficient noise control for a long time.
How to Install Mass-Loaded Vinyl around a Toilet Tank
Mass loaded vinyl, often referred to as MLV, is a powerful tool in the quest to soundproof a toilet tank.
As a highly effective, versatile option, it has garnered popularity among those seeking tranquillity in their bathrooms.
Getting Started with Mass-Loaded Vinyl Installation
In order to implement this solution effectively, it’s important to understand how MLV works.
Essentially, it functions as a sound barrier, blocking the transmission of sound waves due to its substantial weight.
This contributes to its effectiveness in noise reduction scenarios such as soundproofing a toilet tank against fill and flush noises.
Since it’s a flexible and durable material, mass loaded vinyl can be wrapped around the tank, serving to dampen the offending sounds.
This quote captures the essence of why MLV is an effective solution for soundproofing a toilet tank.
Its inherent properties of flexibility and durability make it an unobtrusive measure, as it easily conforms to the shape of the tank.
Moreover, its durability ensures that it can withstand the humid environment of a bathroom without deteriorating or losing its effectiveness.
Step-by-Step Process of MLV Installation
The first step towards installing MLV around your toilet tank involves measuring the tank.
This is necessary to ascertain the amount of MLV required, thereby preventing wastage or shortage of material.
The more accurately you measure your tank, the better the fit of the MLV will be, ensuring optimal sound barrier performance.
This statement underlines the value of precision in measuring the toilet tank.
Also, you should use a good adhesive to ensure that the MLV remains securely attached to the outer surface of the tank.
Most types of construction adhesive should do the trick, but it’s always best to consult with the MLV manufacturer or a home improvement expert to determine the best choice.
Once the adhesive is applied, the MLV can be carefully fitted around the tank, ensuring full coverage for maximum effectiveness.
Considerations During Installation
While installing MLV, it’s crucial to pay attention to the placement of tank components.
These components, such as the fill valve and the flush valve, should not be obstructed by the MLV.
Avoid covering these components with MLV to ensure they continue to function properly.
This blockquote sums up a critical consideration during MLV installation.
It is essential to maintain the functionality of the toilet tank even as we seek to reduce the noise it produces.
In the end, a well-executed installation is one where the MLV is properly adhered, the toilet tank components are unobstructed, and the offending noises are significantly reduced.
The Importance of Using a Quiet Fill Valve
When it comes to soundproofing your toilet tank, one key aspect not to overlook is the significance of using a quiet fill valve.
What is a Fill Valve and Why is it Important?
The fill valve is a crucial component of your toilet tank’s mechanism.
Driven by the float, it is responsible for refilling the tank after each flush.
The fill valve can generate a lot of noise during this process, especially if it is old or faulty.
Thus, a fill valve that functions quietly is important in order to minimize the noise coming from your toilet tank.
A quiet fill valve is designed to control water flow more effectively, thereby producing less noise during operation.
A quiet fill valve is designed to control water flow more effectively, thereby producing less noise during operation.
This is because when water flow is controlled effectively, it decreases the likelihood of unwanted noise from water hammering or gushing.
When water flows in a controlled manner, it also reduces the stress on the pipe works, contributing to overall noise reduction.
The Benefits of a Quiet Fill Valve
Reducing noise is just one of the benefits a quiet fill valve offers.
Quieter operation also typically indicates that a fill valve is more efficient and less likely to lead to leaks or overflow.
This not only makes your toilet quieter but also less likely to require frequent repairs, saving you time and money in the long run.
Plus, a quieter operation implies that your toilet will be less likely to disturb others in your household during use.
Especially relevant for those who live in apartments or shared accommodation where intrusive toilet noise can be a source of irritation.
Quieter operation also typically indicates that a fill valve is more efficient and less likely to lead to leaks or overflow.
Therefore, investing in a quiet fill valve is crucial when it comes to soundproofing your toilet tank.
A quiet fill valve combined with other soundproofing techniques leads to a toilet that is virtually silent, leading to less disturbances and a more peaceful home environment.
How to Choose the Best Quiet Fill Valve
Choosing the right quiet fill valve may seem overwhelming as there are various options available in the market.
It’s important to look for one that has good reviews for its low noise levels and high efficiency.
Also, you should consider the type of toilet you have and what specification of fill valve it requires.
Also factor in the overall durability, installation process, and the level of after-sales service provided by the manufacturer.
Remember, an investment in a good quality quiet fill valve is an investment towards a noise-free and peaceful toilet use.
Adjusting Water Pressure to Reduce Toilet Noise
When attempting to reduce noise from your toilet tank, one often overlooked method is adjusting the water pressure.
To understand why this is a valid solution, one needs to first comprehend the relationship between water flow and noise production.
Higher water pressure typically means the toilet will refill quickly after a flush, but this rapid refill can produce a significant amount of noise.
On the contrary, lowering the water pressure often reduces the speed at which the tank refills and consequently reduces the noise output.
Now, the question arises, how can you adjust the water pressure?
Using the Toilet Fill Valve to Adjust Water Pressure
Among various components of a toilet, the toilet fill valve plays a key role in noise production.
It’s the part of the toilet that controls the water flow into the tank after each flush.
Most modern fill valves have an adjustment screw or a similar mechanism that allows homeowners to control the water pressure.
Turning this screw one way increases the water pressure, while turning it the other way does the opposite.
Understanding the toilet fill valve and learning to adjust its settings can significantly contribute towards reducing the noise output of a toilet tank.
In support to this quote, most plumbers would also recommend regular checks and adjustments of the valve.
This not only maintains the proper functioning of the toilet but also ensures that noise levels remain under control.
Seeking Professional Help
If you are not comfortable meddling with the internals of your toilet, it’s always a good idea to seek professional help.
Professional plumbers have the right tools and expertise to adjust the water pressure efficiently and safely.
They can also provide additional tips and methods for reducing toilet noise, tailored to your specific toilet model and installation.
Again, adjusting water pressure may take some trial and error, but it is a viable step towards soundproofing your toilet tank.
Remember, feasible noise reduction is about making various small adjustments that together contribute to a significant decrease in noise.
So don’t underestimate the impact of water pressure adjustments on your quest to achieve a quieter bathroom environment.
Understanding the Decibel Reduction from Toilet Soundproofing
When it comes to soundproofing your toilet tank, it’s essential to understand the decibel reduction you can expect from your efforts.
Decibels (dB) measure the intensity of sound.
As such, understanding dB reduction is key to quantifying the effectiveness of your soundproofing measures.
The more decibels you reduce, the quieter your toilet tank becomes.
This can be particularly satisfying if you’ve been dealing with the constant noise from a disruptive toilet tank.
How is Decibel Reduction Measured?
Decibel reduction is measured using a sound level meter or an app on your smartphone.
These tools measure the current noise level in dB, before and after the soundproofing.
To get the decibel reduction amount, subtract the final noise level (after soundproofing) from the initial level (before soundproofing).
So if your toilet was initially creating 40 dB of noise, and now it only creates 30 dB, that’s a reduction of 10 dB.
Significant decibel reductions lead to noticeable difference in the peace and tranquility of your home.
Significant decibel reductions lead to noticeable difference in the peace and tranquility of your home.
This implies that the more decibel reduction you attain, the greater the soundproofing effect will be.
Essentially, the goal of soundproofing your toilet should be to minimize its noise as much as possible.
Does Every Soundproofing Method Result in Decibel Reduction?
Not all soundproofing methods will result in significant decibel reduction.
Some may only lessen the sound to a minor extent.
However, combining several techniques can amplify your decibel reduction results.
This is why it’s advisable to use mass-loaded vinyl, sound-damping wraps, anti-vibration mats, and adjust the water pressure and fill valve.
By combining these soundproofing strategies, you are more likely to notice a significant decrease in toilet noise.
By combining these soundproofing strategies, you are more likely to notice a significant decrease in toilet noise.
Remember that soundproofing is not a one-off strategy. It requires a combination of methods used in harmony to achieve the desired silence.
As such, experimenting with different techniques is crucial to discover what works best for your unique situation.
To understand the practical implementation of soundproofing techniques, you might find this video useful.
It provides a comprehensive guide on implementing various methods of reducing toilet sounds.
How to Maintain Your Soundproofed Toilet Tank Over Time
Maintaining Cleanliness
Ensuring the cleanliness of your soundproofed toilet tank is the first step in its maintenance.
Accumulated dirt, grime, and mineral deposits can compromise the effectiveness of your soundproofing materials over time.
This can result in the increased sound transmission from the toilet tank.
Therefore, make sure to regularly clean your toilet tank, focusing especially on the areas around the soundproofing materials.
To do this, you can use standard bathroom cleaning products which are safe for such materials.
>Regularly cleaning your toilet tank can prolong the effectiveness of the soundproofing materials.Thus, maintaining cleanliness is not just about aesthetics or hygiene, but it also plays a considerable role in the efficiency of your soundproofing solution.
By ensuring regular cleaning, you are, in essence, prolonging the noise-cancelling capacity of your toilet tank.
Checking on the Soundproofing Materials Regularly
Just like any other elements in your bathroom, your soundproofing materials are also subject to wear and tear.
They can deteriorate over time, either by constant usage or through exposure to moisture and harsh cleaning agents.
To prevent this, it’s essential to regularly check on these materials.
If you notice any signs of wear, such as thinning or cracking, it may be time to replace them.
>Recognizing the signs of wear and tear on your soundproofing materials is crucial in order to maintain their effectiveness.About replacement, usually, you should consider doing this every couple of years.
This, of course, depends on the type of materials you have used as some are more durable than others.
For instance, Mass-Loaded Vinyl is typically more resilient and might not require replacement for a significant number of years.
However, if you used sound-damping wraps or anti-vibration mats, you might have to replace them a bit more often.
Adjusting the Water Pressure and Fill Valve
Even after soundproofing your toilet tank, it is crucial to continue monitoring your water pressure.
Too high pressure can contribute to noise generation, negating your soundproofing efforts.
Also, the fill valve, particularly if you have opted for a quiet model, may require regular adjustment and maintenance to function correctly.
>Continually monitoring and adjusting the water pressure and fill valve aids in preserving the quietness of your toilet.Remember, even the quietest fill valve can become noisy if not properly maintained.
So, don’t forget to add this to your regular maintenance routine to ensure your toilet tank stays soundproof for longer.
Just by performing these simple, regular maintenance tasks, you can significantly prolong the effectiveness of your soundproofed toilet.
The Bottom Line
Safeguarding peace within your living space involves paying keen attention to soundproofing solutions, including dampening unsettling noise from a toilet tank.
Through a comprehensive step-by-step guide, we can understand that soundproofing a toilet tank involves items such as toilet tank sound-damping wraps, anti-vibration mats, and mass-loaded vinyl.
These materials not only deaden the noise but also mitigate the vibrations that contribute to the sound.
Additionally, taking steps such as installing a quieter fill valve, adjusting the water pressure, and embracing proper maintenance routines helps in extending the lifespan of your soundproofed toilet tank and enhancing its efficiency.
A thorough understanding of decibel reduction contributes to optimizing the effectiveness of your soundproofing solution.
Ultimately, while it may seem like a minor detail, soundproofing your toilet tank is a significant step towards a tranquil and more comfortable home environment.