Soundproofing a room can be crucial, particularly for musicians or anyone seeking to contain the sound of drums within a specific space.
This crucial step prevents noise leakage and minimalizes disturbance to others, thereby providing an optimal environment for drum practice.
In this resource, numerous strategies will be analyzed to effectively achieve this feat.
From simple fixes to more complex methods, every conceivable approach will be scrutinized.
This undoubtedly requires precise planning and meticulous execution.
Each differs in cost and complexity; hence, understanding each method’s implications is critical to make an informed decision.
Contents
- Ways To Soundproof A Room For Drums
- 1. Install Soundproof Drywall or Paneling
- 2. Apply Soundproofing Paint.
- 3. Hang Sound-Absorbing Curtains or Drapes
- 4. Install a Ceiling Sound Baffle
- 5. Place Rubber Mat Under Drum Kit
- 6. Use sound-damping tape on walls
- 7. Install Noise Barriers Around Drums
- 8. Place Soundproofing Foam on Walls
- 9. Use Weather Stripping on Doors and Windows
- 10. Install Acoustic Ceiling Tiles
- 11. Use noise-reducing window inserts.
- 12. Install Carpet to Absorb Sounds
- 13. Use resilient channeling on walls and ceiling
- 14. Set up bass traps in corners.
- 15. Hang Noise-Reducing Artwork or Wall Hangings
- 16. Use Isolation Pads under Drums
- 17. Install Acoustic Door Seals
- The Bottom Line
Ways To Soundproof A Room For Drums
1. Install Soundproof Drywall or Paneling
The first step to effectively soundproofing a room for a drum set is to install soundproof drywall or paneling. This material is specifically designed to reduce the transmission of sound waves through walls.
As a drummer, you often wrestle with noise complaints, whether you’re practicing in a residential area or sharing a wall with your neighbors. Therefore, the installation of soundproof drywall or paneling can make a significant difference.
These materials typically come with inbuilt sound-absorbing layers, providing an excellent defense against unwanted noise penetration. Furthermore, they’re readily available in most home improvement stores, making them a convenient and easy-to-find solution.
It is vital to note that professional installation is recommended to ensure maximum soundproofing efficiency. Improperly installed soundproof panels or drywall may not fully realize their inherent soundproofing capabilities.
Soundproof drywall and paneling serve as an excellent defense against unwanted noise infiltration and a ticket to an uninterrupted, noise-free drumming session.
Supporting this, their superior thickness compared to conventional drywall also adds a substantial sound blocking barrier. So, not only do they absorb sound, but they also block it, ensuring that your drum sounds don’t escape the room and disturb others.
For added efficiency, you could combine the use of soundproof drywall with other soundproofing methods, such as noise-absorbing foams and panels. This does not replace the need for soundproofing walls but complements the existing setup, making your room even more soundproof.
Although soundproof drywall and paneling may be more costly than other soundproofing methods, it is worth the investment. The value they add, in the long run, makes up for every penny spent. The quiet peace you will provide to your neighbors, not to mention the freedom to practice at any time without causing disruptions, are sufficient reasons to consider this significant first step in your soundproofing journey.

By taking the time to watch the embedded video, you will gain a better understanding of the process involved in selecting and installing soundproof drywall or paneling. Plus, you might pick up a few additional tips to increase the effectiveness of your soundproofing efforts.
2. Apply Soundproofing Paint.
Soundproofing paint is a popular and cost-effective method of reducing unwanted noise in a room where drums are present.
This specific type of paint has insulating properties which can help to dampen vibrations and therefore, sound waves that might otherwise be transmitted through the walls.
One of its significant advantages is that it can be applied over existing paint without needing to first remove the older layers.
This characteristic makes soundproofing paint a convenient and user-friendly option. Using it saves you not only the hassle of scraping off old paint but also reduces potential mess and downtime of your drumming space.
The specific formulation of soundproofing paint is typically denser and heavier than regular paint. This difference in consistency contributes significantly to its noise-dampening qualities.
Quite like regular paint, soundproofing paint can be applied using common tools such as rollers or brushes. Therefore, even if you are not a professional painter, the process of painting your drum room yourself is manageable.
This high-density paint often requires more than a single coat for maximum effect. Thus, remember when purchasing to calculate the amount you would need accordingly.
Note that while soundproofing paint is great for dampening lighter sound frequencies, it may not be entirely effective for heavier drum sounds or high volume playing. But despite that, it is an excellent initial step in overall soundproofing process of your drum room.
Also, aesthetic wise, soundproofing paint is available in a variety of colors like any other regular paint. Therefore, you can not only improve your room’s acoustics but also enhance its visual appeal simultaneously.
Another bonus to this product is that it is usually eco-friendly and low in volatile organic compounds (VOCs). This quality makes it safer for use in indoor spaces and less harmful to the environment.
Combining soundproofing paint with other soundproofing techniques can provide even further reduction in noise transmission.
This multi-faceted approach can ensure effective soundproofing for drumming spaces. Soundproofing paint can work well in conjunction with soundproof panels or mats, for instance.
Overall, soundproofing paint is a reasonably accessible and straightforward addition to any soundproofing plan.
Remember that every room and sound source is unique. Therefore, consider the various factors involved such as the size of the room, the intensity of the sound, and your specific needs and expectations while planning your personal soundproofing project.
3. Hang Sound-Absorbing Curtains or Drapes
Investing in sound-absorbing curtains or drapes is an effective way to help soundproof a room for drums.
These are not your average curtains, they are designed specifically to absorb sound waves and reduce noise leakage.
The thickness, density, and material of the fabric all contribute to its sound-absorbing qualities.
Velvet, suede, and polyester are all effective materials for soundproofing curtains.
The principle here is simple: the thicker the material, the more sound it can absorb.
An important detail to remember is that the curtains need to be pleated and measure at least two to three times the width of the window to optimize sound absorption.
This allows for more material to cover the window, which increases its effectiveness in absorbing sound.
Additionally, these curtains are not only functional but also lend a stylish element to the room.
Heavier curtains do a better job at soundproofing and can be easily installed on existing curtain rods.
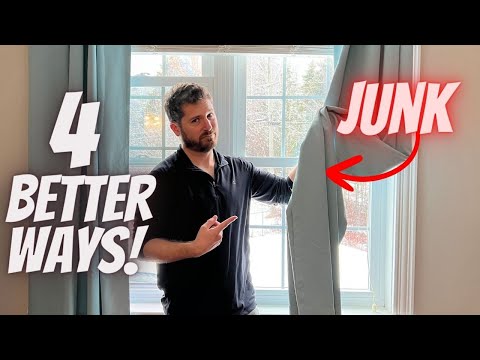
By watching the embedded video, you’ll discover some helpful tips and alternatives to soundproofing with curtains.
It would be beneficial to see firsthand how to implement these suggestions effectively.
Remember, however, that soundproofing curtains may not completely block out the sound of drums.
They are best used in conjunction with other soundproofing methods to achieve a more silent drumming experience.
So while hanging heavy, pleated curtains may dampen sound leakage, it would be more effective to combine this strategy with the installation of soundproof drywall, applying soundproofing paint, or adding other noise barriers to your room.
Again, although not a standalone solution, sound-absorbing curtains or drapes can drastically reduce the noise from drums when used correctly and in combination with other soundproofing solutions.
4. Install a Ceiling Sound Baffle
One effective soundproofing technique to consider for your drum room is the installation of a ceiling sound baffle.
These tools work by disrupting the path of sound waves, causing them to scatter and disperse rather than bouncing directly back into the room.
A ceiling sound baffle is typically made from high-density foam or fiberglass, both of which are excellent materials for sound absorption.
They may also be covered with fabric or another type of sound-absorbing material to further enhance their soundproofing capabilities.
This additional covering not only improves the acoustic properties of the baffle but also regulates room temperature and enhances the general aesthetics of your drum room.
When installing your ceiling sound baffle, it is important to strategically position it so that it intersects with the path of the sound waves being produced by the drums.
Placement of the baffle will ultimately depend on the specific layout and size of the room, as well as the positioning of the drum kit.
Due to these variables, it is often helpful to consult with a professional who specializes in room acoustics to receive guidance on optimal baffle placement.
Additionally, while the initial investment in a ceiling sound baffle may seem substantial, it is crucial to remember that this is a long-term solution to soundproofing a room for drums.
Unlike temporary soundproofing solutions, a ceiling sound baffle will provide consistent sound absorption over time, regardless of changes in drum use or room layout.
Essentially, installing a ceiling sound baffle in a drum room is a viable and effective solution, contributing to a significantly quieter environment both within and outside the room.
Therefore, if you’re looking for a sustainable solution to controlling the noise levels in a drum room, installing a ceiling sound baffle is a reliable option to consider.
It is an innovative yet simple soundproofing solution that works to minimize the high noise levels typically associated with drumming, making it more enjoyable for everyone involved.
5. Place Rubber Mat Under Drum Kit
The positioning of a rubber mat under the drum kit is an extremely helpful way of soundproofing any room intended for drumming.
By doing so, vibrations caused by the drums that would typically travel through the floor and walls are reduced.
The thickness of these rubber mats makes them crafted perfectly for this purpose.
After all, it’s their density that allows them to absorb a significant amount of sound energy.
The use of these mats also protects the floor of your drum room from any possible drum kit damage.
It is worth mentioning, rubber mats serve a dual purpose: soundproofing and floor protection.
These mats not only isolate the noise but also work towards preserving your floor condition as intact as possible.
They can be considered as an investment for your room and drum kit.
Let’s address a common query – is there a specific way to lay these rubber mats? Definitely, yes.
The larger the mat the better; the idea here is to cover as much surface area as possible, thereby getting the maximum noise isolation effects.
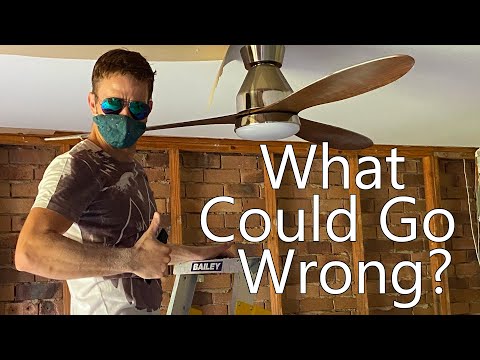
When you watch this video, you will get an in-depth understanding of soundproofing a drum room, including the use of rubber mats.
Additionally, the visual demonstration of various techniques will bring a clearer perspective on how these methods work.
Another important factor here is considering the thickness of the rubber mat.
The thicker the mat, the more sound it is likely to absorb. Hence, thicker mats are always a preferable option for drum rooms.
However, it’s important to remember that these mats should not raise the height of your drums too much as it can affect your playing style.
So, a nice balance between the two is what should be aimed at.
There is a wide variety of rubber mats available in the market. Hence, you must conduct a detailed research before making a final choice.>
The selection of the right mat can have a major impact on the overall soundproofing quality of your drum room.
And remember, a one-time investment in a high-quality mat can drastically reduce sound transmission and prove to be a long-term solution for your drum room.
Again, incorporating a rubber mat underneath your drum kit is a simple, yet retaining effectiveness way for successfully soundproofing a room for drums.
6. Use sound-damping tape on walls
When soundproofing a room for drums, one often underestimated method is using sound-damping tape on walls.
This tape is specially designed to dampen unwanted noise and prevent it from transmitting through walls.
The effectiveness of this tape stems from its ability to absorb and diffuse sound waves, reducing their intensity and preventing them from causing too much disturbance.
One of the key factors that contribute to the success of sound-damping tape in soundproofing is its ease of installation and versatility. Whether you’re dealing with flat, curved or irregular surfaces, sound-damping tape can be easily applied to any kind of walls.
Its versatile usage supports the aforementioned statement. It can be easily used alongside other soundproofing materials, which boosts its efficiency.
Furthermore, the tape acts as an additional layer of defense against sound leakage, ensuring that sound waves don’t penetrate the walls, as well as preventing them from reverberating within the room.
Another important quality about sound-damping tape is its ability to handle different frequencies of sound.
This makes it particularly useful in a room where a drum is being played given the varying sound frequencies that a drum can produce.
Moreover, the thickness and material composition of the tape are essential factors in determining how effectively the tape can soundproof the room.
Typically, tapes that are thicker and made from denser materials have superior soundproofing capabilities.
In addition, it’s worth noting that using sound-damping tape is a relatively cost-effective soundproofing technique.
It’s far less expensive than some other methods such as installing soundproof drywall or using acoustic tiles.
Finally, sound-damping tape is non-intrusive and barely visible once applied.
This means that it won’t interfere with the aesthetics of your room.
Having said that, it’s crucial to note that while sound-damping tape is incredibly useful, it should be used in combination with other soundproofing methods for optimal results.
Again, using sound-damping tape is a practical, low-cost, and effective strategy in soundproofing a room for drums, especially when used in conjunction with other soundproofing techniques.
7. Install Noise Barriers Around Drums
One of the major approaches in soundproofing a room for drumming is to install noise barriers around the drums.
This method involves enclosing the drum set in a booth-like structure that serves as a shield, absorbing and deflecting the sound generated by the drums.
This not only helps to reduce the noise that escapes into the surrounding areas, but it also allows for a more focused and controlled sound environment within the drum booth itself.
Installing noise barriers around drums could be a great soundproofing investment for drummers, as it decreases sound transmission significantly while improving the audio quality inside the booth.
This procedure might seem like a mammoth task to embark on, but with patience and a careful approach, it can prove to be extremely effective in sound control.
The materials typically used to construct drum noise barriers are plexiglass, high-density foam, or fiberglass panels, all renowned for their sound absorption qualities.
Alternatively, premade portable drum booths are also available in the market, which are easier to install and can be moved around if necessary.
Apart from reduction in sound transfer, another advantage of installing these barriers is that they prevent the sound from bouncing off walls, so they enhance the drummer’s playing experience as well.
In your pursuit of silence, the task might seem challenging and sometimes impossible, but the key here is to be thorough and consistent in your efforts.
This method is surely time-consuming and requires some investment, but its effectiveness makes it a worthy consideration for a drummer who is really serious about reducing sound transmission.

This video shows a drummer using a noise barrier during a practice session, where you can observe just how much sound is contained.
It would provide a practical depiction of how barriers work in real-time, aiding your understanding of this particular soundproofing process.
To optimize the use of a noise barrier around drums and attaining the best possible soundproofing, consider combining this method with others detailed in this article.
Remember, every small effort counts and brings you one step closer to achieving your goal of soundproofing your drum room.
Whether you decide to go for a DIY approach using readily available materials or you decide to invest in professional equipment, installing noise barriers around drums proves to be a highly efficient method in achieving soundproofing.
8. Place Soundproofing Foam on Walls
When it comes to drastically reducing noise levels from a drum kit, incorporating soundproofing foam is a must.
Commonly referred as acoustic foam, it is a lightweight material designed to absorb echo and background noise within a room.
It’s usually used in recording studios but it can also be an effective solution for soundproofing a room for drums at home.
Soundproofing foam comes in various shapes and sizes.
It can be cut into specific shapes and sizes to fit the room’s walls.
This allows for greater flexibility when installing the foam, meaning it can be attached to nearly any surface.
To install the foam, simply use adhesive spray to stick it to the walls.
Ensure that the entire wall surface is covered with the foam for best results.
For optimal sound absorption, the foam should be 2 to 3 inches thick. This thickness is best for absorbing low, mid, and high-frequency sounds produced by drums.
The importance of sourcing sufficient thickness cannot be overstated as it directly influences the degree of noise reduction.
Sourcing thicker foams may require a slightly higher investment, but the pay-off in sound quality and noise reduction is worthwhile.
Soundproof foam is easily available and can be ordered online or purchased at a local store.
Also, using soundproof foam has a low impact on the aesthetics of the room. In fact, it can enhance them since the foam can come in different colors and patterns.
Aside from maintaining the professional feel of your music room, the foam also contributes to improving the acoustics of the room.
So, while adding a layer of soundproofing foam may seem like a major task, the benefits far outweigh the drawbacks.
It’s an extremely effective solution for anyone seeking to reduce disturbances and maintain an optimal sound quality when drumming.
9. Use Weather Stripping on Doors and Windows
When discussing the many ways to soundproof a room for drums, using weather stripping on doors and windows is an essential component often overlooked in the process.
Doors and windows are typically the main culprits for sound leakage in any given room.
Therefore, incorporating a simple yet effective solution such as installing weather stripping can bring about significant changes by effectively reducing the noise transmission.
Weather stripping is a fantastic, inexpensive, and accessible soundproofing method that blocks any gaps where sound can escape.
Essentially, it functions by filling in the gaps between the window and door frames and their respective structures, thereby reducing the amount of sound that can leak out.
This is especially crucial when you are trying to successfully soundproof a room for drums, which naturally create more resonant and penetrating sounds than most other instruments.
For those who are unfamiliar with how to properly install weather stripping, you can find several detailed guides and tutorials online.
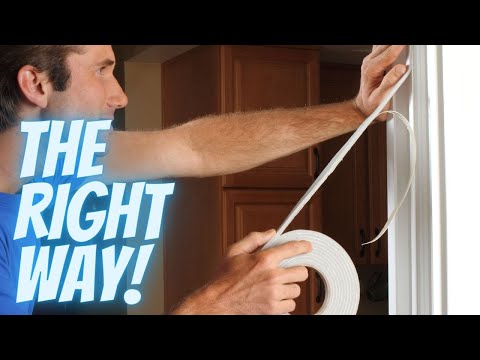
If you’re interested in learning how to apply weather stripping effectively, you might find the above video tutorial very useful.
It provides a thorough and step-by-step method to correctly apply weatherstripping under various circumstances.
Remember that the effectiveness of weatherstripping depends heavily on how well it’s installed.
Improper installation may lead to sound leakage, thereby diluting its effectiveness.
Generally, it is advisable to apply weather stripping along the entire door frame and window sills to ensure that all potential sound leakage points are covered.
The same process should be repeated on windows as well, sealing any possible areas where noise could escape.
Applications of this nature, when done properly, can yield significant results with regards to reducing sound transmission from your drums.
So if you’re contemplating a DIY soundproofing project, then investing in some quality weatherstripping should be high on your list.
Again, using weather stripping on doors and windows is a fairly straightforward, cost-effective technique to enhance your soundproofing efforts for a drum room.
10. Install Acoustic Ceiling Tiles
When soundproofing a room for drums, one of the crucial areas that requires attention is the ceiling.
Sound waves from your drum set bounce off of hard surfaces, including the ceiling, making your drumming sound louder and more echoey than it should.
An effective way of curbing this issue is by installing acoustic ceiling tiles.
These tiles are specially designed to absorb sound and prevent it from echoing around the room.
Therefore, installing acoustic ceiling tiles is a proven and highly effective method of soundproofing a room for drums.
Also, they work well in conjunction with other soundproofing methods to create a much more soundproof environment.
Installing acoustic ceiling tiles not only enhances the sound quality but can also upgrade the aesthetics of your music room.
This quote essentially means that acoustic tiles serve a double purpose.
On one hand, they function to reduce noise, and on the other, they improve the decor of your room, which is critical for your comfort and mood when playing (or practicing) your drums.
More so, acoustic tiles come in various colors and designs, giving you a range of options to choose from for your drum room.
It’s important to note that, while installing these tiles, proper placement is key to maximize their effectiveness.
You may opt to cover the entire ceiling for comprehensive coverage, or you can strategically position them on areas where most sound tends to bounce or escape.
The installation process is also fairly simple, and many brands come with easy-to-follow instructions, which makes it a viable DIY project.
However, if you are not comfortable, you can seek professional help to ensure the tiles are installed correctly and efficiently.
Remember, the goal is to create a space where you can play your drums without causing a nuisance to others in the house or your neighbors.
Therefore, installing acoustic tiles on your ceiling plays a significant role in achieving this.
11. Use noise-reducing window inserts.
Noise can easily infiltrate a room through the windows, even when they are closed. One of the most efficient ways to prevent this and achieve better soundproofing is by using noise-reducing window inserts. They are specifically designed to reduce the amount of noise that passes through windows.
These inserts work by creating an air gap between the window and the insert itself, creating a barrier that sound struggles to pass through. This is similar to the principle of double glazing, but can be much more effective for soundproofing purposes.
By eliminating the weak point that windows often represent in soundproofing, these inserts can significantly decrease the amount of outside noise that gets into the drum room.
When installing these inserts, it is important to ensure they fit perfectly to avoid any gaps where sound could sneak through.
This means taking precise measurements of your windows and making sure the inserts you buy are of the right size. If an insert isn’t fitting correctly, it won’t be able to do its job effectively.
When choosing the right window inserts, you should look for ones made of acoustic grade material. The higher the grade, the better the soundproofing properties will be. Some may also have additional features such as thermal insulation, which can be a nice bonus in colder climates.
The installation process of these inserts is usually straightforward and doesn’t require professional help. This can save you on costs and give you the satisfaction of improving your room’s soundproofing yourself.

By watching the video above, you’ll see a practical demonstration of how these window inserts can be easily installed. Also, the video will provide insights on how to maintain and clean these inserts without damaging their features.
Overall, noise-reducing window inserts are a cost-effective and practical solution to soundproof your drum room. They are easy to install, effective, and don’t require altering the structure of your room or window. If you’re drumming away at home and want to keep the peace with your neighbours, these inserts are a great investment.
While they can be highly efficient, keep in mind that window inserts can only do so much, and will work best when used in combination with other soundproofing methods discussed in this article.
Now that you’ve learned about the effectiveness of noise-reducing window inserts, we can move on to discuss other methods of soundproofing a room for drums.
12. Install Carpet to Absorb Sounds
Whether you’re a professional drummer or just a drummer enthusiast, one effective way to soundproof a room for drums is to install sound-absorbing carpets.
The installation of carpets can massively contribute to reducing the sound produced when drumming.
This method is very feasible whether the room you are using is big or small.
Even in smaller rooms, a thickness of at least 1 inch can make a huge difference.
The denser the carpet, the better it will be at absorbing sound waves.
One important factor to consider when choosing a carpet is its Noise Reduction Coefficient (NRC).
The NRC measures how much sound a material can absorb, with values ranging from 0 (completely reflective) to 1 (completely absorptive).
Typically, carpets with an NRC rating of at least 0.3 are recommended for effective soundproofing.
However, dense and plushy carpets usually have NRC ratings that are above this threshold.
Installing a carpet is not just about laying it on the floor. It also involves treating the underlay.
The underlay is a layer of cushioning made from materials like sponge rubber, foam, or felt, which is installed beneath the carpet.
Underlay serves a dual purpose: increasing comfort for walking while also enhancing the carpet’s sound insulation properties.
The thickness and density of the carpet underlay directly influence how much sound it can absorb.
As such, it’s a good idea to invest in a high-quality underlay with a significant thickness and density.
Bear in mind that the effectiveness of a carpet in soundproofing largely depends on its installation.
Typically, carpets should be fully fitted and extend wall-to-wall to provide the best sound insulation.
If installing a wall-to-wall carpet is not possible, consider using large area rugs.
These rugs, while not as effective as carpets, can still significantly reduce the amount of sound escaping from the room.
So, when it comes to soundproofing a room for drums, do not overlook the power of using carpets.
13. Use resilient channeling on walls and ceiling
One of the most effective methods for soundproofing a room for drums is using resilient channeling on the walls and ceiling.
Resilient channeling, also known as a resilient channel, is an affordable and efficient way to minimize sound transmission from one room to another.
More commonly used in construction projects, resilient channels have proven to be a powerful asset in soundproofing environments for musicians and audio professionals.
Resilient channels work by creating a separation between layers of material, effectively breaking the sound path and preventing the vibration from transmitting.
This method is especially useful because it addresses the two main sources of sound transmission, which are direct transmission and flanking.
By creating this layer of separation, the resilient channel significantly reduces both types of sound transmission, allowing you to play your drums without disturbing others.

Watching this informative video will take you through a step-by-step process of installing resilient channels.
From preparing your walls and ceiling to the best practices during installation, you will gain essential knowledge from this resource.
While the installation of resilient channels might seem difficult, it is a straightforward process that can be accomplished with some basic tools and a bit of DIY spirit.
It’s important to note that the alignment of your resilient channel can greatly impact its effectiveness in soundproofing your room.
The channels should be installed perpendicular to your framing members, and screws should only penetrate the resilient channel and not the actual framing member to maintain the decoupling effect.
Once installed correctly, these channels will greatly decrease the vibration noise that’s common when you play drums.
When combined with other soundproofing methods like sound-absorbing material and isolation pads, resilient channeling can make a significant difference in your audio environment.
You must use resilient channeling in coordination with other soundproofing methods, and not as a standalone solution to achieve optimal results.
Resilient channels are a fantastic investment for anyone looking to take their soundproofing efforts to the next level.
By installing them, you’re giving yourself the freedom to practice and play your drums whenever you want, without worrying about the noise level.
14. Set up bass traps in corners.
Playing drums in a room without proper soundproofing can significantly increase the levels of low-frequency resonances, also known as bass. The role of bass traps is to absorb these excess bass frequencies which are typically complicated to manage just by using traditional soundproofing methods.
Bass traps can be installed in the corners of the room because this is where the bass build-up is likely to be the most significant. By fitting bass traps in these areas, you can prevent this low-frequency sound from reflecting back into the room and contributing to the overall noise issue.
There are different types of bass traps available in the market. The most commonly used type is the foam bass trap. Made of dense foam, this type of bass trap is able to suspend low-frequency sound waves, effectively reducing the bass in the room.
FDL (Frictional Damping Layer) bass traps are another effective option. They feature a special material that transforms the absorbed sound energy into heat, hence “trapping” the bass. FDL bass traps are typically heavier and may require professional installation.
Another type of bass trap is the Helmholtz resonator. It’s a carefully engineered trap that’s tuned to absorb specific frequencies.
The effectiveness of the Helmholtz resonator bass traps is impressive when dealing with particular frequency issues. Unlike foam or FDL traps that address a broad range of frequencies, these resonator traps can be tailored to deal with specific problem frequencies. However, accurate calculations and an understanding of acoustics are required to use them effectively.
Appropriate placement of bass traps is also crucial to their effectiveness. Bass traps are generally most effective when placed in the corners of the room where the walls and ceiling meet. These areas are the primary points of wave convergence and offer the best trapping position.
Bass traps can either be mounted directly onto the wall or hung like a picture. The critical thing is to ensure that the traps are secured firmly to prevent them from falling down and causing an accident.
If you’re working with foam bass traps, you can stick them to the wall using adhesive. FDL and Helmholtz resonators may require brackets or specialized hanging methods due to their weight.
When installing bass traps, remember it is better to over-dampen than under-dampen. If you are unsure of how much damping is needed, it’s better to err on the side of caution and install more traps than you think you may need.
It’s important to note that while bass traps effectively manage low frequency sounds, they are not a standalone solution for soundproofing a room for drums. They should be used in conjunction with other soundproofing methods such as soundproof curtains, sealing gaps and installing soundproofing foam for a holistic approach to sound management.
Overall, the addition of bass traps to your drum room is an essential aspect of creating a soundproof environment. Not only do they improve sound quality, they also ensure that your music practice doesn’t disturb others.
15. Hang Noise-Reducing Artwork or Wall Hangings
Incorporating the use of noise-reducing artwork or wall hangings is another clever strategy that can be adopted while soundproofing a room specifically for drumming sessions.
Not everyone knows that special sound-absorbing art and wall hangings are available, and they can contribute greatly to the reduction of unwanted noise.
These noise-reducing artworks and wall hangings come with built-in properties designed to absorb and reduce noise levels significantly.
The excessive noise reduction is brought about by the specific materials filled in these artworks which are typically lightweight, porous and acoustically functional.
Namely, materials such as foam, felt, and polyester fibers, which have exceptional sound-absorbing properties.
These pieces don’t just work to your advantage by reducing noise but also play a major role in enhancing the overall aesthetics of the drum room, making them a perfect blend of function and fashion.
What’s more, noise-reducing artworks and wall hangings are extremely easy to install and can simply be hung in the right places without requiring any professional installation assistance.
In fact, anyone with basic hand tool knowledge will be able to get these items up on the wall.
This feature allows drummers to make quick and easy adjustments in the room by moving these hangings and artworks from one location to another until they get the desired sound.
Along with getting yourself noise-reducing art and wall hangings, placement is also a key factor that can impact how much noise can be minimized in the room.
In other words, these sound absorbents should ideally be placed on the walls directly facing the source of the sound or in areas of the room where noise is most to be expected.
Make sure to strategically place these items in spots in the room where they would be able to capture and absorb as many sound waves as possible.
Installing these can be a fun DIY project and it also gives you the freedom to customise according to your personal preferences and room aesthetics.

The embedded video above offer practical demonstrations on how to soundproof a room effectively.
By viewing the video, you’ll likely see real-world examples of how noise-reducing artwork or wall hangings can be used in the context of a drum room to soundproof it efficiently.
16. Use Isolation Pads under Drums
When it comes to soundproofing a room for drums, one of the most convenient and affordable ways to do so is to use isolation pads under the drums.
These pads, often referred to as drum risers, perform a critical function in the process of dampening sound.
Designed specifically for use with musical instruments, especially drums, isolation pads significantly reduce the vibrations produced when the drum is played.
This reduction in vibration does not impact the sound quality of the drum, but rather minimizes transmission of the sound to other parts of the house or building.
The use of isolation pads is a surprisingly effective method for soundproofing a room.
This is because these pads are specially designed with materials that absorb vibrations and prevent them from travelling through floors and walls.
By doing so, they help to reduce the overall sound level in the room and decrease the amount of sound that escapes into other areas.
When the drums are played, the vibrations created are absorbed by the isolation pads, thus reducing the resultant noise.
This method is especially useful if the drum room is located on an upper floor, where vibrations can easily travel through the floor and be heard below.
Overall, isolation pads are a simple yet effective way to absorb drum vibrations and control the level of noise in a room.
They can be used alone or in conjunction with other soundproofing methods for a more comprehensive approach to noise control.
It’s important to note that the right isolation pad can make a significant difference in the level of sound control achieved.
Higher-quality pads, although slightly more expensive, can provide better sound absorption and vibration control than their cheaper counterparts.
Therefore, when considering the use of isolation pads, it is worth investing in better-quality options for maximal soundproofing.
Lastly, isolation pads are easy to install and do not require any major modifications to the room or drum setup, making them a practical solution for many drummers.
In a nutshell, the use of isolation pads under drums can be an efficacious way to soundproof a room for drums, combining both efficiency and affordability.
17. Install Acoustic Door Seals
When it comes to soundproofing a room for drums, one often overlooked method is the installation of acoustic door seals.
These seals are specially designed to block out sound and keep it confined within a particular space.
The aim is to stop the sound from leaking out through the small gaps that usually exist around the perimeter of doors.
This is significant as even the smallest gaps can let out a considerable amount of sound.
Interestingly, acoustic door seals are not only effective for soundproofing but they also provide additional benefits such as preventing drafts and keeping the room insulated.
This multi-purpose functionality makes them a good investment, not just for soundproofing, but for overall room optimization.
These seals are simple to install and can be done as a DIY project, saving you the cost of hiring a professional.
The process involves attaching the seals to the door frame to ensure a tight fit whenever the door is closed.
Depending on the specific layout of your drum room, you might need to install seals on both the inside and outside of the door.

In this video, you’ll learn a step-by-step method for installing acoustic door seals properly.
Emphasizing on the right technique and dos and don’ts, it’s a really helpful guide for first-timers.
As a final note, while acoustic door seals can significantly reduce sound leakage, they are often most effective when used as part of a comprehensive soundproofing strategy.
So, consider pairing them with other methods listed in this guide for optimal results.
Investing in the right equipment and putting in the necessary time and effort to soundproof the room can make a world of difference. The goal is to enjoy your drumming without disturbing others.
The Bottom Line
Ultimately, soundproofing a room for drums is not only for the comfort of those around but also to ensure better sound quality during your practice or recording.
From installing robust soundproof drywall and paneling, applying soundproofing paint, to using isolation pads under drums, these methods can significantly reduce noise levels.
Additionally, practical options such as weather stripping on doors and windows, hanging sound-absorbing curtains, and even using noise-reducing artwork can contribute to minimizing sound transmission.
Remember that combining these techniques would provide better results, assisting in creating the ideal environment for your drumming endeavors.
Make sure to effectively use these soundproofing methods to your advantage, and you can enjoy drumming without causing a disturbance.