For any cinema enthusiast, owning a home theater system is the epitome of personal luxury and entertainment.
However, one persistent issue associated with this luxury is the noise leakage.
It might be disturbing to others in the house or even the neighbors.
Optimal sound isolation is crucial not only for creating an immersive viewing experience but also for maintaining a peaceful environment for everyone else in proximity.
Soundproofing can be achieved through various methods.
This article will delve deeper into effective ways to isolate sound and enhance your home cinema system.
Contents
- Ways To Soundproof A Home Theater For The Best Experience
- 1. Use soundproof insulation in walls and ceiling
- 2. Seal All Doors and Windows Tightly
- 3. Install Thick, Heavy Curtains for Windows
- 4. Use Carpeting or Rugs to Absorb Sound.
- 5. Install acoustic panels on the walls
- 6. Use Diffusers to Scatter the Sound Evenly
- 7. Use Bass Traps in the Corners
- 8. Mount Speakers on Vibration-Absorbing Pads
- 9. Install Double-Layer Drywall with Green Glue
- 10. Use resilient channels for walls and ceiling.
- 11. Install Solid Core Doors for Better Insulation
- 12. Use Weatherstripping on Doors and Windows.
- 13. Use Soundproof Curtains or Blinds
- 14. Install Soundproofing Floor Underlay
- 15. Use a Home Theater Acoustic Treatment Kit
- The Bottom Line
Ways To Soundproof A Home Theater For The Best Experience
1. Use soundproof insulation in walls and ceiling
When creating a dedicated home theater, it is crucial to ensure that the sound stays in the room, providing an immersive experience without disturbing others in the household. One effective way to achieve this is by using soundproof insulation in the walls and ceiling.
Unlike regular insulation, soundproof insulation is specifically designed to absorb sound waves, thereby preventing sound transmission to other parts of the house.
Different types of soundproof insulation are available on the market, each with its unique characteristics and degree of sound absorption.
This means that homeowners can choose the most appropriate insulation depending on their specific home theater requirements. Soundproof insulation can come in forms such as batt insulation, blown-in insulation, or soundproofing foam panels.
Regardless of the type, these insulations work by reducing the sound waves’ energy as they pass through the walls and ceiling.
However, it’s very important to remember that installing soundproof insulation is a task that often requires professional expertise for optimal results.
Missteps in installation could lead to less-than-effective soundproofing and in extreme cases, a need to redo the entire effort.
Considering this, hiring a professional to install the soundproof insulation could save you time, money and frustration in the long run.
Professional installers can properly gauge the amount of soundproof insulation needed and make sure it’s installed correctly for maximum sound absorption.
Along with the expertise in installation, they bring knowledge about various types of insulation options that are best suited for your specific requirements.

The given video might further aid your understanding about soundproofing a room. It features practical tips and step-by-step procedures on how you can achieve this.
Please take a moment to watch it as it not only highlights the importance of quality soundproof insulation but also shares other integral components in soundproofing a space.
Again, the inclusion of soundproof insulation in the walls and ceiling is a critical first step in creating a soundproof home theater.
With the wealth of available options and a professional’s help, you can ensure that your home theater delivers crystal clear sound for an ultimate experience.
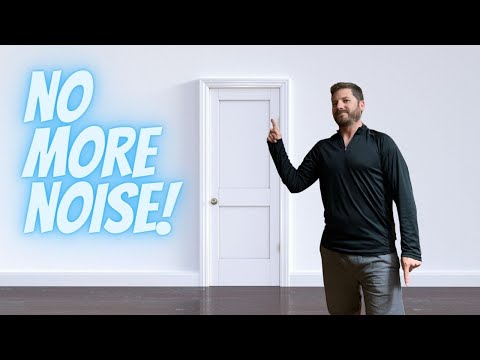
2. Seal All Doors and Windows Tightly
One of the key steps in soundproofing a home theater for the best experience is to seal all doors and windows tightly.
This is because ample gaps or leaks around doors and windows can be significant paths for sound to leak in and out of the room, diminishing the acoustical quality of your home theater.
Therefore, it is highly recommended to closely examine your home theater’s doors and windows and seal any visible or potential leaks.
You can conduct a simple visual inspection, looking for light seeping through or feeling for drafty areas, which are both indications of a needed seal.
Additionally, you can apply weatherstripping to your doors and windows to further soundproof the area.
There are various types of weatherstripping, including adhesive-backed foam tape, door sweeps, V-strips, and door gaskets, all of which can be utilized based on the specific needs of your theater room.
Weatherstripping is highly efficient, easy to install, and relatively inexpensive, preventing sound leakage while also offering the added advantage of increasing your room’s energy efficiency by blocking out drafts.
Application of acoustic sealants along the edges of your doors and windows is another effective technique to soundproof your home theater.
This type of sealant is specifically designed to block sound waves and can fill any gaps or spaces that may have been overlooked or are too small to be handled by weatherstripping.
While being an effective barrier against sound, acoustic sealants remain permanently flexible and will not crack, maintaining the seal and its soundproofing qualities over time.
When sealing your windows, you may also consider using acoustic caulk as an added measure of soundproofing. Essentially, this type of caulking has sound-dampening properties, which can help to further reduce sound leakage.
It is crucial to remember that despite the quality of your sound system, the clear and powerful sound you desire can be compromised by any unsealed gaps, no matter how small they may seem.
Also note, just like every other aspect of building or enhancing a home theater, precision and patience are key in sealing doors and windows to secure the best soundproofing possible.
Implementing these soundproofing measures on your doors and windows can dramatically improve the quality and clarity of sound in your home theater, heightening the overall cinematic experience.
Most importantly, these steps can essentially allow you to enjoy your theater at any time without disturbing others in your home or your neighbors.
3. Install Thick, Heavy Curtains for Windows
Whether you are planning a movie night or simply looking to immerse yourself into an audio-visual experience, the right soundproofing can make all the difference in your home theater.
This is where installing thick, heavy curtains for your windows comes into play.
Thick curtains are designed to absorb sounds and prevent them from escaping your home theater. This contributes to a better, more controlled sound environment inside.
One key factor to consider when choosing curtains for soundproofing is the material. Dense, heavy materials like velvet or polyester are better at absorbing sound than lighter options.
These materials can reduce the amount of noise that enters and exits the room, providing a quieter and more immersive experience.
Aside from their practical soundproofing qualities, heavy curtains can also add an element of luxury and sophistication to your home theater.
You have the flexibility to select colors and patterns that match your interior decor, making the curtains a functional part of your aesthetics.
Therefore, when fully closed, these curtains not only help with soundproofing, but they also increase the overall visual appeal of your home theater.
Curtain installation is generally straightforward and can often be done without professional help, making it a cost-effective part of your soundproofing project.
However, for the best results, it’s important to ensure that the curtains are well-fitted to your windows and hang all the way to the floor.
In addition to these standard curtains, you might want to consider getting a double layer of soundproofing curtains for even better sound control.
These types of curtains have a layer of dense, sound-absorbent material sandwiched between two layers of regular curtain fabric, creating a superior barrier against sound transmission.

In this video, you will see an expert showcasing various types of soundproof curtains and explaining their features. This will provide you with a nuanced understanding of what to look out for when selecting the best soundproof curtains for your home theater.
To sum up, heavily investing in some quality, thick soundproof curtains for your home theater windows can significantly improve your sound experience while not compromising on decor and style.
4. Use Carpeting or Rugs to Absorb Sound.
One of the easiest and yet most effective methods to improve the acoustic quality of your home theater is to use carpeting or rugs.
These products are not only aesthetically pleasing but they also perform a crucial role in sound absorption.
Carpet and rugs, with their high-density fibers, absorb the echo and reverb that can degrade sound quality in a room.
As a result, they contribute to a far greater audio experience when you are watching movies or listening to music in your home theater.
However, it’s important that the carpeting or rugs should be of good quality.
A thick pile carpet or rug, ideally made from wool or synthetic materials, will do a lot better of a job in absorbing sound compared to a thin or low-quality one.
More than just being decorative elements, they act as giant acoustic panels, diffusing and absorbing sound waves to prevent them from bouncing off hard surfaces.
It’s not just about filling the room with carpet or rugs, it is also about strategically placing them. Strategic placement in certain areas where the sound may bounce or echo notably can make a big difference.
Moreover, the larger the carpet or rug, the more effective it will be in absorbing sound.
If the budget allows, consider fully carpeting the entire room.
In case you already have hardwood or tile floors, laying down a few large, plush area rugs can also do a good job.
Whatever the type of floor, don’t forget to add a carpet or rug pad underneath for extra sound absorption.
Equally, consider using carpets or rugs in combination with other types of soundproofing methods to get the maximum result.
Finally, remember to regularly clean and maintain your carpets or rugs. Dirty or soiled carpets may not absorb sound as effectively, impacting the quality of sound in your home theater.
Again, using quality carpets or rugs can contribute significantly to soundproofing your home theater and thereby enhancing your overall listening experience.
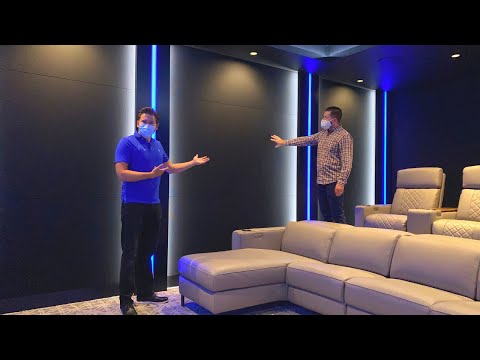
5. Install acoustic panels on the walls
In our quest for the ideal soundproofing strategy for your home theater, installing acoustic panels on the walls is an effective and practical solution.
These tools come in different materials and shapes, purposed to absorb, block, or diffuse sound waves to minimize reverberations and echo.
Addressing these problems is critical to creating an acoustically balanced environment, and acoustic panels accomplish that excellently.
Properly positioning acoustic panels can substantially enhance the clarity of sound and provide a rich listening experience.
In the course of your soundproofing journey, you might encounter panels made from various materials, with each offering unique sound deadening capabilities.
For example, those made with compressed mineral wool or foam are exceptionally efficient in absorbing sound waves and reducing echo.
Here is a perfect video that can guide you through the process:

After watching, you’ll have better insight into how to put up the panels without damaging your walls.
You will also discover that there are several easy DIY methods to fix these panels on your walls perfectly.
As every room is different, the optimal number of panels to be used can vary. Therefore, you might have to experiment with what works best for you.
Generally, it’s advised to install more of these panels on the wall which directly faces the speakers, as that’s where most of the sound waves will be directed.
It’s also important to pay attention to the positioning of the panels. Regular spacing between the panels can help disperse sound more effectively and avoid creating ‘dead spots’.
Remember, the ultimate goal of installing acoustic panels is to create a balanced sound environment in your home theater, not to completely eliminate noise.
The physical appearance of acoustic panels is another factor to consider. As they will be part of your home theater decor, you would want them to blend in nicely with the aesthetic of the room.
If you find the commercial ones unattractive, acoustic panels can be personally designed and customized in any style that suits your preference.
Attractive acoustic panels can add a visually appealing element to your home theater while also maximizing your listening experience.
6. Use Diffusers to Scatter the Sound Evenly
If you aim to fully optimize the audio experience in your home theater, it’s essential to incorporate diffusers. These handy tools work by scattering the sound waves across a wider area.
Sound diffusers prevent the concentration of sound in one spot, consequently eliminating echo and reverberation. This ensures a well-balanced, evenly distributed sound that’s free of any distortions.
Diffusers come in various sizes, shapes, and materials, each with its unique properties that impact how the sound is dispersed.
Implementing these in your home theater design allows for a smooth, multidirectional audio experience that significantly improves the overall sound quality.
Remember, the goal is not only to contain the sound within the room but also to enhance the room’s audio output and prevent any kind of sound distortion.
This is precisely what diffusers do and they are one of the few tools that can strikingly enhance the audio experience while dealing with soundproofing goals.
The manner in which the diffuser is designed and positioned changes how the sound waves are scattered within the room.
For instance, a diffuser with wells and troughs of varying depths will break the sound waves into different sizes as they hit it, spreading the sound evenly across the room. This prevents the sound from bouncing back and creating an echo.
Sound diffusers, therefore can play a critical role in optimizing your home theater’s acoustics. However, the effectiveness of the diffuser may differ based on the type and placement.
For instance, a Quadratic Residue Diffuser (QRD) can be more effective for high frequencies, while a Hemholtz Resonator helps control low frequency sounds better.
Therefore, it’s imperative that you understand your specific audio needs and preferences before investing in sound diffusers.
Be sure also to place these diffusers at the right locations. A good rule of thumb is to position them at the reflection points of the room.
Doing so ensures that the sound waves are effectively scattered, producing a clear, rich, and enveloping sound experience.
So, make sure to consider sound diffusers when soundproofing your home theater because they not only help control the noise but also significantly improve the audio experience.
Remember, apart from soundproofing, your goal is to create a home theater that gives you the ultimate audiovisual experience. Hence, the use of sound diffusers becomes an essential part of your home theater design.
7. Use Bass Traps in the Corners
Soundproofing your home theater requires a comprehensive plan that caters to all aspects of sound control. This includes the often overlooked, but crucial practice of implementing bass traps in the corners of the room.
Bass frequencies are low-frequency sounds that tend to accumulate in the corners of a room due to a phenomenon called standing waves. The corners, where the walls and ceiling meet, are areas where these waves are most intense and problematic.
To counter this, specialized acoustic treatment systems known as bass traps are used. These devices absorb the excess low-frequency sound energy and reduce the magnitude of standing waves, enhancing the overall sound quality of your home theater.
Bass traps are designed to absorb sound energy, especially the low-frequency energy, which can then result in a more balanced and pleasant sound environment.
This quote reinforces the significant role that bass traps play in managing the acoustic properties of a home theater. Bass traps function by absorbing low-frequency sound energy, which in turn manages the standing waves and creates an ideal sound environment.
To ensure proper placement and installation of bass traps, they should be fitted into the corners of the room. This is where the maximum concentration of bass frequency is found.
Keeping in mind that both the upper and lower corners of the room contribute to the intensity of bass sound, it is advisable to install bass traps in these areas for maximum effectiveness.
When selecting bass traps, consider ones with high-density foam or fiber, as these materials are known for their sound-absorbing capabilities.
Watching the embedded video could provide a practical guide to help you install bass traps correctly. It demonstrates the process of mounting corner bass traps and acoustic foam in a way that doesn’t cause any damage to your walls.
By incorporating bass traps in the corners of your home theater, you are taking an essential step towards achieving the best possible audio experience. When effectively combined with other soundproofing methods, bass traps will significantly improve the acoustics and the overall sound quality of your home theater.
Overall, the use of bass traps in the corners of your home theater is a critical step that should not be overlooked. Soundproofing is not just about blocking out external noise, but also about managing the acoustics inside the room itself.
8. Mount Speakers on Vibration-Absorbing Pads
Central to having an immersive home theater experience is the quality of audio produced. This quality can be greatly affected by the vibrations emanating from the speakers.
Mounting your speakers on vibration-absorbing pads can help manage these vibrations. These pads, also known as isolation pads or dampening pads, work by confining the vibration energy to the speaker, preventing it from spreading to other parts of the room.
When the speakers vibrate, the energy transfers to whatever they’re placed on, causing rattling and shaking which can disrupt the sound quality and even damage the structural integrity of your home theater infrastructure over time.
This is where vibration-absorbing pads come in handy. They are engineered to absorb the energy from vibration, hence improving the clarity and quality of the sound output.
Not only do these pads offer acoustic benefits, they also protect your speaker hardware. The vibration can over time lead up to the degradation of your speakers, and these pads are such an effective solution to this issue.
Mounting your speakers on vibration-absorbing pads significantly reduces vibrations, thereby improving the audio experience while protecting your speakers from potential damage.
Post quoting the above, it’s clear that the benefits of these dampening pads are both audio and hardware-wise. They help in rendering a clearer and cleaner sound output, while extending the lifespan of your speakers as well.
These vibration-absorbing pads are typically made from dense foam or rubber, which are materials known for their effective sound-absorbing properties. They are designed to be easy to install and universal with a wide range of speakers.
To formally install these pads, you place them beneath your speakers. These, often, come with peel-off adhesive that sticks to the base of the speaker, ensuring it doesn’t slip off the pad during use.
The cost of these pads varies depending on the manufacturer, size, and material. However, they are generally affordable and a worthy investment for a home theater system considering the benefits they deliver.
As important as these pads are, it’s critical to note that they’re not a total solution to controlling sound in a home theater. They should be used in conjunction with other soundproofing strategies like wall insulation, sealing of windows and doors, use of curtains and rugs among others.
Overall, mounting speakers on vibration-absorbing pads comprises a critical step towards achieving the optimal sound experience in a home theater. It’s a soundproofing strategy that delivers value for the investment, setting the stage for a superior audio experience.
The option to mount speakers on vibration-absorbing pads communicates that you’re serious about the quality of your audio experience in your home theater and demonstrates a commitment to protecting your hardware.
Remember, a soundproof home theater is about more than just blocking out sound, it’s about controlling it for the best possible experience.
9. Install Double-Layer Drywall with Green Glue
In the quest of finding the most effective ways to soundproof your home theater, the installation of double-layer drywall with Green Glue proves to be a very significant factor.
This type of installation involves the use of two layers of drywall paired with the application of Green Glue in between, creating a barrier that significantly reduces noise transmission.
Green Glue is a specific type of noise-proofing sealant known for its effectiveness in dramatically improving sound insulation.
When applied between two layers of drywall, Green Glue works to dissipate the sound energy, helping to greatly reduce the amount of sound that manages to pass through the barriers of your home theater room.
This essentially makes it a great material for converting the sound energy into small amounts of heat, which in turn lessens the noise you may hear.
The double-layer drywall also adds mass to the wall, making it more difficult for sound to vibrate through.
It’s an effective technique that works on the principle that adding mass and density to a wall, can marginally decrease the amount of sound it will let pass.
This type of installation is typically performed during the construction phase of a room, but can also be added to an existing wall for increased noise reduction.
The effectiveness of this type of soundproofing has been studied extensively and is widely accepted in the world of acoustical engineering.
Nevertheless, it would be best if you remember that while the double-layer drywall with Green Glue installation is indeed quite effective, it is not meant to be a standalone solution.
It should be used in conjunction with other methods of soundproofing such as sealing doors and windows, using acoustic panels, and employing sound-absorbing materials.

This embedded video provides a comprehensive tutorial detailing how to effectively install double-layer drywall with Green Glue in your home theater.
Watching it might give you a better understanding of the practical application of this soundproofing method and how it can significantly improve your home theater sound quality.
Finally, while this form of soundproofing is highly effective, it requires careful installation to ensure the best results.
If you are not comfortable performing this installation yourself, consider hiring a professional contractor who specializes in soundproofing to ensure the job is done correctly.
10. Use resilient channels for walls and ceiling.
When talking about ways to soundproof a home theater for the best experience, it’s imperative to discuss the role of resilient channels.
Resilient channels refer to thin metal channels that are designed specifically for walls and ceilings in the quest for soundproofing.
Their primary purpose is to mitigate sound waves through disruption, thereby enhancing the theater’s audio experience.
The intricacies of these resilient channels lie in their installation, which, if done accurately, can lead to the creation of a practically soundproof room.
When installing resilient channels, they are typically affixed to the studs of the walls or the ceiling joists before the installation of drywall.
This installation creates a floating effect on the drywall, subsequently creating an interruption in the path of soundwaves, and thus significantly mitigating noise transmission.
This quoted principle behind the functioning of resilient channels demonstrates their importance in the soundproofing process.
However, this effective decoupling technique requires precise installation, as improper attachment can lead to a phenomenon termed ‘short-circuiting’, which eliminates the advantages brought by resilient channels.
This ‘short-circuiting’ occurs when screws that are too long are used during drywall installation, inadvertently connecting the resilient channels back to the studs or joists, and not the floating drywall.
When the channel connects directly to the wall or ceiling, the soundwaves can again easily travel through these structures.
Therefore, in using resilient channels, it’s critically important to use a professional installer who is aware of the potential pitfalls and can ensure optimum efficacy.
Understandably, this may increase the cost of your home theater soundproofing project, but the resulting sound reduction will undoubtedly heighten your viewing and listening experience.
Thus, resilient channels, while not a direct soundproofing method, play an essential role in enhancing the overall sound insulation in a room.
Used in combination with sound-absorbing materials such as double-layer drywall and proper insulation, these channels can result in significant soundproofing for your home theater.
Without a doubt, factoring in resilient channels to your home theater soundproofing plan will substantially improve the acoustic quality of your room.
11. Install Solid Core Doors for Better Insulation
When it comes to soundproofing your home theater, paying attention to the construction of your doors can have a significant impact on your results.
One valuable step to consider is to install solid core doors throughout the home theater space.
The typical hollow-core door found in most homes does not provide much of a barrier against sound.
Sound waves can quickly pass through these weak barriers, disrupting your home theater experience.
Solid core doors, however, are constructed differently and can drastically help improve the insulation in your home theater.
They consist of a more robust and substantial material that is not easily penetrated by sound waves.
Because of this, a solid core door can significantly reduce the amount of sound that leaks from your home theater.
With superior insulation provided by the thicker and more robust core of these doors, the sound produced within the room remains controlled and maintained within the space.
It is also worth noting that the cost of a solid core door might be higher compared to conventional hollow-core doors.
But, considering the effectiveness with which it prevents the sound leakage, this upgrade can offer an impressive return on investment in terms of sound control in your home theater.
This comprehensive video guide will walk you through some practical ways on how to soundproof a door.
It will provide you with a clearer understanding of how different types of doors can influence the acoustics of a room, enhancing your overall home theater experience.
Again, investing in solid core doors is an effective method for better sound insulation that you shouldn’t overlook when attempting to soundproof your home theater.
Choosing the right doors can be a crucial factor in achieving an immersive and uninterrupted movie time right at the comfort of your own home.
12. Use Weatherstripping on Doors and Windows.
One significant solution for soundproofing your home theater is the employment of weatherstripping on doors and windows.
Weatherstripping, an often overlooked factor, plays a vital role in stopping sound leakage.
These thin pieces of material provide an additional layer of insulation between the door and the frame, or window and sill, effectively barring the escape of sound.
Using weatherstripping in your home theater is eventully beneficial as it also enhances energy efficiency by preventing both drafts and heating or cooling loss.
While weatherstripping is readily available in the market and is usually quite affordable, it’s effectiveness in soundproofing should not be underestimated.
This statement emphasizes the true value of weatherstripping. Despite its low cost and easy availability, it proves highly effective when used for soundproofing.
Moreover, installing weatherstripping is something that can conveniently be done without the need for professional assistance.
Returns would be instantly noticed upon the completion of installation, which is usually quite simple.
The variety of weatherstripping types that exist on the market include adhesive-backed tape, door sweeps, and door seals, each offering various levels of effectiveness for specific uses.
The choice of weatherstripping type very much depends on the nature of the spaces and gaps that need to be sealed in order to achieve a perfect soundproof effect.
Using the right weatherstripping can seal those problematic gaps and cracks around your doors and windows, making a noticeable difference in the sound quality within your home theater.
For an ideal home theater experience, along with reducing noise leakage, you also need to reduce unwanted external noise from entering the room, which can easily be achieved by using weatherstripping.
Doors and windows, when not correctly sealed, can be prime areas for not only sound leakage, but also for external noise to infiltrate your home theater.
Weatherstripping your doors and windows can significantly reduce this infiltration, thereby enhancing the overall acoustic experience of your home theater.
This inexpensive yet effective solution should be an integral part of your home theater’s soundproofing strategy.
Thus, investing in good quality weatherstripping is a small price to pay for the acoustic benefits it provides to your home theater sound system.
13. Use Soundproof Curtains or Blinds
When trying to create an environment that offers the best sound and visual experience for your home theater, consider the use of soundproof curtains or blinds.
Due to their structure, soundproof curtains can significantly minimize the amount of noise penetrating the room.
This gives you a more precise overall sound from your home theater system.
With the latest advancements, innovative manufacturers are developing soundproof curtains with aesthetic appeal without compromising their functionality.
They come in various styles, colors, and patterns, allowing you to select one that complements your home decor and the general setup of your home theater.
Just like soundproof curtains, soundproof blinds also work exceptionally well.
They minimize audio leakage, reducing external noises to a considerable level, adding an extra layer of soundproofing, apart from offering privacy.
This quote means that they not only enhance visuals by controlling light penetration with their adjustable feature but also aid in achieving optimal sound quality.
Their thickness and denseness prevent sound waves from passing through, achieving a steady and undisturbed audio environment.
This is important when you want to enjoy the full thrust of your home theater system without disturbances.

By watching the embedded video, you get first-hand knowledge on how to install soundproofing curtains in your home theater.
It will also provide useful tips that will make the process easier and efficient.
The installation process is basic and straightforward; you do not need to hire a professional to do it, which saves you costs.
Soundproof curtains or blinds are easy to maintain, with most only requiring a simple wash to keep them clean and in good condition.
These practical and aesthetic components provide a smart, easy way to add an extra level of insulation to your home theater.
Bringing the concept of soundproof curtains or blinds into your theater room can turn your average home theater system into an extraordinary audio-visual experience.
As you can see, using soundproof curtains or blinds in your home theater setup is a simple yet effective solution in achieving the best sound in your entertainment space.
14. Install Soundproofing Floor Underlay
One of the more comprehensive approaches to soundproofing your home theater involves the addition of a soundproofing floor underlay.
This underlay, often made from dense, sound-absorbing materials like foam or rubber, is installed beneath your flooring to prevent noise from transmitting through the floor.
Whether you have hardwood, tile, or carpet, a soundproof underlay can make a significant impact on the overall acoustics of your home theater.
A good quality underlay can reduce echo, improve the clarity of audio, absorb vibrations, and most importantly, prevent sound from disturbing the rest of your home.
As already mentioned, the benefits of a soundproofing floor underlay make it an essential consideration for any home theater owner serious about achieving the best viewing and listening experience.
The type of underlay you choose will depend on various factors like your flooring, your budget, and the current acoustic environment of your home theater.
For instance, if you have hardwood or tile flooring, a soundproofing rubber underlay is usually recommended due to its excellent sound absorption qualities.
On the other hand, if you have a carpeted floor, a dense foam underlay might be more appropriate as it can be more easily concealed under the carpet and still deliver excellent sound dampening.
Installation process of soundproofing underlay can be a DIY job if you are comfortable with minor home improvement tasks.
You should start by accurately measuring your home theater room, then cut the underlay according to your measurements.
Lay the underlay on your flooring and secure it in place, ensuring that it covers the entire room, including the corners and edges.
Once the underlay is installed, you can then install your flooring directly on top of it, either by yourself or with the help of professionals.
Keep in mind to always follow manufacturer’s installation instructions for the best results, and don’t hesitate to seek professional help if you are unsure.
Overall, the installation of a soundproofing floor underlay is a long-term investment rather than a short-term solution.
While the initial cost and installation process may seem overwhelming, the acoustic benefits it provides for your home theater make it definitely worth the time and expense.
Once installed, you’re sure to notice a dramatic difference in the audio quality in your room, enhancing your home theater experience noticeably.
15. Use a Home Theater Acoustic Treatment Kit
When setting up a home theater, ensuring the best acoustic experience is essential, which can be achieved with a home theater acoustic treatment kit.
These kits offer comprehensive solutions designed specifically targeting common acoustic issues in a home theater setting.
Essentially, a home theater acoustic treatment kit comprises various components that tackle essential acoustic elements.
An example includes absorption panels, diffusers, and bass traps – all designed to improve your room’s acoustics.
Buying a complete kit ensures you get a mix of acoustic treatments designed to complement each other for best sound quality.
Indeed, these tools are designed not only to work effectively on their own but are precisely designed to enhance each other’s effect when used together, hence providing a more wholesome solution.
In essence, a balanced combination of different acoustic treatments can create a more rounded sound, preventing any ‘dead’ or overly resonant zones in your room.
Furthermore, using a home theater acoustic treatment kit saves you time and energy because it provides all the elements you need in one package.
This way, you don’t have to worry about researching and buying each component separately, which can be quite a daunting task especially if you’re not an audio expert.
Moreover, acoustic treatment kits come with instructions, making the installation process more straightforward.
Your only task is to follow the instructions provided and set up your home theater for optimum sound quality.
By watching the given video, you can learn how to properly install these acoustic treatment components, and also understand how each component works to achieve the perfect audio environment.
Lastly, it’s worth noting that acoustic treatment kits are available in different sizes, so you can choose one based on your room size and specific acoustic needs.
This provides flexibility and ensures that your home theater setup will be perfectly suited to your specific requirements.
Overall, using a home theater acoustic treatment kit is an efficient and effective way to ensure your home theater delivers the best possible sound quality.
The Bottom Line
Ultimately, the process of soundproofing a room effectively lies in understanding the mechanisms of sound and the techniques to control it.
Utilizing strategies such as insulation, sealing, the use of acoustic panels and diffusers, strategic positioning of speakers and the incorporation of special materials and equipment are all essential steps.
The investment in solid core doors, special curtains or blinds and specific underlay for floors could also significantly reduce noise levels.
Additionally, the use of professional soundproofing kits may provide an all-in-one solution for simpler projects.
Each of these initiatives work in unison to create a more serene, noise-controlled environment that can turn your room into a peaceful sanctuary, enhance a home theater experience, or provide the perfect setting for sound recordings.