Soundproofing a shed can transform a basic outdoor structure into a tranquil haven, perfect for work, hobbies, or a bit of relaxation.
However, the process of successfully insulating a shed against noise can be quite tedious if you don’t have the right information.
Understanding the fundamental ideas and applied strategies is key to achieving the desired results.
This blog aims to walk you through a range of useful tips that make the task manageable.
Whether your goal is to create a quiet workspace, music studio or simply reduce the noise from your noisy equipment, the advice provided here will help.
Let’s delve straight into the mechanisms of soundproofing and how they can apply to your shed at home.
Contents
- Tips On How To Soundproof A Shed At Home
- 1. Install thick, insulating drywall
- 2. Install Sound-Absorbing Foam Panels
- 3. Seal any gaps or cracks.
- 4. Use weather stripping on doors.
- 5. Put Down Heavy-Duty Rubber Flooring
- 6. Hang soundproof curtains on windows.
- 7. Use noise-blocking window film.
- 8. Install a Solid Core Door
- 9. Create a double wall inside
- 10. Install Soundproofing Blankets on Walls
- 11. Use Resilient Channels for Ceilings
- 12. Install Acoustic Tiles on the Ceiling
- 13. Add insulation inside walls and ceiling
- 14. Install Double-Glazed or Acoustic Windows
- 15. Cover floor with mass-loaded vinyl.
- The Bottom Line
Tips On How To Soundproof A Shed At Home
1. Install thick, insulating drywall
One of the most effective ways to soundproof a shed at home is to install a thick, insulating drywall. Drywall is a type of construction material designed to reduce sound transmission.
The thickness and density of the drywall can greatly impact the amount of sound it absorbs. Therefore, it’s advisable to choose a drywall that is specifically designed for soundproofing.
The type of drywall you choose is paramount to the success of your soundproofing project.
Installation of soundproofing drywall is similar to regular drywall, but there are key considerations to take into account. You would need the right tools and tactics to ensure that fewer sound leaks occur during the installation process.
Remember to pay attention to areas where the drywall sheets meet as well as corners and edges. These often overlooked areas contribute significantly to unwanted noise leakage.
You should also ensure that the drywall is installed tightly against the framing without gaps or cracks. This helps reflect more sound energy back into the room, reducing the amount of sound that comes into your shed.
The most effective drywall is not only thick but also dense-advantages found in sound-damping drywalls. These types of drywalls have layers of sound-damping materials sandwiched between heavy gypsum layers that help reduce noise transmission to a significant extent.
Spend some time watching this handy video for a practical demonstration on how to properly install drywall for soundproofing purposes. You will learn from an expert in the field how to correctly install insulation and soundproofing.
Moreover, it’s worthwhile to combine the drywall with other soundproofing materials to optimize the sound reduction. This could include materials like mass loaded vinyl (MLV) or soundproofing insulation.
Remember, the ultimate goal in soundproofing your shed at home is to create a serene, quiet space where you can relax or work without external disruptions. Achieving this requires commitment and the elemental knowledge of soundproofing concepts and methods.
As you embark on this journey, it’s essential to understand that soundproofing is both an art and a science. You will need to experiment a bit, and adjustments might need to be made until the desired level of soundproofing is achieved.
Lastly, always make sure to follow safety measures during the installation process. You might need to wear gloves, safety glasses, and a dust mask to protect yourself from any harmful dust or materials.
Indeed, Installing soundproofing drywall involves careful planning, execution, and attention to detail. Nevertheless, the end result is a quieter, more peaceful space, which is a rewarding outcome.
2. Install Sound-Absorbing Foam Panels
When soundproofing a shed, one highly effective tip is to install sound-absorbing foam panels.
These specialized panels are designed primarily to decrease echo and reverberation within the shed.
The effectiveness of these foam panels is determined by their density and their ability to absorb sound waves.
They are commonly made from polyurethane foam, which possesses excellent noise absorption properties.
Sound-absorbing foam panels come in various shapes, sizes, and designs, accommodating almost all types of shed interiors.
In the quest of how to soundproof a shed, investing in these foam panels is a significant step, given their ability to drastically reduce unwanted noise.
This statement signifies the importance and effectiveness of foam panels in soundproofing.
More than just providing a subtle touch of modern design, these panels are truly functional, making them a worth-it investment.
The panels work by absorbing sound waves right after they come into contact with the surface.
Consequently, there is a reduction of noise levels within the shed.
Beyond buying the panels, their proper installation is also crucial for attaining the desired noise control.
They should be correctly aligned and attached on the walls for them to perform their function effectively.
Superior results can be achieved by installing foam panels in combination with other soundproofing materials, such as drywall or insulation.
Consider seeking professional help for panel installation if you are unsure about doing it yourself.
Furthermore, for the best results, the average thickness of the foam panels should be at least 2 inches.
This advice emphasizes the essential role that the foam panel’s thickness plays in sound absorption.
The thicker the foam, the more capable it is of reducing sound reflection.
So, when choosing foam panels, prioritize those with maximum thickness for your shed’s effective soundproofing.
3. Seal any gaps or cracks.
One of the most fundamental and, oftentimes, overlooked steps in soundproofing any room, including your shed at home, is to seal any gaps or cracks.
These openings act as conduits for noise to easily enter or exit your soundproofed haven.
It’s crucial to understand that no matter how much insulation or heavy-duty soundproofing material you use, if there are openings present, those efforts could be negated by these tiny acoustic pathways.
Thus, paying close attention to the minutiae of the structure is of equal, if not greater, importance.
Typically, these gaps and cracks could be found around windows, doors, where the walls meet the ceiling and the floor, and also around any installed fixtures or outlets.
Having a keen eye for detail is vital and would greatly pay off in the effectiveness of your soundproofing efforts.
In addition to this, gaps and cracks also pose a threat in regards to energy efficiency as they could cause AC/Heated air to leak out, further amplifying the need for sealing these gapes.
Various methods and materials could be used in sealing these openings depending on the size and location.
For smaller and medium-sized cracks and gaps, a high-quality acoustic caulk can be used to seal off these spaces.
Acoustic caulks are designed to have superior sound-deadening characteristics as compared to regular caulking.
Larger gaps and cracks could be sealed using materials like expanding foam, specially designed soundproofing weatherstrips or even materials like mass-loaded vinyl for very large gaps.
Sealing these gaps is not only a budget-friendly but also a highly effective way of preventing sound transmission, and it is quite easy to do yourself.

This video provides a practical demonstration of using caulking to soundproof your space.
Watching it can help you gain insights into the proper techniques of applying caulk, and the common mistakes to avoid.
This approach will significantly bolster the effectiveness of your soundproofing project.
Remember, these gaps and cracks may seem insignificant, but sealing them is a central pillar in an effective soundproofing strategy.
4. Use weather stripping on doors.
One of the least expensive and easiest soundproofing methods for your shed at home is the use of weather stripping on the doors.
Not only will it block sound effectively, but it can also serve as additional insulation for your shed, keeping it warm during winters and cool during summers.
As there will inevitably be gaps between the door and the door frame, noise tends to seep through these.
By installing weather stripping, you essentially seal these gaps and prevent sound leakage.
Said sound leakage can be incredibly disruptive, hence the importance of sealing these off.
The weather stripping material acts as a physical barrier that is also soft and flexible, allowing for the door to open and close smoothly.
There are different types of weather stripping available in the market, and they come in a variety of materials like rubber, foam, vinyl, and metal.
The choice of material would depend on how much you are willing to spend, the type of climate you live in, and how frequently the door is used.
Rubber and foam weather stripping materials are generally the most affordable, and they work well for limiting the transfer of noise.>
On the other hand, vinyl and metal weather strips tend to be more durable and effective for noise reduction, but they can be more expensive.
Installing weather stripping is a job you can do by yourself, even though it may take some time for those inexperienced in DIY tasks.
Simply measure the length of the door and cut the weather stripping material accordingly.
Then, attach the weather strip to the door frame using nails or adhesive, depending on the type of weather stripping you purchased.
Once installed, the door will close tightly against the weather strip, effectively sealing the gaps and significantly reducing sound transmission.
Again, using weather stripping on doors is an inclusive, budget-friendly step that contributes to the overall soundproofing of your shed at home.
5. Put Down Heavy-Duty Rubber Flooring
When soundproofing your shed at home, the floor can play a key role in the overall integrity of your soundproofing efforts.
Floors, specifically those made of wood or concrete, can easily transmit sound and echo within the confines of a shed.
Thus, a practical and highly effective solution is to install heavy-duty rubber flooring.
Doing so provides an additional layer of insulation and noise reduction.

By watching the video, you will gain practical insight on how to install rubber flooring effectively.
Also, you get to see firsthand the impact of sound dampening this material brings to environments.
Heavy-duty rubber flooring usually comes in rolls or tiles, making it easier to install even for beginners.
Its thickness and material composition serve to absorb and dissipate sound waves efficiently.
Moreover, beyond just soundproofing, heavy-duty rubber flooring is also known for its toughness and durability, making it a great asset in high-traffic areas.
This means you are not only getting a soundproof floor, but one that can withstand heavy usage for years.
It’s also easy to clean and maintain, adding to its usability and longevity.
When installing, it’s important to ensure that the flooring is laid tightly and that there aren’t any gaps or spaces where sound can escape.
You can also consider adding an extra layer of noise-dampening underlay beneath your rubber floor for enhanced efficiency.
While it might require some investment, the payoff in terms of creating a peaceful, quiet environment is well worth it.
Remember, soundproofing is a comprehensive process, and every bit of effort can make a huge difference.
As you explore this option, take your time to understand the different types and thicknesses of rubber flooring available.
Choose the one that best suits your needs, environmental and use-case considerations.
6. Hang soundproof curtains on windows.
Regardless of your shed’s construction, it’s likely that windows will serve as a major source of noise intrusion.
Typical window glass does very little to prevent the passage of sound.
As such, an important step in soundproofing your shed is to address these openings.
This is where soundproof curtains come into play.
These aren’t just ordinary curtains; they’re thick and heavy, designed specifically to absorb and block sound.
They function by trapping air and sound waves, reducing the amount of noise that penetrates through windows.
Installing soundproof curtains can significantly reduce the amount of external noise that enters your shed.
This is significant because it means that even if you’re using loud tools or playing music, fewer sound vibrations will escape to disturb the peace of your surroundings.
Additionally, these curtains can help to keep your shed more comfortable by adding an extra layer of insulation against heat and cold.
Soundproof curtains are readily available online and in home improvement stores.
They come in a variety of colors and styles, so you’re likely to find something that suits your shed’s aesthetic, whilst also serving a practical function.
Regarding installation, it’s an easy process that you can do yourself.
Most of them come with grommets at the top of the curtain panel, which facilitates hanging on your window frame or curtain rod.
They’re hung like any other curtain, meaning you won’t need any special equipment or skills to put them up.
Remember, their effectiveness is dependent on proper coverage, so ensure they adequately cover the entire window for best results.
By using soundproof curtains, you’re practising a budget-friendly, yet extremely effective method of noise reduction to help soundproof your shed.
7. Use noise-blocking window film.
Reducing noise in your shed significantly involves more than just the doors and walls. Equally, windows play a substantial role in either leaving room for the noise to enter or creating a soundproof environment.
This is especially important if your windows aren’t double-glazed or you’re working with a limited budget.
One affordable and effective way of soundproofing your windows is by applying noise-blocking window film.
This film is very similar to the standard window tinting film, but it has been specially designed to block out sound and thermal transmission.
While the film does not entirely silence the exterior noise, it dramatically reduces the levels that make it into your shed, thereby creating a quieter environment.
The noise-blocking film works by adding an extra layer to your window that helps prevent both sound and heat from penetrating, thus it improves the acoustic and thermal performance of your windows.
For better results, you’ll want to add multiple layers of the soundproofing window film.
This might seem like a daunting task but in reality, it is relatively easy to install. The film usually comes with an adhesive side which you stick directly onto the interior surface of the window.
Like many DIY processes, first, you’ll have to measure your window, cut the film to the required size, then carefully apply it onto the window.
Eliminate any air bubbles existing between the film and window using a credit card or an applicator.
You might be wondering what to expect from installing the soundproofing film on your shed windows.
This video explores the installation process and effectiveness of soundproofing films.
By watching it, you’ll gain a greater understanding of how this solution works and gain tips on proper installation for optimum performance.
One crucial factor to note is that the noise-blocking window film does not alter the appearance of your windows – other than a potential slight tint – making it a practical solution for those who don’t wish to compromise on natural light.
That means, despite installing the film, you’ll still be able to enjoy the sunlight in your shed, but it’d be much quieter and more peaceful.
Overall, the use of noise-blocking window film can be an effective step in your journey to soundproofing your shed, providing a decent decrease in ambient noise levels.
8. Install a Solid Core Door
A critical aspect in your quest to soundproof a shed at home is to consider the type of door you install. You might wrongly overlook the door, but it plays a significant role in the soundproofing process.
In many cases, sheds use light, hollow doors that readily allow noise to pass through. Therefore, replacing this with a solid core door is of utmost importance.
Solid core doors have a center made up of solid wood or a composite material. This center is encased within a veneer of finished wood that gives them a stylish, homely design while increasing its noise-blocking capacity.
They are heavier than standard doors, which directly impacts their ability to absorb and block out sound.
Sound waves function by traveling through air and vibrating the first solid material they come into contact with. Thus, a denser material, such as a solid core door, provides a formidable barrier to these sound waves.
This is not to say that the entire door must be a solid slab of wood. Wood is a great insulator, but there are also other materials available like steel or fiberglass, which are equally effective.
The material used fundamentally depends on your personal preferences or the design of the shed.
The installation of a solid core door should be done accurately to ensure it fits perfectly into the door frame, leaving no gaps.
It might seem like a minute detail, but even a small gap can significantly compromise the effectiveness of your soundproofing efforts. Sound waves are persistent and will find the smallest gap or crack to seep through.
With this in mind, it’s recommended to hire a professional or someone proficient in door installations for this task.
If you decide to do this yourself, make sure you seal any small gaps around the door’s edges with insulating foam and caulk.
Applying a weatherstrip along the bottom edge of the door can also enhance the door’s soundproofing property by blocking any sounds that might want to creep in beneath the door.
Typically, solid core doors are more expensive than hollow doors due to their material and the superior sound insulation they offer.
However, the level of tranquility and peace you will enjoy in your soundproofed shed at home makes this investment worthwhile.
Remember, every measure you take to ensure proper installation will enhance your soundproofing efforts. With a properly installed solid core door, you’re one step closer to having a fully soundproofed shed.
This underscores why embarking on the journey to soundproof your shed requires a carefully planned and meticulously executed strategy.
9. Create a double wall inside
Creating a double wall inside your shed is a highly effective soundproofing method which provides a substantial barrier against outside noise.
This strategy involves constructing an additional wall with a gap between it and the existing wall, which greatly enhances sound isolation.
The layers of the walls and the air gap in between them work together to form a barrier that prevents sound waves from passing through.
While it might be a relatively complex process, it’s worth noting that creating a double wall considerably reduces the transmission of noise.
The combination of the double wall structure and the insulation placed in the gap block the travel of sound waves, making it a highly efficient method of soundproofing.
This is due to the fact that sound waves find it difficult to travel through multiple layers of different materials.
They are also further impeded by air gaps, making them dissipate faster before reaching the interior of your shed.
In other words, the multi-layered construction coupled with air-gap can absolutely limit sound transmission.

Watching the embedded video will provide a clearer understanding of the actual construction process and benefits of a double wall for soundproofing.
You will be able to grasp the fundamental principles behind a double wall technique and see a real-world demonstration of its assembly and use.
Despite its high effectiveness, remember that creating a double wall does need some level of construction knowledge and practical skills.
It might involve measuring, cutting and fixing wooden or metal studs, drywall panels and insulation.
You may need to call in a professional if you’re unsure about doing this yourself.
Also, keep in mind that this could be a costlier approach as it involves the use of additional materials and possibly professional assistance.
However, given the excellent soundproofing benefits it provides, the double wall method is truly worth considering if your budget allows.
Thus, if you are looking for the most effective way to soundproof your shed, creating a double wall is surely the way to go.
10. Install Soundproofing Blankets on Walls
Within the multitude of strategies to soundproof your shed, one effective method is the use of soundproofing blankets.
These utilitarian items, known also as acoustic blankets, are specifically designed to restrict sound transmission and absorb excessive noise.
The design of these soundproofing blankets is intentional, with most models featuring an outer surface made of sound-absorbing materials.
The core typically consists of materials that block the travel of sound waves, hence effectively soundproofing your shed.
The incredibly practical design of these blankets allows you to easily attach them to the walls of your shed, using velcro, nails or any other suitable attachment method.
Having these blankets attached to your shed walls will massively reduce noise transmission, thereby creating a serene environment inside of it.
It is up to you to determine how you want to hang these soundproofing blankets based on your specific needs and what your shed’s wall surfaces can handle.
Perhaps the greatest advantage of these acoustic blankets is their efficiency and ease of use.
You can install them yourself, even if you are not particularly skilled or experienced in soundproofing techniques.
Moreover, the cost of these soundproofing blankets is quite reasonable, fitting into most budgets.
These blankets don’t merely serve to soundproof your shed; they also add an insulating layer, further enhancing the comfort of your shed by maintaining a consistent temperature inside.
The flexibility that these acoustic blankets offer is truly unmatched; you can use them temporarily and them remove them, or you can opt for a more permanent installation.
It’s worth noting, however, that the effectiveness of soundproof blankets can vary depending on the type of noise and its volume.
Despite this, they generally provide a substantial reduction in noise, contributing greatly to achieving your goal of a soundproof shed.
To sum up, using soundproofing blankets is an easy, fast and effective way to minimize noise levels in your shed.
11. Use Resilient Channels for Ceilings
One of the most effective ways to soundproof a shed is by using resilient channels for ceilings.
These channels create a separate barrier to prevent sound waves from directly hitting the hard surface of the ceiling.
Resilient channel installation requires just a few tools and some patience, but the result is remarkably effective in reducing noise transmission.
These materials are accessible and relatively easy to install.
Resilient channels work by providing a ‘break’ in the connection between the wall stud or ceiling joist and the drywall or plasterboard; this drastically reduces the path for sound to travel.
This technique is effective because it introduces a layer of separation between the noise source and the surface receiving the noise.
With the reduction in contact, vibration from sound waves is less likely to be transferred, leading to less audible noise.
Regardless of what’s causing the noise, whether it’s the wind blowing against the shed, or activities inside causing the commotion, resilient channels can greatly reduce the sound that escapes.
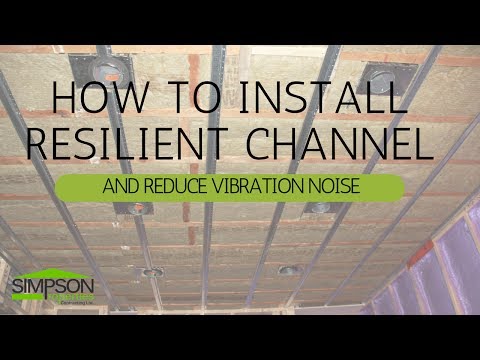
In this video, you’ll gain practical insights on incorporating resilient channels in your soundproofing project. It details the step-by-step process of installation, clarifying any doubts you might have.
This informative video demo can help to visualize and understand how the soundproofing effect is achieved through the use of resilient channels.
Resilient channels are particularly useful when dealing with low-frequency sounds which are typically more difficult to soundproof effectively.
As with any soundproofing tactic, it’s important to carefully follow instructions and apply the materials correctly to get the most benefit.
Poor installation could result in a less effective barrier, allowing more sound to be transmitted.
Ultimately, the success of your soundproofing depends on the combination of techniques you use and how well they are implemented.
Adding resilient channels to your soundproofing plan can make a significant difference in reducing noise, thereby creating a serene and productive space within your shed.
12. Install Acoustic Tiles on the Ceiling
One effective way to soundproof a shed at home is to install acoustic tiles on the ceiling. These tiles are specially designed to absorb and diffuse the sound, thereby reducing the amount of noise that enters or escapes the shed.
Acoustic tiles are often used in recording studios, theaters, and other places where controlling sound is critical. Their addition can significantly enhance the soundproofing of your shed, making it a more peaceful and quiet place.
These tiles are typically made of mineral fiber or foam and come in various sizes, thicknesses, and designs. Thus, they can also add a stylish touch to the interior of your shed while providing a practical solution to your sound issues.
Depending on their design and material, acoustic tiles can absorb different frequencies of sound, but typically they are good at reducing mid to high-frequency noises.
This property makes them an excellent choice for soundproofing. For example, if your shed is located near a busy road, the tiles can help reduce the noise of passing vehicles. Similarly, if you plan to use the shed as a music studio or a home cinema, the tiles can help contain the sound within the shed, preventing it from disturbing your neighbors.
When it comes to installing acoustic tiles, you have several options. Some tiles come with adhesive backings that you can simply stick to the ceiling. Others require you to fix them with glue or screws. It’s essential to follow the manufacturer’s instructions to ensure the best soundproofing performance and the longest lifespan of your tiles.
Consider using soundproofing sealant around the edges of the tiles. This can help prevent sound leakage through gaps between the tiles and enhance the overall soundproofing effect. It’s also important to pay attention to the joints and corners, as sound can often seep through these areas.
Installing acoustic tiles may require a moderate level of DIY skills. If you’re not confident in your abilities, you may want to hire a professional. However, many people find the process straightforward and fulfilling, and there are many resources available online to guide you through the process.
It’s a good idea to wear protective clothing and equipment, such as gloves and safety glasses, during the installation. Cutting the tiles may release fine particles that you should avoid inhaling. Always work in a well-ventilated area and dispose of the waste responsibly.
Once installed, acoustic tiles require little maintenance. You can dust them periodically with a soft brush or vacuum cleaner or wipe them with a damp cloth if necessary. However, avoid using abrasive cleaners or strong detergents, as these can damage the tiles and reduce their sound-absorbing properties.
Remember that acoustic tiles can make a significant difference in the amount of noise your shed can tolerate, but they may not eliminate all sounds. For the best results, consider combining them with other soundproofing measures, such as those provided in this guide.
No matter your reason for needing to soundproof your shed, the installation of acoustic tiles can offer a powerful solution towards achieving a more peaceful and soundproof environment.
13. Add insulation inside walls and ceiling
One critical step in your endeavor to soundproof your home shed is introducing insulation within the walls and ceiling.
This procedure maximizes the sound absorption and consequently minimizes noise pollution.
Reasonably, to achieve this, various materials are at your disposal but mineral wool, foam insulation, and fiberglass are some of the most common options.
Remarkably, these materials not only serve to soundproof your shed but also offer excellent thermal insulation.
Thus, they also help keep your shed cool in summer and warm during winter, which makes this a worthwhile investment.
However, this does not substitute the fact that choosing the right insulation material depends on multiple factors including your budget, specific soundproofing needs, and environmental considerations.
For instance, while they all work effectively, mineral wool is usually the most expensive option but it boasts of the best sound and thermal insulation.
On the other hand, foam insulation is not only less costly than mineral wool but also very easy to install since you only need to spray it into the spaces inside the walls and ceiling.
Fiberglass, while cheaper than both, is equally effective but requires more caution during installation due to the tiny glass particles that can be hazardous when inhaled.

From this video, you gain a visual understanding of how to effectively install insulation inside your shed’s interiors.
Furthermore, the video will also give you additional tips regarding the installation process, putting into practice various techniques to ensure maximum soundproofing results.
In addition to the insulation material, another critical element to consider is the thickness of the insulation layer.
Usually, a denser layer provides better soundproofing because it has a more superior sound absorption capacity.
However, you must also account for the fact that a thicker layer will slightly reduce the inner space of your shed, a factor that you should consider especially if your shed is not very large.
Overall, adding insulation within the walls and ceiling is one of the most effective measures to soundproof your shed, but it needs a thoughtful approach to optimize its function and also meet your unique needs.
14. Install Double-Glazed or Acoustic Windows
One of the significant ways to soundproof your shed is by installing double-glazed or acoustic windows, which greatly help in reducing noise levels.
First off, double-glazed windows are designed with two layers of glass with an air gap in between, which makes it harder for noise to get through.
They are not only useful in enhancing noise reduction but also essential in improving insulation, which is an added advantage.
Acoustic windows, on the other hand, are specifically designed for sound isolation.
Acoustic windows are engineered with a particular type of glass and framing that diminishes sound transfer, making them a preferred choice for numerous soundproofing applications.
This specialty glass and framing work synergistically to diffuse sound frequencies to ultimately reduce unwanted noise.
However, the effectiveness of these windows can be impacted by poor installation; hence, they should be installed by an expert to guarantee maximum results.
The installation process should also account for sealing all gaps and cracks around the window as these can act as pathways for noise transfer.
Additionally, the effectiveness of these windows can be boosted when they are used in conjunction with other soundproofing measures like the installation of thick, insulating drywall or the use of resilient channels for ceilings.
Therefore, while these windows offer significant noise reduction on their own, for the best soundproofing performance, it’s suggested to use them as part of a more comprehensive soundproofing strategy.
It’s worth noting that while double-glazed and acoustic windows offer excellent noise reduction, they are typically a more expensive choice compared to standard windows.
However, considering that they offer energy efficiency and durable quality in addition to soundproofing, they are certainly a worthwhile investment for anyone seeking to soundproof their shed.
Moreover, when these windows are properly maintained, they can serve their purpose for a very long time, thereby giving you good value for money.
Again, installing double-glazed or acoustic windows can be a game-changer in your quest to soundproof your shed at home.
By selecting a trusted brand and a qualified installer, coupled with the support of other practical soundproofing strategies, you can achieve a significant reduction in noise levels in your shed, creating a peaceful and more usable space.
15. Cover floor with mass-loaded vinyl.
One of the most effective ways of soundproofing a shed at home is to cover the floor with mass-loaded vinyl (MLV).
MLV is a limp, dense material often used to minimize airborne noise through walls, ceilings, and floors.
When it comes to flooring, its effectiveness in plugging the tiny gaps where sound can slip through is phenomenal.
The efficacy of this material is due to its mass and the fact that it doesn’t resonate with noise.
Mass-loaded vinyl is perfect for those who seek to maintain a tranquil and quiet space, free from outside interference.
Given its dense nature, it doesn’t vibrate or become a medium for sound waves to propagate.
Thus, it can significantly cut down noise transmission.
To achieve better results when installing MLV, it’s crucial to cover the entire floor surface without leaving any gaps.
The overlapping should be a minimum of a quarter inch and sealed using a high-grade adhesive to ensure an airtight seal.
After laying down the MLV, you can then add your flooring of choice on top.
This could be anything from carpet, tiles, to hardwood flooring.
Regardless of the flooring material, MLV will continue to offer soundproofing properties.
Remember, when installing MLV, make sure the seams do not coincide with the seams of your floor boards to avoid weak points where sound can leak.

You may find it beneficial to watch the embedded video for more information on how to correctly install MLV for soundproofing.
This tutorial will aid you in understanding all aspects of application and will teach you some additional tricks for ensuring maximum effectiveness.
All in all, if you are on the hunt for a practical, affordable and durable solution to soundproof your shed floor, look no further than mass-loaded vinyl.
Happy soundproofing!
The Bottom Line
Ultimately, effective soundproofing involves strategic layering of various sound absorbing and noise blocking materials.
This can be achieved by starting with insulating drywall and installing foam panels, followed by meticulous sealing of all gaps or cracks.
Use of weather stripping on doors, heavy-duty rubber flooring, soundproof curtains, noise-blocking window film and solid core doors further enhance the soundproofing.
The additional creation of a double wall, installation of soundproofing blankets and acoustic tiles, as well as use of resilient channels can vastly improve sound insulation in ceilings.
Insulation within the walls and ceiling serves to both thermally insulate and soundproof the areas.
Upgrading to double-glazed or acoustic windows can significantly reduce outdoor noise.
Lastly, covering the floor with mass-loaded vinyl provides superior sound-deadening properties.
By combining these techniques, your space can enjoy efficient noise reduction and improved acoustics.