Soundproofing plays an integral role in enhancing the overall sound quality in a music recording session.
Besides offering a quiet environment, an acoustically insulated room also eliminates interference from external noises, thereby rendering clear audio output.
Successful soundproofing, however, goes beyond just putting up some acoustic foam and closing the door.
It involves employing various techniques and materials specifically designed to control sound reflections.
The following post aims to provide practical guidance on effective ways to bolster sound insulation in your recording space.
The goal is to enable musicians and sound engineers to record and produce high-quality music without any disruptive noise intrusions.
Contents
- Tips On How To Soundproof A Room For Music Recording
- 1. Use Thick Carpets or Rugs on the Floor
- 2. Install Insulated Doors and Windows
- 3. Add mass-loaded vinyl to your walls.
- 4. Use Acoustic Foam Panels on Walls
- 5. Install bass traps in room corners.
- 6. Use diffusers to reduce echoes.
- 7. Ceiling should be soundproofed too.
- 8. Use silicone or caulk to fill gaps.
- 9. Use soundproof curtains around windows
- 10. Install a room within a room
- 11. Use a Drum Shield for Loud Instruments
- 12. Use Double-Wall Construction Technique
- 13. Arrange furniture for best sound absorption.
- 14. Use weatherstripping on doors and windows.
- 15. Use a Quiet Ventilation System
- The Bottom Line
Tips On How To Soundproof A Room For Music Recording
1. Use Thick Carpets or Rugs on the Floor
Whether you are equipping a new recording studio or revamping an old room in consideration of soundproofing, the type and style of the flooring is a factor worth deliberating on.
One of the most affordable and convenient ways to minimize noise and sound reflections from a room is to use thick carpets or rugs on the floor.
These materials are designed to absorb sound waves thus reducing not only the sound that escapes from your room but also decreases the sound entering your room.
The effectiveness of a rug or carpet in soundproofing a room is mostly determined by its thickness.
The thicker the material, the better it is in absorbing and minimizing sound waves.
However, it doesn’t necessarily mean that adding multiple layers of carpets will work better. An effective soundproofing strategy should be balanced and appropriate.
Large and thick rugs or carpets with a dense pad underneath are more effective in trapping and absorbing sound waves, giving you a quieter recording environment.
This claim is supported by various acoustics studies that have confirmed the ability of such materials to absorb and trap sound waves, therefore, inhibiting them from bouncing off the surfaces and creating echoes.
By covering your entire floor space with a thick carpet or rug, you are essentially creating a vast surface area that absorbs and diffuses sound.
This technique combines both engineered soundproofing and decorative design, because carpets and rugs come in many styles and colors that can enhance the look of your room.
When selecting carpet or rugs for soundproofing, prefer materials made of fibers like wool which are known for their excellent sound-absorbing properties.
Additionally, you can also use underlays that are made of dense materials underneath the carpets to further improve the sound absorption capacity.
While it is not as effective as the more technical methods of soundproofing such as double-wall construction or installing a noise barrier, using thick carpets and rugs go hand in hand with those techniques to create a comprehensive soundproofing system.
These fixtures are however not enough to completely soundproof a room, but using carpets and rugs sets the stage for further soundproofing measures.

By watching this video, you will understand the principles of soundproofing a room and how each material works.
Also, it offers practical steps on implementing these methods, including ways to utilize carpets and rugs effectively.
2. Install Insulated Doors and Windows
Soundproofing a room for music recording often goes beyond the immediate thought of carpeting, rugs, and foams. A significant step to take is to install insulated doors and windows.
External noises infiltrating your recording space can be attributed to sub-standard doors and windows. Hence, they should been given top attention like any other component of a room.
Common doors and windows lack the necessary components to offer adequate soundproofing. They are often thin and made of lightweight materials.
One effective approach to maximize soundproofing is to exchange ordinary doors and windows with insulated versions.
Insulated doors and windows are designed with materials that absorb and reflect sound waves. They are usually composed of multiple layers, air spaces, and tight seals to provide this soundproofing functionality.
This design ensures that they offer substantial resistance to sound transmission. The layers and air spaces reduce sound conduction, while the heavy materials used in their production enhance the absorption of noise.
Installation of these types of doors and windows might be more expensive than regular ones, but the soundproofing benefits are worth the cost.
Also, endeavor to engage the services of a professional for the installation because wrong installation can undermine the soundproofing capabilities of the doors and windows.
If budget allows, it is recommended to combine insulated doors and windows with additional soundproofing solutions like curtains to maximize the overall effect.
This does not only enhance the acoustic performance of your music recording room, but it also enhances the energy efficiency of your space. This is because these doors and windows additionally offer excellent thermal insulation properties.
Therefore, the installation of insulated doors and windows is a worthwhile process in your pursuit of a soundproof music recording room.
However, remember to consider additional aspects like the quality, acoustical ratings, and installation process when choosing the right insulated doors and windows for your recording space.
Again, installing insulated doors and windows can be an invaluable investment when setting up a soundproof room for music recording.
3. Add mass-loaded vinyl to your walls.
Mass-loaded vinyl, often referred to as MLV, is a thin but very dense material that is recognized as a highly effective soundproofing tool. This vinyl is specially designed to block out noise, making it an excellent choice for a recording studio where maintaining audio purity is a priority.
One of the fantastic properties of MLV is that it not only provides soundproofing but also has perfect versatility. Its flexible nature allows it to easily conform to the shape of your walls, around corners, and even around door frames, ensuring a neat and tight seal capable of muffling the vast majority of unwanted noise intrusion.
Moreover, MLV has an STC rating that ranges from 26 to 30, which implies it can block out around 26 to 30 decibels of sound.
This impressive sound transmission class (STC) rating indicates a high performance with both high and low-frequency noises. As such, the use of MLV will be effective regardless of the type of sound being emitted within or from outside the recording space.
It’s worth noting that the thickness of the MLV is also a factor in determining the level of soundproofing provided. Thicker MLV will, of course, provide better noise reduction, although it may also be more difficult to install because of its increased weight.
Regarding installation, mass-loaded vinyl can be attached directly to your wall studs before you put up drywall, or it can be glued to the surface of existing walls with special adhesive. Once the MLV is installed, you can then cover it with drywall, paneling, or another decorative wall finish.
httpv://www.youtube.com/watch?v=7Si—sw36USeeing a step-by-step installation process could give you invaluable insights and a clearer understanding of how to best use MLV for soundproofing. This video guide covers all the crucial steps, from proper measuring and cutting to secure mounting of MLV.
Although the installation process of MLV might seem a bit tedious, it’s an essential step that will significantly enhance your soundproofing efforts. The time and resources invested in their installation are very much justified.
Speaking of investment, mass-loaded vinyl products are fairly reasonable in cost, but it’s also important to recognize that quality soundproofing does require a financial commitment. An effective soundproofing strategy for a music recording studio is an investment in the quality and professionalism of your work.
In spite of the challenges that may come with the installation of MLV, it offers a substantial reduction in sound transmission, thereby providing a quieter, more controlled recording environment. No doubt, adding MLV to your walls is a tip you don’t want to miss!!!!
4. Use Acoustic Foam Panels on Walls
One effective method for soundproofing a room for music recording is the use of acoustic foam panels on walls.
These are specially designed panels made from a foam-like material that helps to absorb sound waves instead of merely reflecting them.
Acoustic foam panels achieve this by altering the path of the sound wave, reducing it’s energy and ultimately its volume.
If you are serious about creating a soundproof recording space, acoustic foam panels should be an integral part of your setup.
The panels come in various shapes, sizes, and densities which have different sound absorption qualities.
You can purchase these panels from numerous online and physical stores, with the price varying based on the quality and size of the panels.
Tile shaped acoustic foam panels, wedges, and pyramid designs are among the most effective as they can cover a wide range of frequencies. They allow for even better sound absorption.
These more advanced designs are able to absorb high, middle and low-frequency sounds and are thus particularly beneficial in a recording environment.
Besides just sound absorption, acoustic foam panels also significantly improve the acoustics within a recording room.
This is achieved by controlling the excess reverb in the room, giving a cleaner and more accurate sound recording.
Installation of acoustic foam panels is also quite straightforward, you can even do it yourself.
You simply attach adhesive strips onto your walls, then fix the panels onto these strips.
Alternatively, you can use an adhesive spray that is usually sold along with the panels.
It is worth noting that while installing these panels, make sure to cover all the main reflecting points in the room.
Remember also that the panels should not cover every inch of the room walls.
It is crucial to leave space between the panels to allow for diffusion, that will create a balanced sound.
Using acoustic foam panels on your walls will not only soundproof your recording room but also improve the overall recording quality.
However, the acoustic foam panels only work to reduce the noise in a given space, and do not block sound transmission completely.
Therefore, using these panels alone might not be fully effective in soundproofing a room, but when combined with other techniques, the results will be significantly better.
5. Install bass traps in room corners.
When tackling soundproofing in any given room, especially those intended for music recording, it is critical to consider the role corners play in sound dynamics.
These spaces, more often than not, are notorious for gathering and amplifying low frequency waves, or bass sounds, which can greatly affect the overall sound clarity.
One effective strategy to mitigate this issue is by installing bass traps in room corners.
Bass traps are devices specifically designed to absorb excessive bass and prevent it from causing unwanted resonances.
In their simplest form, bass traps are essentially absorptive material that you can place in corners where bass tends to build up.
Widely used in music production and recording studios, bass traps can significantly improve your soundproofing efforts and enhance the overall quality of sound captured.
With their capabilities to dampen low-frequency noise, they can balance the sounds within the room and reduce the chances of sound leaking out or external noise leaking in.
The construction of bass traps is usually dense and incorporates materials known for their sound absorption properties.
These include mineral wool, fiberglass, and sometimes foams, all of which work together to absorb and scatter sound energy, significantly reducing echo and resonance.
What makes these bass traps more appealing is the fact that they are easy to install and relatively affordable, making them a great addition to your suite of soundproofing solutions.
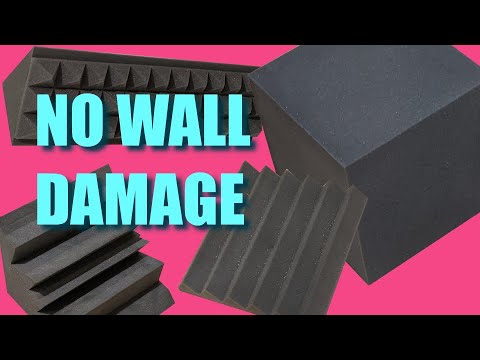
By watching the video, one can receive practical advice on properly installing corner bass traps and acoustic foam without causing damage to walls.
This step-by-step guide can give you a better understanding of how to effectively work around room structure and materials, providing you with an informed and competent execution of your soundproofing task.
Having covered the pivotal role of bass traps in your soundproofing initiative, always remember to pair this method with others for maximum sound quality and insulation.
Silencing the corners of your room with bass traps not only fine-tunes your recording environment but also enhances the overall sonic experience within the space.
6. Use diffusers to reduce echoes.
One key approach to soundproofing a room for music recording is the strategic use of acoustic diffusers. These particular soundproofing devices serve to scatter or distribute sound waves evenly across a room, effectively helping to reduce echoes and improve sound quality.
It’s not uncommon for sound waves to bounce off hard, flat surfaces and create bothersome echo effects in any room, and even more so in a music recording space. Diffusers help to break up these sound reflections, offering a significant soundproofing advantage.
There are various types of acoustic diffusers available in the market, with designs ranging from quadratic residue diffusers, skyline diffusers, or even custom made designs. It is critical to pick the diffuser that best suits your specific needs.
Importantly, the placement of the diffusers within your room can greatly affect their efficiency in soundproofing.If diffusers are placed too close to each other or too near to other soundproofing devices, they could negatively interfere with each other’s performance, diminishing their soundproofing effect. Therefore, proper placement is essential.
Diffusers can be placed on the walls, ceiling, and even on the floor of the recording room. However, the most common placement of diffusers in a recording studio is typically on the back wall. This helps to achieve a balanced sound diffusion that contributes to reducing the effect of echoes and reverberations.
However, using diffusers alone in your music recording room might not guarantee complete soundproofing. So, it should be combined with other soundproofing techniques such as using carpets, sound panels, insulation methods, and so on to assure the best achievable soundproofing.
Installing diffusers can also aid in creating a pleasant ambience for recording sessions. These devices not only contribute to soundproofing but can also enhance the aesthetic appeal of your recording space.
Lastly, apart from purchasing designed diffusers, a budget-friendly option could be DIY diffusers. Making your own diffusers can be a cost-effective way to soundproof your room while having complete control over the design and type of diffuser you want.
Again, the use of diffusers is a crucial aspect of soundproofing a music recording room, and paying attention to the types, arrangement, and placement of these devices can effectively reduce echoes and improve the overall sound quality. However, remember, diffusers work best in combination with other soundproofing techniques.
No soundproofing journey is complete without understanding and using diffusers effectively in your music recording room.
7. Ceiling should be soundproofed too.
When considering soundproofing for a music recording room, people often overlook the ceiling, focusing solely on the walls and doors. However, soundproofing the ceiling is an integral step in the process.
Like the walls and floor, a ceiling can also transmit sound waves. Hence, failure to soundproof it could mean your studio is not fully sound insulated.
Apart from sound leakage, failure to properly insulate the ceiling can result in elevation in echo within the room.
Therefore, for a thorough soundproofing, the ceiling should also be considered.
This statement clearly emphasizes the importance of the ceiling in a complete soundproofing process. By soundproofing your ceiling, you significantly reduce the likelihood of sound leakages and echo within your room, offering a more effective and efficient soundproofing solution.
There are numerous methods to soundproof a ceiling, such as the use of special sound-absorbing ceiling tiles, acoustic foam or fiberglass insulation.
These are smart ways to trap sound waves, preventing them from bouncing around and causing noise pollution. They can drastically improve the overall acoustics of your music recording room.
Mineral wool insulation is another material often used for soundproofing ceilings. It’s known for its excellent sound insulating properties and can help reduce the transmission of mid to high-frequency sounds.
However, it should be noted that undertaking ceiling soundproofing is not a simple task. Depending on the method you choose, it may require a significant amount of work and precision.
While DIY solutions can work, for optimal results, you may want to consider working with soundproofing professionals.
They will ensure that the soundproofing is done correctly, which can save you time, effort, and eliminate the margin for errors.
Also, it’s important to carefully consider the height of your ceiling before starting any soundproofing work. Low ceilings may result in a claustrophobic feel, so make sure there’s still an ample amount of head room after the soundproofing is installed.
Understanding these intricate details can greatly improve your outcome and create a more efficient music recording environment.

For additional tips and visual guidance, check out this video. It demonstrates some useful techniques to soundproof a ceiling effectively, offering valuable insights to help you tackle the task at hand.
8. Use silicone or caulk to fill gaps.
When soundproofing a room for music recording, a common issue that arises involves unaccounted gaps and small holes within the room’s structure. These can be windows, doors, or any potential entry for sound waves.
A great solution to counter this predicament is to use silicone or caulk to fill the gaps. The caulking compounds are easy to use, and they effectively block out noise disruption.
It’s crucial to understand the significance of using silicone or caulk in soundproofing. Essentially, these compounds function by forming a solid, flexible barrier in cracks, gaps, or joints to prevent sound transmission.
Proper application is essential to ensure effective soundproofing. Thus, when filling gaps with silicone or caulk, it is recommended to apply the substance thoroughly and evenly, ensuring there are no small gaps left uncovered.
While it is a relatively simple method, using silicone or caulk can have a significant impact on your room’s overall level of soundproofing.
Upon applying this technique, one can observe a noticeable reduction in the amount of airborne sound transmission. This works particularly well for eliminating low-frequency noises, which are usually a challenge in many soundproofing endeavors.
Moreover, silicone and caulk are not only a fantastic solution for soundproofing, but they are also great for heat conservation, helping maintain a comfortable atmosphere in the room.
Remember to allow the caulk or silicone to dry completely before assessing its effectiveness to ensure accurate results. This could take anywhere from 12 to 48 hours depending on the type and brand used.
More so, both silicone and caulk are affordable and widely available at local hardware stores or even online.
However, it is paramount to choose high-quality silicone or caulk products for the best effectiveness. Different products come with varying levels of density and flexibility, factors which influence their soundproofing abilities.
Also, safety should be a priority while handling these substances. Consider wearing gloves and ensure proper ventilation in the room during application to avoid health risk.
Wrapping up, using silicone or caulk may seem like a small step, but it is an integral component of soundproofing a room for music recording. It, in fact, enhances the overall result when coupled with the other steps outlined in detail in this article.
Each step contributes significantly to the total soundproofing process and should not be overlooked or underestimated.
9. Use soundproof curtains around windows
One of the most effective ways to soundproof a music recording room is to use soundproof curtains around the windows.
While windows are great for natural lighting, they can unfortunately let in unwanted noise from outside or allow sound waves to escape.
Thus, soundproof curtains can come in handy and serve as a barrier against sound transmission.
Not just any curtains, but those specifically designed to absorb sound. These are often made from heavy, dense materials to ensure they function effectively.
Soundproof curtains not only block out external noise but also absorb internal sound to prevent it from bouncing off the windows.
“It is worth noting that the effectiveness of soundproof curtains can be greatly enhanced by using them in conjunction with other soundproofing techniques“
After all, to achieve the best soundproofing effect in a music recording studio, it’s always best to incorporate a variety of methods.
The very success of soundproofing a room is heavily dependent on creating multiple layers of sound barriers, and every additional method makes a difference.
There are different types of soundproof curtains available in the market today, each with varying levels of sound absorption capabilities.
Therefore, it is vital to do some research before purchasing to ensure you pick the right curtains for your specific needs.
The installation process is simple and straightforward. However, it is recommended to use a double rod for hanging to maximize sound absorption.
Furthermore, if your windows are large, you may want to consider using extra-wide soundproof curtains to ensure full coverage.
These curtains are also easy to clean and maintain, making them a practical choice for any music recording studio.
Indeed, soundproof curtains are a cost-effective yet useful tool in your soundproofing efforts.
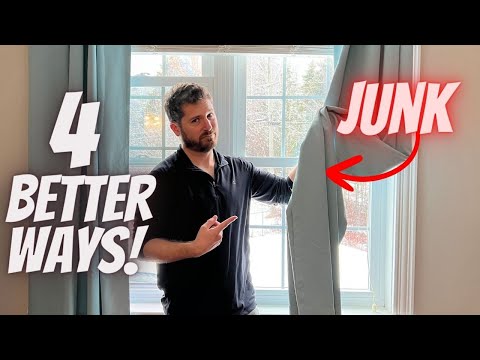
For those who still have doubts regarding the functionality of these curtains, you could learn about different alternatives by checking out this video.
As well as the actual effectiveness of soundproof curtains, you’ll also gain a broader understanding of other sound deadening strategies.
10. Install a room within a room
One of the more advanced and effective methods of soundproofing a room for music recording is to install a room within a room.
This notion involves building an entirely independent room within the existing space, creating a double layer of insulation to prevent sound leakage.
Often used in professional recording studios, this method is considered highly effective for its ability to create a complete barrier against sound transmission.
The materials used to create this inner room should be soundproof or highly sound absorbent, rendering the space within virtually silent to the outside world.
Initially, you need to measure the existing room to plan the dimensions of the inner room with precision.
Then, it’s crucial to choose the correct materials for construction, with mass loaded vinyl and mineral wool being top picks for their sound absorbing properties.
Once the materials are chosen, it’s time to construct the ‘inner room’. But it’s essential to keep in mind that this new room should not touch the existing walls, ceiling, or floor.
This is because any contact points between the existing room and the new room could potentially allow sound to escape.
A gap of at least 1-2 inches, filled with acoustic sealant, should be maintained between the walls of the inner room and those of the existing one.
Using resilient channels or sound isolation clips to attach drywall or other materials to the walls and ceilings can help minimize these contact points.
Moreover, taking care of structural elements such as beams and pipes can help further prevent sound transmission.
Remember to also soundproof the door to the inner room. You could use a solid core door with weatherstripping around the frame and a door sweep at the bottom.
Providing proper ventilation in this room is essential to maintain comfort during long recording sessions.
However, it’s equally important to ensure that these ventilation points are also soundproofed to prevent any sound leakage.
Installing a room within a room is a major project that may require professional guidance, especially if you do not have experience with construction. However, the remarkable reduction in sound leakage makes it worthwhile for those serious about their music recording.
11. Use a Drum Shield for Loud Instruments
When it comes to soundproofing a room for music recording, one of the specific steps you can take is to use a drum shield for loud instruments.
This can be particularly valuable when recording drum sounds, as drums tend to be one of the loudest instruments in a recording setup.
Drum shields are typically made from clear acrylic and are designed to prevent the sound of the drums from bleeding into other microphones.
By using drum shields, you can have better control over the isolated sounds of the drums and minimize leakage to other mics in the room.
There are different types of drum shields available on the market, offering different levels of sound isolation.
Some models even offer sound absorption features, capable of reducing the echoes produced by drum hits.
This ensures that the drum sounds captured are clear and do not disturb the recording process of the other instruments.
When positioned properly, a drum shield can also help mitigate the effect of the drums on the room’s overall acoustics.
While using a drum shield, placement is key, as incorrect positioning might not offer the desired soundproofing effect.
When deciding on the right drum shield for your studio, you would have to take into consideration the size of your room, the type of drums you are using and the other instruments present.
Moreover, investing in a high-quality drum shield may seem pricey but is a one-time investment that can significantly improve the sound quality of your recordings.

By watching this video, you could learn some effective ways to implement a drum shield in your recording environment.
It offers practical tips on how to set up the shield for optimal soundproofing.
The next step in soundproofing your room for music recording after setting up your drum shield, as mentioned in the outline, would be to double-wall your studio space.
Thus, the use of a drum shield for loud instruments can be a vital addition to achieving a competent and professional sounding recording space.
Remember, the ultimate goal here is not only to soundproof but also to create an environment where every aspect of the sound can be controlled.
12. Use Double-Wall Construction Technique
Leveraging the double-wall construction technique is a highly effective approach to soundproofing a room for music recording.
This technique involves building an additional wall, adjacent to your existing one, with an air gap in-between.
We acknowledge, however, that this requires a higher investment both in terms of time and resources.
*The effectiveness in noise reduction, particularly for a recording studio, makes this approach well worth it.
It’s important to note that the actual air gap between the two walls plays a significant role in this technique’s effectiveness.
The wider the gap, the better attenuating effect you can achieve. however, a too-wide gap might not be practical for smaller rooms.”
The reason this technique is so effective is because sound waves, when they meet a barrier, either get absorbed, reflected or deflected.
With this technique in place, the sound waves end up losing most of their energy to the barrier, and hardly any noise gets transported to the other side.
When constructing the double wall, it is crucial to ensure that the two walls are not physically touching each other as this could result in the sound being transferred through the contact point.
Therefore, it is recommended to use a special sound insulation material to fill up the space between the two walls.
One of the best options for this is fiberglass insulation as it effectively absorbs the sound waves without transmitting them through.
*When it comes to the construction process, it’s recommended to seek the help of a professional contractor who specializes in soundproofing.”
Ensure they install a special insulating material, like drywall, on both sides of the wall, and then they fill the air gap in-between with sound-absorbing insulation.
Although the double-wall construction technique can be labor-intensive and costly, it is one of the most effective ways of soundproofing a room for music recording, ensuring that no undesired noise sneaks into your recordings.
Please note that the effectiveness of this soundproofing technique highly depends on the proper installation of all the components.13. Arrange furniture for best sound absorption.
When it comes to soundproofing for a music recording room, it’s not just about the design and materials of the room itself, but also how the furniture within it is arranged.
Furniture can play a key role in absorbing sounds and reducing reverberations, thereby improving the acoustic qualities of the room.
Different kinds of furniture can absorb different frequencies of sound, affecting the overall sound profile of your room.
For example, large soft furnishings such as sofas and armchairs are excellent for absorbing sound, but smaller items such as bookshelves and cabinets can also help.
However, the positioning of the furniture is just as critical as the items themselves.
Arranging your furniture strategically could be the difference between a good and excellent recording environment.
This is because different areas in the room will have different acoustic properties, which will affect how sounds react.
By placing furniture in these areas, you can manipulate the acoustics of your room to create a perfect recording environment.
An effective strategy is to place larger items in corners or against walls, where sound is likely to bounce back into the room.
Irregular surfaces can also help diffuse sound and therefore should be considered in your furniture arrangement.
If you have the option, try to arrange your recording area so that it’s away from windows and doors, as these are notorious for letting in unwanted noises.
Remember, the goal is to achieve a balanced sound profile that is suited for your specific recording needs.
Lastly, be open to experimenting with different arrangements until you find the one that works best for you.
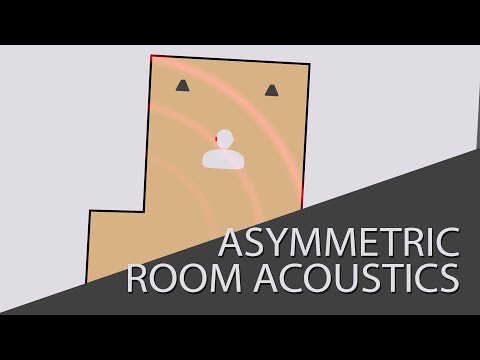
By watching the linked video, you’ll discover more strategies on improving room acoustics based on different room shapes.
These techniques, coupled with smart furniture arrangement, can take your soundproofing efforts to the next level.
14. Use weatherstripping on doors and windows.
When soundproofing a room for music recording, one can easily overlook the significant role that doors and windows play.
It’s not uncommon for doors and windows to have gaps, no matter how minute, that act as channels for exterior noise.
Therefore, the fourteenth tip for effective soundproofing involves the use of weatherstripping on doors and windows.
Weatherstripping is a simple yet effective soundproofing technique that addresses the gaps present around doors and windows.
This technique not only curtails the entry of unwanted noises, but also enhances the insulation of the room.
Weatherstripping can be particularly helpful in preventing sounds from seeping in or out, thereby ensuring a sound environment ideal for music recording.
Various types of weatherstripping materials exist in the market, all designed to suit different needs and preferences.
Among the popular choices are adhesive-backed tapes made of foam, V-strip (also known as tension seal), door sweeps, and door gaskets.
The choice of material will largely depend on the size of the gap to be sealed and the type of door or window in question.
Importantly, aside from filling gaps, most weatherstripping materials have the added advantage of being thermal insulators.
This means they can help to regulate the temperature within the soundproofed room, making it a more conducive environment for music recording.
Installing weatherstripping is a straightforward process that anyone can handle, even without any professional help.
Guided by the instructions provided by the manufacturer, one simply needs to cut the stripping to the desired length, peel off the backing where applicable, and stick it around the door or window.
It’s advisable to apply pressure to the weatherstripping for optimum adhesion.
Furthermore, for doors, it’s recommended that the stripping be applied on all the four edges for best results.
Adopting weatherstripping as a soundproofing technique, therefore, not only ensures that the sound quality within the room is top-notch but also conserves energy by restricting air leakage, thereby making it a cost-effective method.
15. Use a Quiet Ventilation System
Achieving an optimal recording environment isn’t confined to just soundproofing the walls or ceiling. One aspect that is often overlooked yet significantly influences the quality of recording is the ventilation system.
A noisy ventilation system can ruin your recordings, but turning your air conditioning or heating off in order to achieve a quiet environment can lead to uncomfortable temperatures. The solution lies in using a quiet ventilation system.
The quiet ventilation system operates in a way that reduces the noise emanating from the air movement within the system. This is achieved by using materials that absorb the sound waves and prevent echo within the system.
There are several brands that offer quiet ventilation systems, specially designed for use in recording studios.
These brands have their ventilation systems engineered in a way that the traditional noise associated with HVAC systems is eliminated or drastically reduced.
Installing a quiet ventilation system in your recording room is not a simple DIY task. It requires a knowledge of ductwork, electrical systems, and soundproofing principles. If you’re not confident in your ability to install it yourself, hiring an HVAC professional could be a wise investment.

This video tutorial will guide you through the installation process of a quiet ventilation system. By watching, you’ll gain a deeper understanding of the component parts and how they work together to reduce noise.
The decision to invest in a quiet ventilation system not only benefits the quality of your music recordings but also contributes to a comfortable working environment. Adequate ventilation reduces the risk of your equipment overheating, which can lead to costly damage or reduced lifespan.
The placement of the quiet ventilation system also matters. Aspect such as proximity to your microphones can affect the amount of ventilation noise picked up during recording sessions.
Furthermore, while a quiet ventilation system significantly reduces noise levels, it doesn’t eradicate them completely. Therefore, to further minimize any residual noise, consider housing the ventilation system within a soundproof enclosure.
The combination of a quiet ventilation system and a soundproofed room can greatly enhance your recording studio. It can make a world of difference in producing clean, crisp, and professional-level recordings.
Although the initial cost of investing in a quiet ventilation system might seem high, the long-term benefits in terms of the recording quality and comfort make it a worthwhile investment for any serious music producer or sound engineer.
Remember that soundproofing a room for music recording involves more than just blocking out external noise. It also means creating an environment where the sound within the room is as clean and pure as possible.
The use of a quiet ventilation system is an integral part of achieving this goal. So, don’t neglect this aspect when planning to soundproof your room for music recording.
The Bottom Line
Adopting these comprehensive soundproofing strategies can greatly improve the auditory environment in any space.
By implementing a combination of thick carpeting, insulated windows and doors, acoustic panels, bass traps, diffusers, and substantial materials such as mass-loaded vinyl, substantial noise reduction can be achieved.
Ensuring that all gaps are sealed with silicone or caulk and windows are covered with soundproof curtains further bolsters these efforts.
The additional measures of installing a secondary, interior room, employing a drum shield for especially loud instruments, utilizing double-wall construction methods, strategically arranging furniture, weatherstripping openings, and installing a quiet ventilation system present even more robust solutions for optimal sound control.
Essentially, the effectiveness of these soundproofing techniques lies in their combined use, offering a comprehensive approach to managing and mitigating sound in any given setting.