Soundproofing a recording studio is crucial for achieving optimal sound quality.
However, it’s a common myth that this pursuit requires a significant financial investment.
With strategic planning and creative problem-solving, soundproofing can be both affordable and effective.
The key is to understand the basic principles of sound and how it behaves.
This post will provide practical guidance and share some innovative strategies to help stretch your dollars further.
The aim is not only to provide affordability but to maximize your audio quality, thereby enhancing your overall recording experience.
Contents
- How To Soundproof A Recording Studio On A Budget
- Step-by-Step Guide: How to Soundproof a Recording Studio on a Budget
- Understanding the Basics of Soundproofing
- The Role of Acoustic Treatment in a Budget Recording Studio
- Affordable Materials You Can Use for Studio Soundproofing
- Affordable Materials You Can Use for Studio Soundproofing
- How to Effectively Seal Gaps and Cracks for Sound Leakage
- Innovative Uses for Heavy Blankets and Curtains in Sound Absorption
- The Value of Rugs and Carpets in Minimizing Sound Reverberations
- Comparing the Effectiveness of Different Budget Soundproofing Techniques
- Maintaining Audio Quality While on a Budget: Is It Possible?
- Unique Strategies to Enhance Your Recording Experience Without Breaking the Bank
- The Bottom Line
How To Soundproof A Recording Studio On A Budget
Soundproofing a recording studio on a budget involves the use of affordable yet effective materials and techniques. First, seal all gaps and cracks in the room with foam or insulation tape to prevent sound leakage. Then, hang thick, heavy curtains or blankets on the walls and cover the floor with thick rugs or carpet to absorb and minimize sound reverberations, resulting in improved sound quality.
Continuing on this topic, it’s worth delving deeper into specific techniques and materials that can help enhance the soundproofing of your studio.
This includes exploring different types of sound-absorbing materials, strategic placement of these materials, and understanding the role of various studio equipment in soundproofing.
It’s important to gain a comprehensive understanding of all these aspects to optimize your budget and still achieve the desired level of soundproofing in your recording studio.
Keep reading to expand your knowledge about affordable soundproofing measures.
Step-by-Step Guide: How to Soundproof a Recording Studio on a Budget
Soundproofing a recording studio on a budget requires creativity, the right materials, and understanding of the basic concepts.
Getting Started with Budget Soundproofing
Knowing where to begin is often the most challenging part. Embarking on a DIY project of soundproofing your recording studio doesn’t have to be difficult with the right guidance.
An initial step to consider is understanding the basics of soundproofing and its significance in a recording studio.
Identifying Sound Leakage
Before you embark on any soundproofing project, the first task is identifying the areas in your studio where sound leaks.
Common sound leakage points are windows, doors, wall joints, and any other spaces with gaps and cracks.
“Common sound leakage points are windows, doors, wall joints, and any other spaces with gaps and cracks.”
This means that cheaper soundproofing methods can often be as simple as sealing these areas as efficiently as possible.
Therefore, having an initial understanding of your space before diving into purchasing materials can save both time and money.
Choosing Affordable Soundproofing Material
With an idea of your soundproofing needs, you can now focus on purchasing materials.
It’s important to choose cost-effective, yet functional materials such as acoustic foam, soundproof blankets, and thick rugs to fill gaps and absorb sound.
Then it’s time for a hands-on approach where you cover the targeted spots with the chosen materials.

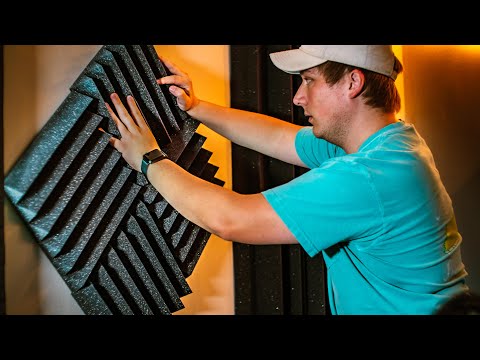
This video will provide you with a practical guide on constructing your own acoustic panels.
These home-made panels will enhance your soundproofing efforts and ultimately improve the sound quality of your recording studio.
Execution is Key
Finally, one major point to remember is that no matter how great your materials are, proper execution will make a huge difference.
Attaching your material neatly, covering all potential leakage points and maximizing the usefulness of every piece is key.
“Attaching your material neatly, covering all potential leakage points and maximizing the usefulness of every piece is key.”
For example, hanging thick curtains can serve as a sound absorber, while a wall-to-wall carpet can minimize sound reverberations on the floor.
Simple solutions like these can contribute significantly to improving the overall soundproofing of your studio.
Soundproofing your recording studio on a budget not only enhances the acoustics of your room, but also affords you the opportunity to record professional audio quality even within minimal expense.
Understanding the Basics of Soundproofing
To successfully soundproof your recording studio, you need to fully understand the basics of soundproofing. Soundproofing is simply the process of minimizing or preventing the transmission of sound between spaces.
Sound is produced by vibrations that spread out and cause other objects to vibrate. These vibrations travel in the form of waves through mediums such as air before they reach your ears. Soundproofing aims to control this energy and prevent it from reaching unwanted areas.
This is achieved through the use of different soundproofing techniques which include adding mass, damping, decoupling, and filling air gaps. Each of these techniques works best under specific circumstances, and a combination of multiple techniques often yields the best results.
However, it is worth noting that soundproofing should not be confused with acoustic treatment. While soundproofing is about blocking or absorbing sound, acoustic treatment deals with improving the sound quality inside a space.
Knowing the basics of soundproofing is crucial in building a soundproof recording studio to ensure the best possible results.
This is because the type of soundproofing material and technique you use will greatly influence the effectiveness of your soundproofing effort. It is therefore always advisable to take time to learn the fundamentals before embarking on your soundproofing project.
The Role of Acoustic Treatment in a Budget Recording Studio
Acoustic treatment plays an integral role in a budget recording studio. Acoustic treatment, as mentioned earlier, is about improving the sound quality inside a space, different from soundproofing which aims to minimize or prevent sound leakage.
Acoustic treatment is used to reduce reflections within the room to control reverberation and make your recordings sound more clear and professional.
This is usually achieved by placing sound absorbing materials like diffusers and bass traps at strategic points within the room. These materials reduce the strength of reflections and control the reverb time to create a controlled sound environment.
However, it is important to note that sound absorption doesn’t block outside noise from entering the space, it only improves the quality of sound within a given room. Hence, it is best to use it in conjunction with soundproofing techniques for the best outcomes.
One of the key aspects of a professional sounding recording is a space that is both soundproofed and acoustically treated.
This is especially true for a budget recording studio. For such a studio, the quality of sound output is the primary focus. And since most traditional soundproofing and acoustic treatment materials and techniques tend to be expensive, it is paramount to find cheap but effective alternatives. That way, you can have a studio that is both soundproof and acoustically treated without breaking the bank.
Affordable Materials You Can Use for Studio Soundproofing
Soundproofing a recording studio on a budget may seem like a daunting task. However, understanding the basics of soundproofing and knowing which materials to use can make the process simpler and more affordable.
Purchasing Durable Acoustic Foam
One vital material that you would need to invest in for efficient soundproofing is acoustic foam. It’s a versatile, lightweight, and budget-friendly material that assists in suppressing the reflection of sound within a room.
Acoustic foam can be easily placed on walls, ceilings, and corners to absorb unwanted echo and excess reverberation.
Although other soundproofing materials are available, nothing matches the accessible and affordable features of acoustic foam.
“Acoustic foam can be easily placed on walls, ceilings, and corners to absorb unwanted echo.” This feature plays a significant role in enhancing the overall sound quality within the studio.
The easy and affordable installation of acoustic foam makes it an excellent option for people who aim to soundproof their studios on a budget.
Moreover, it is available in various blends and colors, enabling you to customize your studio’s interior design as you wish.
Using Heavy Blankets and Cloth Materials
Another efficient yet affordable way to soundproof your studio is by leveraging heavy blankets and thick cloth materials.
These dense fabrics can absorb a substantial amount of sound, reducing reverberation and echo.
They are incredibly versatile, lending themselves well to covering doorways, windows, and bare walls where sound leakage can often occur.
“Heavy blankets and dense fabrics can absorb a substantial amount of sound, reducing reverberation and echo.” They operate well, particularly when used in combination with other soundproofing materials like acoustic foam.
So, if you’re aiming to soundproof your studio without spending much, consider using these materials as they are not only effective but can also add a unique aesthetic flair to the room.
Soundproofing with Vinyl and Mass Loaded Vinyl
Vinyl and Mass Loaded Vinyl (MLV) are two more materials suitable for a budget soundproofing project.
Known for their high-density and flexibility, they are excellent for blocking out noise transmission.
You can attach these materials directly onto walls, ceilings, or floors, helping prevent the escape of sound from your studio.
“Vinyl and Mass Loaded Vinyl are excellent for blocking out noise transmission.” Their application versatility makes them a great choice for any budget recording studio.
To optimize these materials’ noise reduction power, ensure a sealed finish with no gaps, enhancing noise blocking qualities even further.
If you want a more visual guide on how to use these materials for soundproofing, this video provides practical demonstrations. It also offers a broad-step procedure on how to install these soundproofing materials correctly, and the best practices for utilizing them effectively.
Affordable Materials You Can Use for Studio Soundproofing
When considering soundproofing, many immediately think about costly, professional-grade materials. However, there are affordable alternatives that can deliver comparable results for those working on a budget.
Homemade Bass Traps
One way to soundproof on a budget is by using homemade bass traps. Traditional bass traps can cost a significant amount, particularly for a good quality product.
Thankfully, you can create your own version using large foam wedges. These can be placed in room corners to collect low-frequency sound waves, helping to prevent unwanted reverberations and give a cleaner sound recording.
Most types of insulating foam can work effectively, or you can choose acoustic foam if you prefer something designed specifically for this purpose.
> Most types of insulating foam can work effectively, or you can choose acoustic foam if you prefer something designed specifically for this purposeThis suggests that it isn’t necessary to invest in the highest costing materials. Instead, with some resourcefulness, you can achieve similar results within your budget.
Soundproofing Blankets and Rugs
Acoustic blankets and rugs are also a very affordable option. These items have thick fabrics that can absorb sound waves, preventing them from bouncing around the room.
These can be hung on walls or thrown on the floor to reduce echo and absorb noise. Not only do they help with soundproofing, but they also add aesthetic appeal to your recording studio.
While not meant for total noise blockage, soundproofing blankets and rugs can significantly reduce the amount of ambient noise.
> While not meant for total noise blockage, soundproofing blankets and rugs can significantly reduce the amount of ambient noise.It’s important to remember that while these methods won’t completely eliminate noise, they will significantly improve the audio quality.
Sealing Materials
Sealing materials are effective ways to soundproof a studio without breaking the bank. These materials target the cracks, gaps, and other openings that allow sound leakage.
Items such as weatherstripping tape and door sweeps can dramatically reduce the amount of noise seeping in and out of a room. They’re also incredibly easy to install with minimal effort.
Investing in these types of soundproofing materials is cost-effective and beneficial in the long run, as it also insulates the room.
> Items such as weatherstripping tape and door sweeps can dramatically reduce the amount of noise seeping in and out of a room.This reinforces how small changes can significantly improve your overall soundproofing. It’s not always about spending a lot of money; it’s about investing intelligently.
Vinyl Barriers
Vinyl sound barriers are a cost-efficient and easy way to add extra soundproofing to a recording studio. These objects can block far more sound waves than general building materials, making them an affordable yet effective option.
They can be installed on the walls, ceiling, or floor to absorb sound and prevent it from leaking into and out of your studio.
Vinyl barriers are highly flexible, which means they can comfortably fit around bends or corners. It’s also easy to cut them to the appropriate size and stick them to surfaces with adhesive.
> Vinyl sound barriers are a cost-efficient and easy way to add extra soundproofing to a recording studio.By using innovative, cost-effective materials, you can build a soundproof studio that offers quality audio recording without going over budget.
How to Effectively Seal Gaps and Cracks for Sound Leakage
Sealing gaps and cracks is a crucial aspect of soundproofing a room. An unsealed room can severely undermine your soundproofing efforts, as sound can easily escape through these openings. Thus, it is vital to know how to effectively seal gaps and cracks to prevent sound leakage.
Fortunately, there are inexpensive materials and tools you can use for this purpose. Let’s explore some of them and understand how to use them properly in your recording studio.
The Importance of Sealing Gaps and Cracks
Inadequate sealing can lead to unwanted noise intruding into your recording space. It can also cause sound from your recording to leak into surrounding areas. Essentially, it is just as important as high-quality soundproofing materials and acoustic treatment.
Proper sealing requires attention to detail. It is necessary to thoroughly assess the room and identify all the gaps and cracks that need to be sealed. Common places where these are found include windows, doors, floorboards, and joints between walls, floors, and ceilings.
Always remember that “a recording room is only as soundproof as its weakest point”.
“A recording room is only as soundproof as its weakest point.”
This quote drives home the importance of thorough sealing in achieving effective soundproofing. No matter how superior your soundproofing materials are or how well you’ve installed them, if the room isn’t sealed properly, your efforts would be futile. Sound leakage could occur, which would interfere with the sound quality of your recordings and cause disturbance to others.
Economical Sealing Solutions
There are several economical materials you can use to seal cracks and gaps. Silicone or latex caulk is a common option. It comes in tubes and is easy to apply using a caulking gun. The material is flexible, adheres well to most surfaces, and effectively blocks sound transmission.
Weatherstripping tape is another excellent choice for doors and windows. Door sweeps or door seals can also be installed to prevent sound from leaking under the door.
An affordable and effective way to handle larger gaps and cracks is using expanding foam spray. It expands upon application, filling the space and prohibiting sound leakage.
“An affordable and effective way to handle larger gaps and cracks is using expanding foam spray.”
Further validation for the effectiveness of these methods can be gathered from research and personal experience of professionals in the field. All of these materials are readily available and easy to install, making them well-suited for a budget soundproofing project.

The embedded video above provides comprehensive guidance on sealing gaps and cracks in a home recording studio. In it, you will witness the practical application of some of the methods discussed in this article. Viewing this could significantly enhance your understanding and skill in this essential soundproofing task.
Conclusion:
Sealing gaps and cracks effectively is critical to soundproofing a recording studio. It’s a step that requires keen attention to detail and the use of the right materials, but it doesn’t have to break the bank. By understanding and applying the concepts mentioned above, you are well on your way to a soundproof studio that allows you to produce top-quality work, while remaining within your budget.
Innovative Uses for Heavy Blankets and Curtains in Sound Absorption
One creative method of affordable studio sound-proofing involves the use of heavy blankets and curtains.
This may seem like an unconventional method, but the texture and density of these materials make them an excellent barrier for sound absorption.
They work by trapping sound waves within the fibres and preventing them from bouncing back into the room, reducing echo and unwanted reverberations.
The Use of Heavy Blankets
Heavy blankets, in particular, can be highly effective when used to soundproof recording studios on a budget.
They can be hung on walls, doors, and even the ceiling as a makeshift barrier against noise.
For better results, consider using moving blankets. These are designed to be thick and heavy to protect furniture during transit, but these attributes also make them excellent for sound absorption.
Key point to remember: The thicker and denser the blanket, the more effective it will be at absorbing sound.
Backing up this statement, it’s not just about the material of the blanket, it’s also about the thickness and density. A denser material will capture and dampen more sound energy.
Similarly, a thicker blanket will provide better sound absorption as compared to a thinner one as it has more material to absorb sound energy.
Advantages of Using Curtains
Curtains, on the other hand, serve similar sound-proofing functions.
They are particularly practical because they can be easily hung and removed as needed.
Not only do they absorb sound, but they also add an aesthetic touch to your studio.
Curtains provide a dual function, offering both sound absorption and enhancing the visual appeal of your music studio.
That said, not all curtains are created equal when it comes to soundproofing a studio. Thick, heavy drapes or specially designed acoustic curtains are ideal options.
By selecting curtains with multiple layers or those made from densely woven fabric, you can significantly enhance their sound absorption qualities.
They serve as an acoustic treatment, softening the sound within the room and preventing echoes and reverb.
The Value of Rugs and Carpets in Minimizing Sound Reverberations
The use of rugs and carpets in a recording studio serves a seemingly simple yet crucial purpose: to minimize sound reverberations.
As simplistic as they may seem, these materials are integral to achieving optimum sound quality on a budget.
Why consider rugs and carpets?
The first point to consider is what makes rugs and carpets so useful in a soundproofing context.
These soft, thick materials are incredibly efficient at absorbing sound waves, thereby reducing echo and background noise in your recording space.
On top of that, carpets and rugs are generally affordable and accessible, making them an excellent choice for budget-conscious studio owners.
Indeed, one might go as far as to say that the value of rugs and carpets in a recording studio is in their ability to provide quality sound absorption at a minimal cost.
Indeed, one might go as far as to say that the value of rugs and carpets in a recording studio is in their ability to provide quality sound absorption at a minimal cost.
This represents an efficient and cost-effective method to enhance your studio’s sound quality.
Moreover, the material’s widespread availability means that it should be easy to incorporate into any studio setup.
How should you use them?
When it comes to integrating these materials into your studio, there’s a variety of methods to consider.
For instance, one could lay down a thick carpet or rug around the studio space to diminish the sound waves bouncing off the floor.
Another method involves hanging smaller rugs or heavy fabrics on the walls to absorb the sound waves and reduce echo.
Regardless of how one decides to use them, it’s essential to remember that the goal is to minimize sound reverberation and create a more controlled recording environment.
The goal is to minimize sound reverberation and create a more controlled recording environment.
It’s truly remarkable how such common, everyday items can play such a significant role in enhancing your studio’s audio quality.
Experiment with different placements to identify what works best in your recording space.
This video discusses several practical tactics for effectively soundproofing your home studio.
Viewers may gain a more comprehensive understanding of sound treatment methods, including some innovative uses of rugs and carpets.
Comparing the Effectiveness of Different Budget Soundproofing Techniques
Affordable Soundproofing Materials
When planning to soundproof your studio on a budget, the choice of material plays a huge role in determining how effective the resulting insulation will be.
Conventional soundproofing material can be quite costly, but luckily, there are various affordable alternatives available on the market.
These include mass loaded vinyl, soundproof foam, insulation boards, and even heavy duty curtains and blankets.
Each of these materials has its unique advantages relating to durability, ease of installation, and acoustic properties.
With thoughtful selection and careful installation, a combination of these inexpensive materials can offer substantial noise reduction.
Sealing the Space
Consequently, merely installing soundproofing material is not enough; effective sealing of gaps and cracks is also key to preventing sound leakage.
Failure to do so can render the most sophisticated soundproofing efforts ineffective as noise seeps in and out through these openings.
Fortunately, affordable options such as facoustic sealants and weather-stripping tape can be used to achieve an airtight seal.
These not only plug gaps and cracks but also help to create an enclosed environment within which sound is contained.
Deep Dive into Acoustic Treatment
Soundproofing does not end with creating a barrier and sealing the room; the acoustic treatment is a crucial part of this process too.
The right acoustic treatment ensures that you get the best quality sound by eliminating echoes and reverberations.
To support this, acoustic tiles and bass traps can be used to control reflections and optimize the acoustics in the studio.
Moreover, you don’t always have to purchase professional acoustic tiles. A bit of resourcefulness and imagination can enable you to create your own DIY acoustic solutions. For instance, carpets, rugs, and bookshelves can be used to reduce echo and control sound reflection.
Combining these clever tricks with the right acoustic treatment will ensure you achieve a studio with perfect sound possibilities.
Taking All Techniques into Account
Taking all these techniques into account, it is important to remember that the effectiveness of these budget soundproofing techniques and materials can vary vastly depending on variables such as the initial room construction and materials, the type of noises you intend to block, and the specific soundproofing goals.
Likewise, the level of soundproofing required will also differ based on the purpose of your recording studio.
A music recording studio, for instance, will need a different soundproofing approach than a podcast recording space or home cinema.
Consequently, it is crucial to consider the specific requirements of your space before choosing the soundproofing techniques.
Thorough research, analysis and, where possible, professional advice can help ensure that you choose the most effective and cost-efficient soundproofing solutions for your studio.
Maintaining Audio Quality While on a Budget: Is It Possible?
In the world of recording and sound production, the common assumption is that quality is proportional to cost.
However, this belief can be easily tested and often disproven, thanks to a plethora of cost-effective soundproofing and audio-enhancing methods.
The Myth of Cost-Effectiveness in the Audio World
For many people, it is believed that expensive music and recording equipment result in higher quality sounds.
This belief can be traced back to the early days of sound recording and production, where only the most sophisticated and expensive tools could deliver excellent sound quality.
Whilst it’s true that professional-grade equipment typically has a higher price tag, it doesn’t necessarily mean that they are the only options for achieving high-quality audio.
With the continuous advancement of technology, many affordable options now offer comparable audio quality to their high-end counterparts.
Thus, the idea that cost is associated with quality in audio recording and sound production is, in many cases, a myth.
In the world of sound recording and production, expensive doesn’t always equate to better.
Nowadays, there are various budget-friendly alternatives and practices available that can achieve sound quality on par with or even superior to some high-end equipment.
One of the keys to maintaining audio quality while on a budget is knowing how to utilize available resources effectively.
Understanding the science of sound, including how to prevent sound leakage and minimize reverberation, can significantly improve the audio environment without requiring significant monetary investment.
Importance of Soundproofing in Maintaining Audio Quality
Soundproofing plays a significantly vital role in controlling and managing sound quality within a recording studio or any audio environment.
Investing in costly microphones, amplifiers, or monitoring speakers will prove unnecessary if the space used for recording or listening isn’t properly soundproofed.
Sound leakage and echo can drastically affect audio quality, no matter how expensive the equipment you use.
Therefore, successfully soundproofing a recording or listening space can enhance audio quality and enrich recording or listening experiences.
Moreover, soundproofing doesn’t have to be expensive, as various cost-effective methods can effectively limit sound leakage and echo.
Proper soundproofing of a recording or listening space is essential in maintaining quality of sound, irrespective of how much is spent on equipment.
In this context, affordable practices such as sealing gaps and cracks, using heavy blankets and curtains, and utilizing rugs or carpets can all contribute significantly towards achieving a soundproofed space.
Even budget solutions can drastically enhance the audio environment and result in superior audio quality when implemented correctly.

Given this discussion, you might be interested in enhancing your understanding of practical soundproofing methods.
Watching this video can provide you with comprehensive, hands-on advice on how to soundproof a space effectively on a budget.
Unique Strategies to Enhance Your Recording Experience Without Breaking the Bank
Working in a recording studio can be an exhilarating experience, but it can also be a costly one. If you’re a music producer or artist working on a budget, it’s important to learn some cost-efficient strategies to improve your recording experience without breaking the bank.
Finding Economical Gear
The first place to start when looking at saving money in your studio is the gear you’re using. It can be tempting to think that you need to spend thousands on professional equipment, but that’s not always the case.
Many affordable options can offer you excellent sound quality, such as home studio bundles that often include necessary items such as a microphone, headphones, and audio interface for a fraction of the cost. In fact, some of the best recordings have been made on inexpensive gear.
Purchasing second-hand gear can be a smart financial move, as long as you check the condition of the equipment before buying.
There is a bustling market for used music gear, and you can often find high-quality pieces for a significant discount. However, it’s essential to thoroughly inspect used equipment to ensure everything is in good working order.
Using Virtual Instruments
Another cost-saving strategy is to use virtual instruments and plugins. With modern technology, the level of realism and functionality that virtual instruments offer is impressive.
You can have access to a full orchestra, a vintage synthesizer collection, or rare world instruments, all from your computer and often at a much lower cost than purchasing each physical instrument themselves.
Investing in Proper Acoustic Treatment
One could argue that your room’s acoustic treatment may be the most important part of your studio setup. Effective soundproofing can make a substantial difference in the quality of your recordings.
This does not mean you need to spend extravagant amounts on top-of-the-line soundproofing materials. Instead, look for budget-friendly alternatives and innovative ways to soundproof your space.
Implementing heavy blankets, thick curtains, and rugs in the room can significantly reduce sound reflections and improve acoustics on a budget.
Furthermore, you can seal any gaps or cracks where sound may be leaking, which is often an overlooked yet inexpensive form of soundproofing.
Quality Over Quantity
Lastly, when working on a budget, always remember that quality trumps quantity. It’s better to invest your money into few quality pieces of gear and spend time understanding them, rather than buying lots of cheap equipment.
Similarly, when it comes to recording, try to capture the best possible performance in the room. This not only enhances the quality of the recording but also reduces the amount of time and costly resources spent on editing and mixing in post-production.
Again, enhancing your recording experience without breaking the bank is indeed achievable. Just always remember to spend smartly, experiment with inexpensive or free resources, and emphasize producing quality work over anything else.
The Bottom Line
Taking into consideration the information outlined in this article, it is clear that soundproofing a recording studio on a budget is not only a possibility, but it can be done effectively and efficiently.
Through understanding the basic principles of soundproofing, utilizing affordable materials like heavy blankets, curtains, rugs, and carpets, and employing unique strategies to seal gaps and absorb sounds, a high audio quality recording environment can be achieved without breaking the bank.
Moreover, by comparing the effectiveness of various budget soundproofing techniques, you can tailor a solution that fits your needs perfectly.
Ultimately, prioritizing acoustical treatment and innovative soundproofing techniques is a value-for-money approach in enhancing your recording experience, contributing to the production of high-quality music or audio.