The noise from your upstairs neighbor or a bustling street can be significantly disruptive, especially when you need a serene environment for relaxation or work.
Often, the culprit behind this unwanted noise is a lack of adequate soundproofing in the ceiling.
Achieving a quieter indoor atmosphere is not as daunting as it may seem.
Various practical and effective solutions can help reduce noise penetration from above.
This blog will explore several techniques and materials that you can utilize to successfully soundproof your ceiling.
We’ll provide you with well-vetted, cost-effective methods to significantly reduce intrusive noise, ensuring a more peaceful indoor environment.
Contents
- Ways To Soundproof A Ceiling That Actually Work
- 1. Install Soundproofing Insulation in the Ceiling
- 2. Use resilient channels or soundproofing clips.
- 3. Attach Acoustic Foam Panels to the Ceiling
- 4. Install Mass Loaded Vinyl on the Ceiling
- 5. Use Soundproofing Compound for Ceiling Seams
- 6. Use soundproof drywall for better noise block
- 7. Install a Suspended Ceiling with Soundproof Tiles
- 8. Use soundproofing ceiling paint
- 9. Use Green Glue in Between Drywall Layers
- 10. Attach Fabric-Wrapped Fiberglass Panels
- 11. Apply Multiple Layers of Drywall
- 12. Use special soundproofing sealants.
- 13. Install Special Soundproofing Ceiling Tiles
- 14. Add a layer of plywood.
- 15. Apply Soundproof Plasterboards on the Ceiling
- 16. Use soundproof floor mats on the floor above.
- 17. Install Soundproof Curtains or Blinds
- The Bottom Line
Ways To Soundproof A Ceiling That Actually Work
1. Install Soundproofing Insulation in the Ceiling
When we talk about the various ways to soundproof a ceiling, one of the most effective methods to consider is the installation of soundproofing insulation in the ceiling.
This insulation material can greatly reduce noise penetration through the ceiling, thereby ensuring a quieter and more serene indoor environment.
The first thing to do is to choose the right type of insulation material.
There are several types available in the market, such as fiberglass, cellulose and spray foam insulations.
Each of these materials has its own unique properties, and the choice of material will greatly depend on your specific soundproofing requirements, as well as the structure of your ceiling.
Remember that
The initial step of installing the insulation involves measuring the space between the joists in your ceiling, and cutting the material to fit precisely in these spaces.
It is essential to make accurate measurements to ensure the insulation firmly fits between the joists. One can use a utility knife for precision cutting.
Remember to wear protective gear such as safety glasses and gloves to avoid any accidental injury while cutting the insulation.
After this, you can proceed to fit the cut out insulation material into the space between the ceiling joists.
Ensure that the insulation fits snugly, leaving no gaps, as this may compromise the effectiveness of the soundproofing.
It is also important to be cautious during the process to avoid damaging the ceiling finish.
Once installed, you can proceed with attaching drywall to the joists to seal off the insulation.
Additionally, consider applying acoustic sealant around the edges of your drywall for enhanced soundproofing effect.
Remember, perfect installation of soundproofing insulation can significantly improve the acoustic properties of your ceiling and reduce noise transmission.
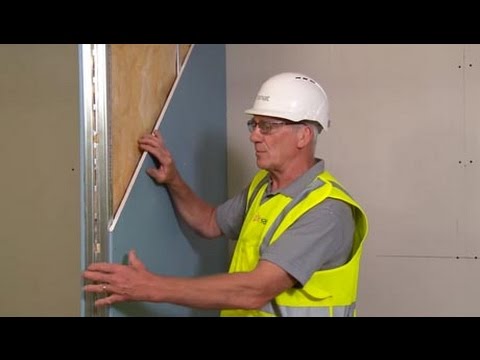
Now, let’s take a practical look at how to soundproof a ceiling.
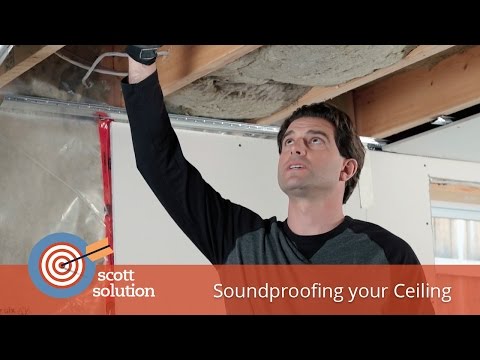
From the video, you will learn how to efficiently install soundproofing insulation in your ceiling with practical demonstrations. Also, you can get a better understanding of the entire process together with some important tips to achieve the best soundproofing outcome.
2. Use resilient channels or soundproofing clips.
Part of the arsenal of strategies that can effectively soundproof a ceiling, is the use of resilient channels or soundproofing clips.
These tools are specifically designed to disrupt sound waves and diminish their impact, aiding in the reduction of noise transmission from one room to the other.
Resilient channels, sometimes also referred to as soundproofing channels, are thin, flexible metal structures that can be attached to the ceiling’s framing.
The effectiveness of these channels lies in their ability to create a separation between the ceiling’s surface and its framing. This separation, also known as decoupling, is a crucial principle in soundproofing.
Decoupling works by breaking the path that sound waves take from one room to another. By doing so, it reduces the intensity and therefore the audible impact of the sound.
This solution is often used in commercial as well as residential settings, for its effectiveness and affordability.
On the other hand, soundproofing clips can also be used in lieu or in conjunction with resilient channels.
Soundproofing clips are designed to absorb and reduce the vibration that can be transmitted through ceiling structures, contributing to noise reduction.
They are attached to the framing of the ceiling before drywall or other material is installed. Once affixed, they provide a stable and reliable method of soundproofing.
The clips incorporate a rubber element which is specifically designed to absorb and dissipate the energy of the sound waves, reducing sound transmission.
Soundproofing clips are a favorite in the soundproofing industry for their simplicity and efficiency.
Whether you decide to use resilient channels, soundproofing clips, or both, you can expect to see a significant reduction in the level of sound that penetrates your ceiling.
While not a complete solution, using resilient channels or soundproofing clips plays an integral role in creating a more soundproof environment.
Please note that the installation of soundproofing clips or resilient channels should ideally be done by professionals, or under professional guidance, to ensure optimum effectiveness of soundproofing.
3. Attach Acoustic Foam Panels to the Ceiling
One of the most popular methods to soundproof a ceiling involves utilising acoustic foam panels.
These specially designed panels reduce noise transmission by absorbing sound waves and preventing them from resonating throughout the room.
These panels are constructed of a material that is highly efficient at absorbing noise.
Available in various sizes and patterns, they not only function effectively, but can also add an aesthetic element to your space.
Installing these panels is a straightforward process that can be completed without the need for professional assistance.
This is especially useful for anyone on a budget or for individuals looking for a simple and effective solution to their noise problem.
You simply attach the foam panels to your ceiling using a special adhesive that usually comes with the panels.
For an even distribution of sound absorption, it’s recommended to space out the panels evenly across the ceiling.

By watching this video, you can learn the ins and outs of proper acoustic foam panel installation.
It covers everything from measuring and marking your ceiling to attaching your panels in the most efficient manner.
An important point to note is that while acoustic foam panels are extremely effective for soundproofing, they work best in combination with other soundproofing techniques.
So while you may see significant improvements after installation, pairing them with other methods like installing soundproofing insulation or applying a soundproofing compound, will increase their effectiveness.
This way, you can create a more comprehensive soundproofing solution for your space.
However, even as a standalone solution, acoustic foam panels are a crucial component in your quest to create a quieter, more peaceful environment.
4. Install Mass Loaded Vinyl on the Ceiling
When discussing the most effective methods used in the realm of soundproofing, mass loaded vinyl (MLV) often tops the list.
This type of material is popular due to its high-density weight factor, which prohibits sound waves from passing through it.
High-quality mass loaded vinyl is generally about 1/8 of an inch thick and weighs roughly 1 pound per square foot.
You will want to purchase enough MLV to cover your entire ceiling surface, ensuring there are no gaps for sound to escape.
The degree of soundproofing provided by mass loaded vinyl is so effective that it is commonly used in professional recording studios, home theaters, and busy office environments.
This unique quote explains how widespread and effective MLV is when it comes to soundproofing. Being used in various environments where sound control is crucial, its popularity speaks volumes about its efficacy.
Installation of MLV involves attaching it directly to the ceiling, which can be achieved using a staple gun or nails.
Once you’ve accomplished fastening the material, you must cover all seams with acoustical caulk to further block any potential sound leaks.
A beneficial aspect of MLV is that it can be installed directly over existing drywall, reducing the need for extensive renovations.
It does not significantly lower the ceiling height and thus does not interfere negatively with the aesthetics of the room.
Importantly, while MLV does an exceptional job at soundproofing, it does not degrade the acoustic quality within the room, making it a go-to choice for music professionals.
However, it should be noted that mass loaded vinyl is not typically used as a decorative component and will often be hidden behind a finished surface such as ceiling tiles or drywall.
This allows homeowners to benefit from its soundproofing qualities while maintaining a stylish and appealing appearance in their living spaces.
In addition to being a robust sound barrier, MLV also provides insulation that can help conserve energy by regulating a room’s temperature.
Despite its many benefits, one potential drawback to using MLV is its higher cost compared to other soundproofing options, given its unique properties and benefits.
However, its durability and effectiveness make it a worthwhile investment, especially for homeowners looking to create a peaceful and tranquil environment.
5. Use Soundproofing Compound for Ceiling Seams
When it comes to implementing ways to soundproof a ceiling that actually work, one useful and effective technique is using soundproofing compound for ceiling seams.
Soundproofing compounds are often overlooked, but they play a significant role in adding another layer of noise protection to the space.
Their primary function is to exist in the gaps and seams of the ceiling, helping to reduce noise transfer by mitigating the vibrations from any surrounding noisy areas.
These compounds have a pliable texture which helps in absorbing sound waves and decreasing flanking noise through ceilings.
>Another advantage of soundproofing compounds is that they are easy to install and do not require any professional help, making them a user-friendly option.
This ease of installation not only saves cost, but allows those with limited home improvement skills to participate in the soundproofing process.
In other words, anyone looking for a DIY-friendly solution should consider using soundproofing compounds for ceiling seams.
The compounds are applied between layers of drywall or other construction materials, working like an adhesive to bond these materials together and provide an additional layer of sound insulation.
The use of soundproofing drywall in conjunction with soundproofing compounds often delivers a more comprehensive and efficient noise blocking solution.
However, the most important aspect to remember is choosing a high-quality soundproofing compound to ensure durability and maximum noise reduction.
When applied correctly, a soundproofing compound can make a noticeable difference in the acoustic quality of a room, offering a more peaceful and quiet environment.
There are several trustworthy brands on the market that offer soundproofing compounds, so doing some research before purchasing can be beneficial.
Also, when planning your soundproofing project, ensure you have enough compounds since a good rule of thumb is to have enough compounds to cover the surface at least twice.
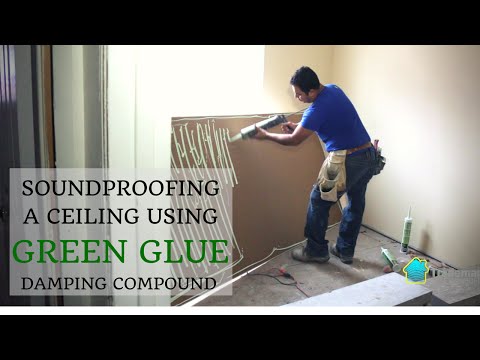
The video embedded above is a useful resource that visually explains how to use a popular soundproofing compound called Green Glue.
After watching this video, you may have a clear understanding of how to correctly apply this compound to your ceiling for superior soundproofing results.
In short, using a soundproofing compound for the ceiling seams is an effective method to significantly reduce the level of noise in any room.
6. Use soundproof drywall for better noise block
When it comes to soundproofing, using soundproof drywall can significantly help dampen noise transmission.
Soundproof drywall is a specific type of construction material designed specially to reduce the amount of noise that can penetrate through walls and ceilings.
In comparison to standard drywall, soundproof drywall incorporates added mass and particular design features that help in blocking noise vibrations.
It’s composed of viscoelastic polymers and ceramics, making it a denser and more effective noise barrier than traditional drywall.
Still, certain sound frequencies are particularly challenging to block without extra soundproofing.
This means that it may not completely eliminate the unwanted noise, but it could dramatically reduce it.
It is indeed superior in performance to standard gypsum board and provides better acoustic attenuation.
Furthermore, soundproof drywall is more flexible, which allows it to absorb more sound waves instead of merely bouncing them back.
Not only does it provide improved acoustic performance, but it also has the added advantage of being easy to install.
The process of installation is similar to that for regular drywall, but some considerations must be taken into account.
It’s best to install soundproof drywall during the construction phase, as replacing existing drywall can be more time-consuming and costly.
Improper installation can reduce its effectiveness, so it’s recommended to engage professionals experienced in acoustic treatments.
The installation of soundproof drywall can contribute to a much quieter and peaceful environment within your home or workspace.
The addition of soundproof drywall to your ceiling can result in an overall 50% to 70% reduction in noise.
Though it’s not the cheapest soundproofing option, the investment is often worth it for those struggling with high levels of noise intrusion.
Therefore, using soundproof drywall as part of your soundproofing strategy can significantly enhance your noise block and help you maintain the desired tranquility in your space.
.7. Install a Suspended Ceiling with Soundproof Tiles
If you are struggling with noise infiltration in your room, installing a suspended ceiling with soundproof tiles could be your go-to solution. This method is often applied in office spaces, studios or rooms that require a high degree of sound insulation.
Suspended ceilings, also known as drop ceilings or false ceilings, create a gap between the actual ceiling and the suspended one which further helps in mitigating sound transmission
Basically, a suspended ceiling offers a two-fold advantage. Besides providing efficient soundproofing, it is also easier to install and repair, offering an aesthetic appeal as well.
Installing a suspended ceiling with soundproof tiles is not only cost-effective but also a stress-free soundproofing technique.
It goes a long way in reducing the noise levels without breaking the bank or getting involved in a labor-intensive process.
When combined with the right kind of soundproof tiles, it can make a major difference in cutting off the unwanted noise.
The market offers a plethora of options for soundproof ceiling tiles, each designed to cater a specific set of requirements.
These tiles come in various thicknesses and densities, playing a decisive role in the amount of noise they can absorb.
Thus, it’s crucial to know which tiles would serve your purpose the best before you embark on the installation process.
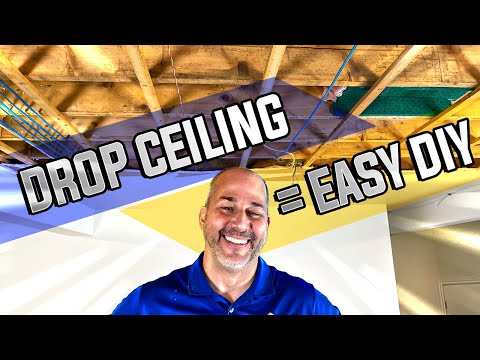
For a detailed understanding, you may want to watch the above video which provides a clear insight into installing a drop ceiling. It would be incredibly handy for beginners.
The video showcases a step-by-step process, making it potentially easier for those planning to carry out a DIY installation of a suspended ceiling.
When professionally installed, these soundproof tiles can considerably reduce noise levels, thereby enhancing the comfort of your space.
A well-installed suspended ceiling not only adds aesthetic value to your room but also takes care of the annoying noise issues.
It does mean you will have to sacrifice ceiling height, but that is a small price to pay when it comes to achieving tranquil and peaceful surroundings.
In essence, a suspended ceiling with soundproof tiles comes forward as an effective solution in battling noise infiltration.
As always, research well, assess your requirements, and choose the best available option.
8. Use soundproofing ceiling paint
When tackling the task of soundproofing a ceiling, many people often overlook a simple solution: soundproofing ceiling paint.
This is a specially designed paint product, which contains tiny sound-absorbing particles.
It’s designed to absorb sounds waves and reduce the level of noise penetrating through the ceiling.
Soundproofing ceiling paint is a cost-effective and easy-to-apply way to reduce noise transmission.
When applied correctly, soundproofing ceiling paint can be a simple, yet effective measure against noise.
It is a great choice for those who are on a budget or are not looking for an extremely high-level of noise reduction.
The paint can be applied like any other regular paint, with a standard paint brush, roller or sprayer, making it a do-it-yourself friendly option.
When it comes to effectiveness, it’s worth noting that while this solution is not going to completely annihilate sound, it can greatly reduce the echoing and hollow sounds often associated with ceilings.
This is typically more noticeable in larger rooms, where sound has more space to bounce around and create echoes.
Another benefit of this option is that it is quite unobtrusive.
It will not alter the appearance of the room, which is a major concern for many focused on not just the function, but also the form of their space.
Soundproofing paint is available in various colors, and can be easily matched to any room’s décor, making it a popular choice among homeowners.
The important thing to remember when using soundproofing paint is that it is most effective when applied in multiple coats.
Therefore, if you are considering this solution, plan to apply at least two to three coats of paint to ensure maximum soundproofing effectiveness.
Finally, it’s worth stating that despite its ease of use, soundproofing paint should be seen as a part of a more comprehensive soundproofing strategy, rather than a standalone solution.
Again, while the effectiveness of soundproof ceiling paint may vary based on different factors, this method is definitely worth considering as part of your larger plan to soundproof a ceiling.
9. Use Green Glue in Between Drywall Layers
When it comes to soundproofing a ceiling, one of the best products on the market is Green Glue.
This product is a type of noise proofing compound designed specifically to reduce sound transmission between layers of drywall or other similar materials.
Not only is it easy to use, but it also provides exceptional sound isolation, making it an excellent choice for creating a quieter environment in any room.
The excellent utility of Green Glue comes from its viscoelastic properties, allowing it to effectively convert sound energy into heat, thereby reducing sound transmission.
Most importantly, using Green Glue between your drywall layers will help to significantly reduce both impact and airborne noises, thereby contributing to a much quieter and peaceful space.
While the above point illustrates the usefulness of Green Glue, it is this characteristic of converting sound energy into heat that makes this compound highly efficient at soundproofing.
The energy transformation happens at a minute level, not resulting in an actual rise in room temperature.
Furthermore, applying Green Glue is an uncomplicated process that does not require any advanced technical skills.

For those who may be beginners in soundproofing, the video above will provide a practical tutorial on how to apply Green Glue between drywall layers.
By watching, you will gain insights on how to apply the compound effectively for optimum soundproofing.
It’s worth noting that it’s recommended to use at least two layers of drywall when using Green Glue for optimal noise reduction.
By doing this, you are creating a dense barrier that is more challenging for sound waves to penetrate.
This method enhances the soundproofing capabilities of your ceiling even further.
Lastly, allow for a curing time of about 30 days after application of Green Glue for achieving the best results.
While this could seem like a lengthy time, the result is a significantly soundproofed ceiling that is worth the wait.
When used correctly, Green Glue has proven to be a reliable and efficient method of achieving soundproof ceilings, contributing to peaceful and comfortable living spaces.
10. Attach Fabric-Wrapped Fiberglass Panels
Considered to be one of the most effective soundproofing techniques, the installation of fabric-wrapped fiberglass panels offers a substantial reduction in noise levels by absorbing excess sounds.
These panels offer a perfect blend of style and functionality; they can be customized with different fabric designs to blend perfectly with your existing interior decor while serving a practical purpose.
Fiberglass is an excellent medium for absorbing sound and stopping it from reverberating within a particular space.
Moreover, wrapping this fiberglass in fabric not only makes it more aesthetically pleasing but also helps it to function more efficiently.
The fabric wrapped fiberglass panels work by trapping and absorbing sound, hence limiting the amount of noise that manages to escape through the ceiling.
Fiberglass is also a versatile medium and it can be cut to fit the dimensions of your ceiling or to fit around features such as lights or fans.
The thickness of these panels plays a significant role in their effectiveness – the thicker the panel, the better its soundproofing properties.
Installation of these panels is a relatively easy process and doesn’t require any complex tools.
Most often, these panels are installed on the ceiling using an adhesive or a mechanical fastener.
This makes the installation simple enough for even the most inexperienced individuals to navigate correctly.
In addition to their ease of installation, fabric-wrapped fiberglass panels are relatively light, which means they pose no risk of placing excess weight on the ceiling.
Maintenance is also fairly straightforward because the fabric can be cleaned using a vacuum or a damp cloth.
Investing in high-quality fabric-wrapped panels will ensure you get the best value for your money in terms of soundproofing results, durability, and aesthetic appeal.
Overall, attaching fabric-wrapped fiberglass panels on your ceiling is a soundproofing technique that doesn’t disappoint.
Your space will not only look even more stylish but you will also enjoy a significant reduction in noise, thus guaranteeing a calm, peaceful environment.
11. Apply Multiple Layers of Drywall
One of the most effective methods to soundproof your ceiling involves the application of multiple layers of drywall. This technique serves to significantly enhance the sound-absorbing capacity of your ceiling, thereby reducing the amount of noise that penetrates through.
Subsequent layers of drywall essentially increment the density and thickness of the barrier on your ceiling, hence increasing its efficiency in sound attenuation. With additional layers, the sound waves get impeded substantially, thereby minimizing the noise able to get through.
Installers utilize a special type of noise-proofing adhesive like Green Glue to sandwich multiple layers of drywall. This increases the sound-blocking properties and also add mass to prevent noise transmission.
Check out the video above for a practical demonstration on how to apply drywall for optimum soundproofing. This will give you an insight into the professional techniques used in the installation process and help you understand how noise-proofing actually works.
It’s not just about applying layers, but about doing it effectively to ensure no gaps or spaces remain, which can let in noise.
While piling layers of drywall, it’s vital to ensure appropriate installation that leaves no spaces or gaps. Remember, sound, much like water, can seep through the slightest spaces. Therefore, getting it done appropriately to fully cover your ceiling is critical to effective soundproofing.
The layers of drywall must be correctly affixed, and any seams should be sealed off perfectly. At times, this can be quite a technical task demanding precision and expertise. It’s worth seeking professional assistance if you’re uncertain about carrying it out correctly yourself.
Furthermore, if improperly conducted, the addition of excess weight on your ceiling might make it susceptible to structural problems in the long run. Hence, caution is necessary to ensure the ceiling can support the extra weight of additional drywall layers.
If you’ve already soundproofed your walls and floors and are still experiencing noise issues, installing multiple layers of drywall on your ceiling can immensely bolster your soundproofing initiatives.
Also, keep in mind that while implementing this method, the electrical outlets, fan fixtures, and lights etc on the ceiling need thoughtful consideration for safety and effective soundproofing.
So, to effectively soundproof your ceiling, consider applying multiple layers of drywall as a feasible, reliable, and robust soundproofing solution.
Remember, however, to pay attention to the quality of the drywall you’re using. Better quality drywall does not only offer superior noise reduction because of its density but also lasts longer, ensuring that your soundproofing investment is worth every penny.
12. Use special soundproofing sealants.
Special soundproofing sealants are one of the most effective ways to soundproof a ceiling.
These sealants are acoustic-grade products specifically designed to reduce noise transmission.
Constructed of a flexible material, soundproofing sealants remain elastic even after drying, allowing for effective noise blocking.
They are commonly used to seal gaps and cracks that could otherwise ‘leak’ noise.
Applying the sealant is an easy task that does not require any special technical skill.
However, it is essential to choose a high-quality, acoustically-rated sealant for the best results.
Usually, these products are applied using a caulking gun and utilized along the edges where the drywall or plywood meets.
They can also be used to seal gaps around light fixtures, air vents, and other devices attached to the ceiling.
It is important to thoroughly clean the area before applying the sealant to ensure an optimal bond.
Whilst it’s appurtenant to note that the sealants are not designed to soundproof an entire ceiling on their own, they play a crucial role in augmenting the outcome of other soundproofing methods applied.
Constructed of a flexible material, soundproofing sealants remain elastic even after drying, allowing for effective noise blocking.
This flexible quality enables the sealants to absorb vibrations from sound waves, thereby decreasing the amount of sound that passes through the ceiling.
Additionally, soundproofing sealants have optimal adhesion to a variety of materials, including wood, metal, and glass, making them a versatile tool in any soundproofing project.
Furthermore, these sealants are easy to paint over, allowing you to conceal any visible uses of the product easily.
To ensure thorough soundproofing, consider applying multiple layers of sealant or combining with other noise reduction measures.
With the appropriate use of special soundproofing sealants, achieving a quiet and serene environment in your space is not a far-fetched dream.
Regardless, it is important to remember that soundproofing is a process which may require a combination of methods for the desired outcome, and using soundproofing sealants forms an integral part of this process.
13. Install Special Soundproofing Ceiling Tiles
There are different ways to achieve a quiet, serene indoor environment, but when you’re dealing with noises coming from the floor above or from neighboring units, installing special soundproofing ceiling tiles can be quite effective.
These tiles are specifically designed to absorb and reduce echo and background noise, hence the name ‘acoustical tiles’ is also used interchangeably.
Soundproofing ceiling tiles come in various designs, textures and profiles to offer both aesthetic and acoustic solutions for residential and commercial settings.
Even better they can be easily installed over your existing ceiling surface, making them a favorable choice for any soundproofing project.
The effectiveness of these soundproof tiles lies in their ability to trap sound waves and their unique construction that isolates sound.
This construction typically involves a layer of denser sound-absorbing material covered by a decorative finish layer, which although thin, plays a significant role in the absorption and deflection of sound waves.
Another advantage of using soundproof tiles is their high Sound Transmission Class (STC) rating.
The STC rating is a measure of how well a building partition attenuates airborne sound, and with a high rating, soundproofing tiles can significantly reduce the transmission of sound from one room to another.
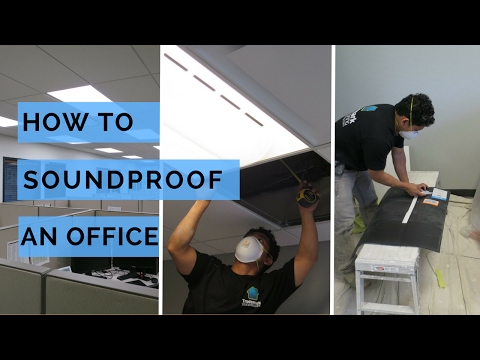
By watching the linked video, you will gain greater insight into how to effectually install soundproofing ceiling tiles in an office setting.
It is a practical demonstration that will show you the exact steps to follow, which materials to use, and the typical installation tools required.
In addition, you can opt to enhance the soundproofing effectiveness by adding an additional layer of mass loaded vinyl or attaching acoustic foam panels on top of the tiles for superior sound absorption.
You could also consider filling in gaps or spaces between the tiles with soundproofing compound or special soundproofing sealants to ensure no sound leaks through.
If you’re concerned about the visual appeal, there’s no need to worry.
Today’s market offers a wide range of soundproof ceiling tiles that are attractive and stylish without compromising on their soundproofing abilities.
By applying these soundproofing techniques and using the special soundproofing ceiling tiles, you can achieve a high level of soundproofing in your home or office which improves your living comfort and quality of life.
14. Add a layer of plywood.
When it comes to soundproofing methods, coupling a layer of plywood to your ceiling can be an effective and readily available option. This can be a subtle yet effective way to reduce noise transmission through the ceiling.
This technique can be employed during your home construction period, renovation phase or even if you’re simply looking to add an added layer of effective sound control. The thickness of the plywood, typically ranging from 1/2 to 3/4 inch, can significantly alter the level of sound attenuation.
Plywood contains dense layers of wood, creating a wall for soundwaves to pass through, impeding their progress. It works by adding additional mass to your ceiling, an important principle in soundproofing.
Plywood can assist in absorbing, deflecting and interrupting the path of soundwaves, therefore, reducing overall noise pollution.
This quote illustrates the potential effectiveness of plywood as a soundproofing material. Through absorption and deflection, plywood ingeniously interrupts the trajectory of soundwaves, reducing the reach of noise pollution. Furthermore, the confounding path can disrupt and reduce the intensity and volume of the sound.
Although it’s often not the first material that comes to mind when considering soundproofing, plywood’s high density and stiffness make it a valuable asset in any soundproofing strategy.
You can either add a layer to the existing ceiling or, if you’re renovating, incorporate the plywood into the design as one of the layers in a multilayer construction. In either case, it should be effectively sealed in place to ensure maximum soundproofing effect.
Sealing the plywood requires the use of green glue, caulk or similar products. Such will distribute the sound further reducing its impact.
Almost any type of plywood can be used for this purpose, but certain types may be more efficient than others. For instance, hardwood plywood, engineered plywood or plywood specifically created for soundproofing might work better.
It’s also important to remember to prepare the surface before installing the plywood. This means it should be cleaned free of dirt, dust, and any other substances that may interfere with the soundproofing process.
When appropriately installed and sealed, adding a layer of plywood can work well as a tactic for reducing noise pollution. It’s a versatile and cost-effective solution that can provide acceptable results when applied correctly.
The success of this method depends on the thickness of the plywood, the quality of sealing and whether it’s integrated correctly into the overall soundproofing strategy.
Adding a layer of plywood works best when combined with other soundproofing methods. Nothing should be overlooked when it comes to achieving the quiet and peaceful environment that you’re seeking.
Again, while it may not seem like the flashiest or most technical soundproofing method, don’t underestimate the potential effectiveness of adding a layer of plywood to your ceiling. Every extra layer contributes to reducing noise transmission.
15. Apply Soundproof Plasterboards on the Ceiling
The effectiveness of soundproofing largely depends on the soundproofing materials you choose to use, and one of the most effective ways is to apply soundproof plasterboards on the ceiling.
Soundproof plasterboards, also known as acoustic plasterboards, are specifically designed to absorb and block sound waves.
They are typically made from dense gypsum and other sound-absorbing materials sandwiched between paper layers.
By making use of these plasterboards, you can significantly reduce the noise transfer through the ceiling.
This feature makes them a great option for soundproofing not only ceilings but also walls and floors in residential and commercial buildings.
The installation process of soundproof plasterboards is much the same as with standard plasterboards.
However, because of their additional mass and soundproof properties, they tend to be heavier and a bit more difficult to handle.
Thus, professional installation might be required to ensure they are securely mounted and effective.
But once professionally installed, these plasterboards can provide excellent sound insulation, significantly reducing noise pollution in the home or office.
Furthermore, they can be finished just like regular plasterboards, using jointing compounds and paint, meaning that no additional aesthetic elements of your room have to be compromised.
It’s also possible to combine plasterboard installation with other soundproofing methods for even greater sound insulation.
Combining plasterboards with other materials like mass loaded vinyl, for example, can help create a more comprehensive acoustic barrier.
By choosing to watch the provided video, you’ll get a detailed look at the installation process of these types of plasterboards.
This will help broaden your knowledge and give you practical tips on how to install them effectively for maximum soundproofing benefits.
Given their effectiveness in blocking sound and relative ease of installation, it’s clear that applying soundproof plasterboards on the ceiling is a great solution for your soundproofing needs.
16. Use soundproof floor mats on the floor above.
When it comes to soundproofing a ceiling, many people often overlook the potential of soundproofing the floor above. This technique can significantly enhance the soundproofing efficiency of the ceiling beneath.
One effective method of doing this is to deploy soundproof floor mats. These mats are specially designed to minimize noise and sound vibrations. They are made up of thick and dense materials that can absorb and deaden sound.
These floor mats can be easily installed on any type of floor, including hardwood, carpet, tile, and even concrete. This makes them a versatile soundproofing option.
Since sound travels through vibrations, placing these mats on the floor above can help reduce the amount of noise that is able to pass through to the ceiling below.
As the quote suggests, the sound we hear is essentially vibrations being interpreted by our ears. Therefore, any effective soundproofing method works by reducing or blocking these sound vibrations. Soundproof floor mats achieve this by being made out of materials that can absorb these vibrations, which in turn reduces the amount of sound that is able to pass through.
Apart from reducing noise, soundproof floor mats are also beneficial because they are easy to install and remove. This makes them a great option for renters or individuals who need a temporary soundproof solution.
Another good feature of soundproof floor mats is their durability. These mats are designed to withstand heavy foot traffic and constant use without losing their sound-absorbing properties. This ensures that they provide consistent soundproofing over a long period of time.
Moreover, these mats not only block the sound but can also improve the acoustics of the room. This is particularly useful if the room above is used for playing musical instruments or recording.
However, while soundproof mats can provide a significant amount of noise reduction, they might not be enough on their own. In most cases, they will need to be used in conjunction with other soundproofing techniques for optimal results.
For instance, in addition to using soundproof mats on the floor, you could also consider adding acoustic panels or soundproof insulation in the ceiling, using soundproof drywalls, or applying soundproofing compounds for ceiling seams.
Moreover, it’s important to note that high-quality soundproof mats can be quite expensive. Therefore, if budget is a concern, you might want to explore other cost-effective options.
To sum up, soundproof floor mats are a practical and efficient solution when it comes to soundproofing a ceiling. While they may seem unconventional and are slightly on the costly side, they can significantly reduce noise penetration from the floor above and enhance the overall soundproofing of your space.
17. Install Soundproof Curtains or Blinds
Among the numerous strategies to soundproof a ceiling, installing soundproof curtains or blinds is a rather effective and accessible approach.
This approach not only helps in reducing noise, but also serves to enhance the aesthetic appeal of your room.
Soundproof curtains or blinds are specifically designed to absorb and diminish sound waves, helping to reduce the amount of noise that transfers into your space through the ceiling.
These sound deadening materials are constructed with dense materials such as mass-loaded vinyl or other heavy fabrics that absorbs sound rather than allowing it to pass through.
Investing in soundproof curtains or blinds could be beneficial as they serve a dual purpose, marrying style and functionality in a most effective manner.
This is because, in addition to soundproofing, the thick, elegant fabric will enhance the aesthetic appeal of your room.
They come in a variety of designs, colors, patterns, and sizes, catering to individual tastes and preferences, and allowing for customization based on the specific needs and décor of your room.
Moreover, soundproof curtains and blinds are quite easy to install.
You might not require a professional to do the installation; a few simple tools and a step ladder would be sufficient to do the job efficiently and effectively.
It’s also worth noting that, compared to other soundproofing methods, installing curtains or blinds is relatively less invasive and less costly.
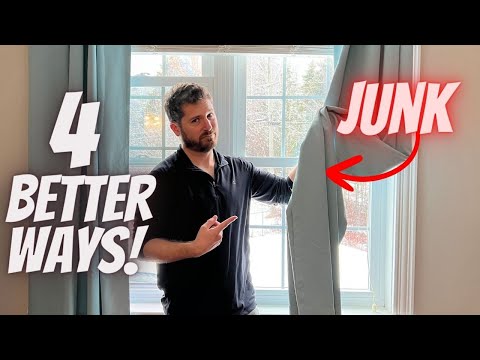
By watching the embedded video, you can gain practical insights on alternatives to traditional soundproofing methods.
You can learn how to use different materials and techniques to achieve your soundproofing goals, potentially saving time and money in the process.
While soundproof curtains or blinds are generally effective, they might not entirely eliminate the problem of noise if used alone.
Therefore, combining them with other soundproofing strategies such as installing insulation, soundproof drywalls, and resilient channels, among others, can yield better results.
Again, when it comes to soundproofing a ceiling, it’s crucial to consider various combined approaches to achieve an effective soundproofing solution.
The Bottom Line
Overall, a range of effective strategies can be implemented for successful soundproofing of ceilings.
Whether it’s through the installation of soundproof insulation or mass loaded vinyl, or the employment of resilient channels and soundproofing clips, each method contributes significantly to noise reduction.
More innovative approaches such as attaching acoustic foam panels, using soundproofing compound and sealants for ceiling seams, and applying layers of green glue in between the drywall can also lead to impressive results.
Furthermore, investing in soundproof drywall, special soundproofing tiles, and plywoods amplify the potential for noise block.
The edge can be further pushed through the utilization of fabric-wrapped fiberglass panels, soundproof plasterboards, and even soundproof floor mats on the floor above.
Lastly, soundproof curtains or blinds not only soundproof but also enhance the aesthetics of the room.
Thus, creating a serenely quiet and tranquil space is entirely within your grasp.